Cake pops are tiny, cheerful treats that somehow feel fancy without costing a fortune. I love when something feels high-end yet stays friendly on the wallet. I’ve found that this is the perfect dessert when you want cute and fun on a budget, especially when you want to impress without pulling out every tool in your kitchen. These little spheres balance cute, sweet, and smart spending.
I’m always looking for ways to stretch a dollar while still feeding my craving for stylish desserts. Because if I’m spending, I want that money to work for me. Cake pops do that. They’re practical, flexible, and surprisingly simple. You can grab a boxed cake mix and still end up with a dessert that looks like it came from a high-end bakery. That makes my frugal heart happy.
I also like how easy they are to make look intentional. A drizzle here, a sprinkle there, and you have something ready for parties, fundraisers, school treats, and yes, even TikTok or Pinterest. They store well and travel well. They also feel fun to share.
Shortcuts matter. I’ve found that using discount store supplies is one of the easiest ways to keep these treats budget-friendly. And if you live somewhere warm, like me in Orlando, chilling them in the fridge helps keep the chocolate coating from getting too moody. Warm weather has opinions.
In this post, I’ll walk you through simple tips, flavor options that make sense on a budget, and smart ways to avoid mistakes. Each section is relaxed, friendly, and packed with practical value. I’ll also share the recipe with exact measurements and steps, so you won’t guess. Let’s make treats that help us stay money wise, one tiny cake ball at a time.
Some of the links here are affiliate links, which means that if you click on them and buy something, I might get a small commission. Don’t worry though—it never costs you extra. You can peek at my full disclosure if you’re curious about the fine print.
The Budget-Savvy Cake Pop Basics
Cake pops look fancy, but they’re actually simple. This is why I love them. You take baked cake, crumble it, add a bit of frosting, and shape it into small balls. Since they’re so easy, you control the cost. You can go as frugal or dressed-up as you want. Because of that, they fit birthdays, holidays, school events, casual gatherings, and even wedding showers. This flexibility saves money and time.
However, I still pay attention to a few things before I start. The base matters. You can bake your own cake. But you can also use a boxed mix. Boxed mix is cheaper, easier, and just as delicious. I’ve found that it helps beginners relax because it’s predictable. Because most cake pops end up covered in chocolate and sprinkles, the flavor comes through just fine. That keeps things affordable without sacrificing taste.
Next, let’s talk frosting. Some people like homemade frosting. I respect that. But store-bought frosting has the right texture and saves time. It also keeps things predictable. If you can’t decide, go with vanilla. It’s neutral and works with most cake flavors. Vanilla also keeps ingredients minimal, which means fewer items to buy.
Now, let’s talk candy coating. You can use candy melts, chocolate chips, or almond bark. Although candy melts are most popular, almond bark gives a smooth finish for less money. Because we’re watching costs, I love almond bark. It melts fast and looks sweet with a drizzle.
When shaping the cake balls, chill them before dipping. This helps the candy stick. Because cold cake stays firm, the process is easier. Although you might think this slows you down, it actually makes you faster. Chilled pops stay on their sticks and hold their shape.
Here are basics to remember:
- Boxed cake mix saves budget
- Store frosting works well
- Chill before dipping
- Keep decorations simple
- Use sprinkles to elevate for cheap
Although you can buy premade cake balls at bakeries, making them yourself costs less. For a few dollars, you can create a large batch. This makes them perfect for gifting or selling at school fundraisers. Because profit margin matters, simple flavors keep costs down while still pleasing a crowd. If you want super frugal, chocolate and vanilla are best. They’re classic and easy.
Although decorating can seem tricky, it doesn’t have to be. Use one main chocolate color, then top with sprinkles. This creates a beautiful look while keeping costs low. I’ve found that sticking to two decoration elements helps control spending but still feels stylish.
Try these:
- Crushed cookies
- Colored sprinkles
- Drizzled chocolate
- Mini marshmallows
Cake pops help you look creative, stylish, and smart with money. And because they store well, you can make them ahead. Now let’s talk flavors.
Fun Flavor Ideas For Cake Pops
Although chocolate and vanilla rule most kitchens, variety can be fun. Because you’re crumbling the cake anyway, flavor feels flexible. You can make almost any flavor fit your budget. Adding flavor doesn’t require expensive extras. Simple pantry items keep things wallet-friendly. You can mix frosting flavors with different cake flavors for endless combinations. So, you can keep options fun without spending more.
Here are budget-friendly cake and frosting combos:
- Vanilla cake + vanilla frosting
- Chocolate cake + chocolate frosting
- Lemon cake + vanilla frosting
- Strawberry cake + cream cheese frosting
- Funfetti cake + vanilla frosting
Although these are simple, they’re crowd favorites. Most require no extras. That means fewer groceries. If you want something new, try using a drizzle of melted white chocolate. Even cheap white chocolate adds style. A little goes far.
You can also use simple add-ins:
- Crushed Oreos
- Mini chocolate chips
- Sprinkles
- Coconut flakes
- Instant coffee
Adding Oreos makes flavor pop without extra frosting. Add mini chocolate chips for texture. If you like coffee flavor, stir in a teaspoon of instant coffee to chocolate cake. Because coffee deepens flavor, you get a rich taste with little cost.
However, watch the texture. You want the mix moist enough to roll. Too many add-ins can make them dry or crumbly. Add frosting a spoon at a time. Because too much frosting makes them mushy, go slow.
Here are some simple themed ideas:
- Birthday: Funfetti cake + white drizzle + rainbow sprinkles
- Valentine’s Day: Strawberry cake + white drizzle + pink sprinkles
- Summer BBQ: Lemon cake + vanilla drizzle + coconut flakes
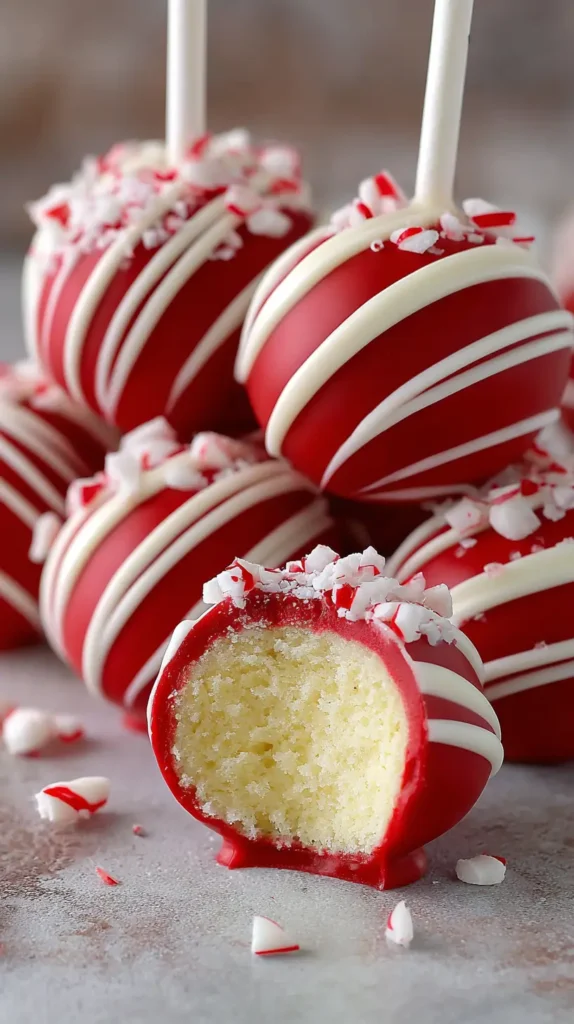
- Christmas: Chocolate cake + crushed peppermint + red sprinkles
Although seasonal options feel stylish, they stay cheap. Use what you have. Holiday sprinkles go far. Leftover sprinkles stretch budgets. You can also reuse almond bark across colors to keep costs down.
I’ve found that flavored coatings can get pricey. So keep it simple. Candy melts or almond bark deliver the best texture. Because they melt easily, they make dipping simple for beginners. Use a microwave to keep tools minimal.
Flavor should be fun, not stressful. Use what your budget allows. Cake pops stay forgiving. Cheap ingredients can still taste bakery-level. Use what works. Because that’s what money-savvy kitchens do.

How To Make Cake Pops (Step-by-Step)
Although the recipe below looks full, it’s simple. Everything is easy to find. Because costs matter, you’ll see short ingredient lists. You won’t need special equipment. A microwave, bowl, and baking sheet work.
Easy Ingredients
Cake
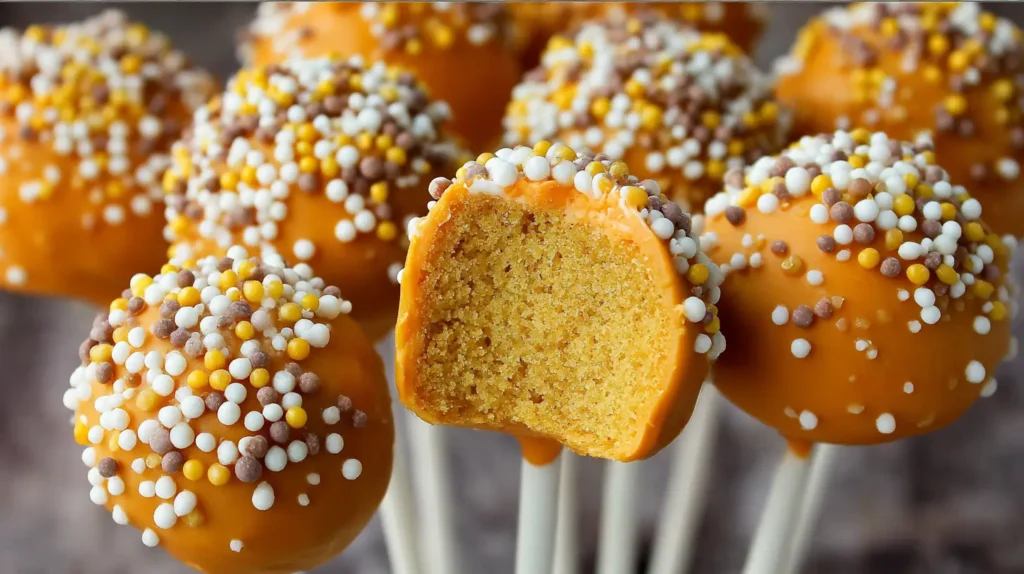
- 1 box yellow cake mix (15.25 oz)
- 1 cup water
- 3 large eggs
- 1/2 cup vegetable oil
Frosting
- 1/2 cup canned vanilla frosting
Coating
- 16 oz almond bark or candy melts
Extras
Instructions
- Bake cake according to box instructions. Let cool.
- Crumble cooled cake into fine crumbs. Use clean hands.
- Add 1/2 cup frosting. Mix until dough holds shape.
- Scoop and roll into 1-inch balls.
- Chill 1 hour in fridge.
- Melt almond bark in microwave. Heat in short bursts.
- Dip each stick tip in melted chocolate. Insert into cake ball.
- Chill 10 minutes.
- Dip cake balls into chocolate. Tap lightly to remove excess.
- Add sprinkles.
- Chill 15 minutes until set.
This makes about 24 cake pops.
Freeze-and-Dip: A Smart Trick That Saves Time And Money
I’ve found that freezing the shaped cake balls before dipping them can change everything. Most people chill them, but freezing takes the stress out of dipping, especially when you want smooth coating without fuss. Because the chocolate hits a colder surface, it firms faster and keeps its shine. That helps you move quicker and waste less coating, which saves money.
Instead of dipping with sticks first, let the cake balls freeze on a parchment-lined pan. Once firm, hold each one with a fork and dip. After the chocolate sets, then insert the sticks. This little switch feels backward, but it gives you way more control. You skip the awkward drips down the stick. You skip pops falling off. And you skip reheating bowl after bowl of chocolate. Because the coating sets fast, you use less chocolate overall.
Although serving cake pops on sticks is classic, there’s something charming about serving them stick-free in mini paper cups. They travel well and feel like tiny plated desserts. You can pop them into a box, stack them easily, and never worry about a forest of sticks poking everywhere. It also keeps portions neat when feeding a crowd. People love the no-mess grab-and-go setup.
This approach also fits warm climates. Since I live in Orlando, I know chocolate can melt fast. Freezing keeps the centers firm and reduces mess when transporting. You still get the cute bite-size shape, but with less stress. It’s perfect for budget-friendly events, because you spend less on materials and still get a gorgeous display. Add a simple drizzle or a few sprinkles, and they look polished for any party.
Cake Pops On A Budget
Although baking can get expensive, I like how easy it is to keep these cake pops affordable. Because you can swap ingredients without losing quality, you can keep spending low. In fact, you can make these with items from a dollar store. Use what’s available. Check weekly grocery ads. Stock up during holiday sales. Cake mix often goes on sale. Almond bark can be found cheap too. These small choices create savings fast.
I’ve found that making cake pops at home is far cheaper than buying them. Even simple cake pops can cost a few dollars each at bakeries. But homemade versions cost pennies. That’s a big savings if you’re feeding thirty kids at a party. Because of that, they make sense for birthdays, classroom events, and fundraisers.
Smart swaps:
- Boxed cake mix instead of bakery cake
- Store frosting instead of homemade
- Almond bark instead of pricey melts
- Bulk sprinkles instead of specialty decorations
Although I like candy melts, almond bark usually melts smoother. It also costs less per ounce. That means you get more coating for less. The texture sticks well, so beginners can still get beautiful results. Because smooth chocolate creates a professional look, it keeps these frugal treats feeling premium.
You can also save by buying generic cake mix. Most generic mixes taste similar to name brands. Then, buy the smallest frosting tub you find. Cake pops need only a bit of frosting. Too much makes them mushy. Because of that, small tubs work best. You’ll spend less and avoid leftover frosting.
Decorations can also eat budgets. Keep it simple. Sprinkles stretch far. A tiny sprinkle pinch creates big visual impact. Because of that, they cost less than fancy candies. You can choose one main sprinkle color for a theme. This keeps things cute and coordinated without extra cost.
To store cake pops, place them in an airtight container. They last three days at room temp. Refrigeration keeps them longer. This helps if you need to prep ahead for a party.
Although I love cute versions, budget always matters. With smart planning, these treats look high-end at a fraction of the price. Keep it simple. Spend where it counts. Because every dollar should feel deliberate.
Decorating Fun Without Overspending
Although fancy designs look impressive, you don’t need to be a pro. You only need a few decorative touches. Because viewers focus on color and shape, simple choices go far. A small drizzle of chocolate takes seconds. That little drizzle looks expensive but barely costs anything.
If you want something colorful, use sprinkles. One bottle can decorate many pops. If you buy a variety pack, you can match events all year. Although seasonal sprinkles can be fun, don’t overspend. Use what you already have.
Decoration ideas:
- White drizzle
- Rainbow sprinkles
- Crushed cookies
- Shredded coconut
- Colored sugar
These add color without extra steps. Because coconut flakes weigh almost nothing, they stick well. Cookies also add texture without spending more. Crush them and sprinkle.
Because every dollar counts, buy bulk almond bark when possible. Bigger blocks cost less per ounce. Yet, don’t buy more than you need. If you have a small freezer, store leftovers for next time. Melted bark keeps on any season.
I’ve found that using squeeze bottles makes drizzles easy. They help you control the chocolate. But you don’t need them. Use a spoon and let chocolate slide. This saves money while keeping things pretty.
Make a design lineup:
- Solid dip
- Drizzle zigzag
- Sprinkle top
- Partial dip
Although simple, these patterns look professional. Kids can help. Since there’s no complex artistry, everyone has fun. Keep things light. Add flair when you can. Because decorating happens fast, you’ll finish quickly.
Now that you have ideas, let’s explore troubleshooting.
Troubleshooting And Tips For Success
Although cake pops are simple, a few things can go sideways. Don’t panic. Most issues have easy fixes. Because the mixture is forgiving, a little tweak solves most problems.
If cake balls fall off sticks, chill longer. Firm cake grips better. Dip stick tips in chocolate before inserting. This creates glue. Because chocolate hardens, the stick stays secure. Although you might want to rush, patience pays.
If coating cracks, temperature mismatch is usually the issue. Let cake balls warm slightly before dipping. Cold cake under hot chocolate cracks coatings. Because warm rooms help, a few minutes on the counter works.
If chocolate is too thick, add a teaspoon of oil. Stir well. But don’t add water. Water ruins chocolate texture. Although beginners might try water, skip it.
If balls are mushy, there’s too much frosting. Add more cake crumbs. Because texture should feel like dough, avoid over-mixing.
Key tricks:
- Chill balls before dipping
- Melt chocolate slowly
- Tap stick to remove excess
- Add sprinkles quickly
- Store upright
Storage also matters. To keep shape, stand cake pops in foam blocks. If you don’t have foam, use a cardboard box and poke holes. This saves money. Because foam isn’t cheap, the cardboard trick feels smart.
Transporting? Use a tall container. Because Orlando heat melts chocolate fast, I keep them chilled when taking them out. Warm climates challenge cake pops. Chill ahead when possible.
Cake Pops
Ingredients
- 1 box yellow cake mix 15.25 oz
- 1 cup water
- 3 large eggs
- 1/2 cup vegetable oil
- 1/2 cup canned vanilla frosting
- 16 oz almond bark or candy melts
- Lollipop sticks
- Sprinkles
Instructions
- Bake the cake according to the box instructions.
- Let the cake cool completely.
- Crumble the cooled cake into fine crumbs using clean hands.
- Add 1/2 cup vanilla frosting to the crumbs.
- Mix until the texture holds together like dough.
- Scoop and roll the mixture into 1-inch balls.
- Place the cake balls on a parchment-lined sheet.
- Chill in the refrigerator for 1 hour.
- Melt almond bark in the microwave using short bursts, stirring until smooth.
- Dip the end of a lollipop stick into the melted coating.
- Insert the dipped end of the stick into each cake ball.
- Chill for 10 minutes so the coating firms.
- Dip each cake ball into the melted coating until fully covered.
- Gently tap to remove extra coating.
- Add sprinkles while the coating is still wet.
- Place dipped pops upright and chill for 15 minutes until set.
Final Thoughts
I love sweets that feel special but still keep me smart with money. Cake pops check every box. They look charming, stretch ingredients, and feel stylish without the price tag. I’ve found that they help me feel creative without running my budget into the ground. They’re fun for gatherings, fundraisers, bake sales, and long weekends at home.
Because small treats fit so many events, I make them for nearly any celebration. They store easily and travel well. I also love how flexible they are with flavor and looks. Because boxed cake and simple frosting taste wonderful, the recipe stays affordable. When I’m moving through a messy week here in Orlando, having easy treats on hand makes life feel lighter.
What I like most is how they inspire play. You drizzle, sprinkle, cool, and done. Because small steps create big results, cake pops give instant joy. Add a bit of fun color, and you have treats that feel boutique. Best part? You didn’t overspend. This lets you treat your people while staying on track with your goals.
Save this post to Pinterest. Use it again for birthday parties, school nights, or any fun weekend. You’ll always get a cute result. I think cake pops prove you can make something adorable without spending much at all. Make a batch and share. Or freeze them. Or bundle them to gift. You have options.
I hope these ideas help you stretch your budget while still having fun. Tiny treats, big joy. Enjoy every bite.