I get suspicious when spring crafts show up with price tags. Cute wreaths, pastel planters, artisan anything… it adds up fast. Meanwhile, my budget still wants dinner, gas, and that random school fee.
So I start craving the crafty version. Not the messy-for-days version. The polished one that looks styled, yet costs pocket change.
I like spring crafts because they shift a room’s mood quickly. A corner can look brighter in ten minutes. Still, I refuse boutique prices for fresh.
Living in Orlando makes this extra obvious. Warm days hit early, and humidity hates flimsy decor choices. So I lean into light pieces that do not warp or wilt.
Here’s what I’ve found over time. The smartest projects look like decor first and crafts second. They use what I already own, or what I can thrift cheaply.
Also, I get picky about vibe. I want effortless, not I tried five trends at once. That means fewer colors, cleaner lines, and one tiny fancy detail.
If you want your home to look springy and pulled together, stay with me. I’m sharing eight ideas that keep things cute and money-savvy. One of them uses plain paper and looks oddly expensive. It also surprises people, which is the best part.
I’ve found that budget works best when it still looks stylish. Otherwise, it just looks like I gave up. And I did not come this far to give up on cute.
You can copy one idea or mix a few. Either way, the last section has my sneaky favorite twist. It looks expensive, and it barely costs anything.
Some of the links on this page are affiliate links. That means if you click and make a purchase, I may earn a small commission at no extra cost to you. If you’re curious about the fine print, you can check out my full disclosure.
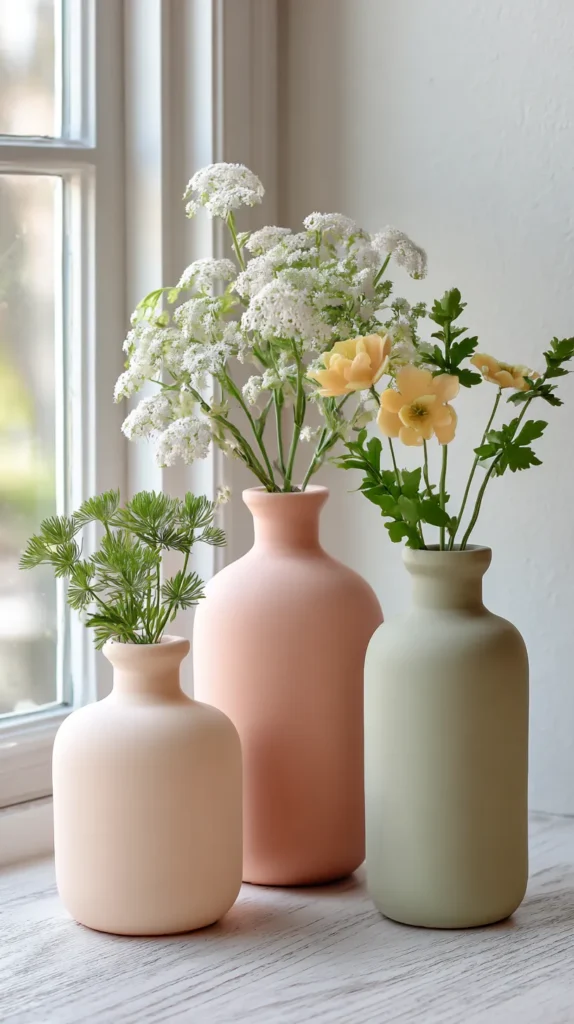
Spring Crafts With Thrifted Glass That Looks High-End
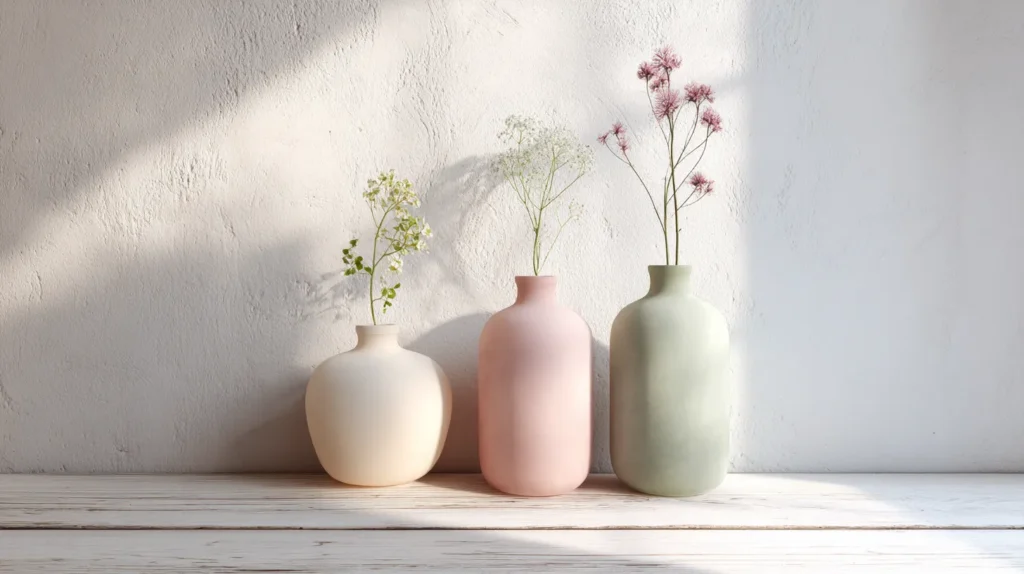
Thrift stores always have lonely vases. They sit there, dusty, and slightly embarrassed. I grab clear glass shapes with clean lines and ignore the rest.
Then I do one simple upgrade. I paint them in a soft, chalky finish. That matte look reads modern, even in bright daylight.
Here’s my unpopular take. Shiny glass can look cheap, especially near windows. Matte surfaces look calmer and more expensive.
I use leftover wall paint when I can. Otherwise, I buy a sample pot in a warm neutral. A sample costs less than a candle, and it lasts longer.
To get the chalky texture, I mix in baking soda. I keep coats thin, because thick coats drip. After drying, I sand the rim lightly for a worn edge.
Now the styling part matters. I tend to notice clutter ruins pretty faster than anything. So I keep the vase contents simple and bold.
Try one of these looks:
- One tall stem, like faux tulips or a single branch.
- A bundle of dried grass, tied with twine.
- Nothing at all, just the shape on a shelf.
That last option sounds odd. However, empty vases can look like sculpture. Also, they cost nothing to maintain.
Most people think more flowers mean more style. I get better results with less.
Want a scroll-stopper moment? Group three vases together in the same color family. Use different heights, then stop before it looks matched. That tiny bit of mismatch looks designer.
The best part is the payoff. People assume you bought them at a boutique. You can shrug and think, sure, let’s go with that. These spring crafts save money.
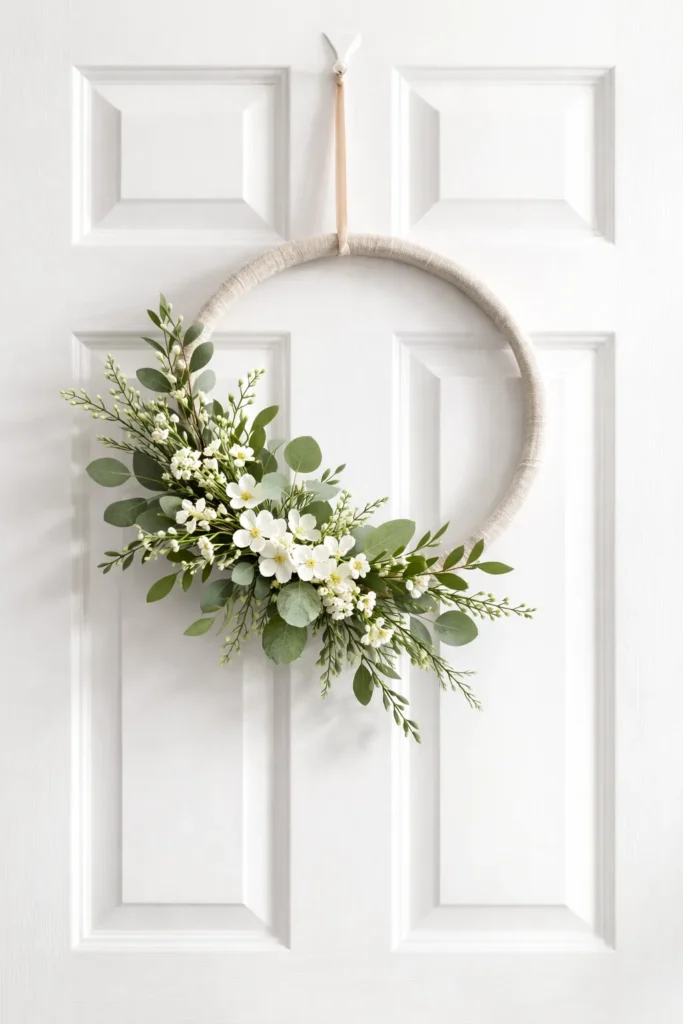
The No-Drama Embroidery Hoop Wreath
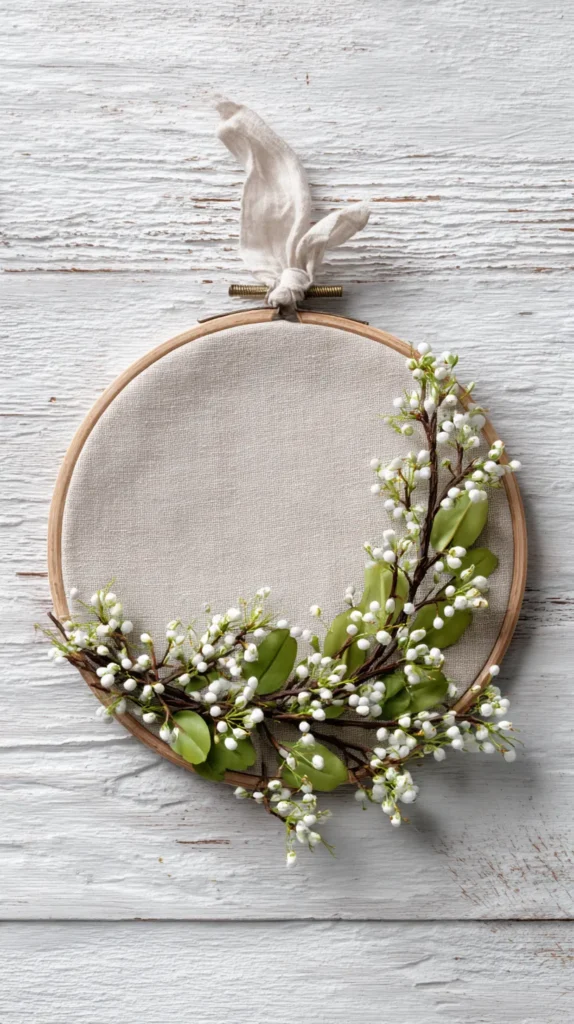
Embroidery hoops might be the most underrated decor tool. They already look like hardware, which helps. Spring decor needs structure, and spring crafts can give it.
I pick a hoop that feels medium, not huge. Then I wrap it with fabric from a thrifted scarf. That one choice saves money and adds texture.
Next, I add a small cluster of faux stems. I keep it off-center on purpose. Centered clusters can look like a badge on a jacket.
Here’s the contrast. Big wreaths shout, and small wreaths whisper. Most homes need a whisper.
I attach stems with floral wire, not only hot glue. Wire lets me tweak the angle later. That matters when you hang it and something looks off.
Now for the style upgrade. I match the wrap fabric to something I already own. Think pillow stripes, a rug tone, or curtain trim. That tiny echo makes the wreath look custom.
People think bows make wreaths look finished. I skip bows most of the time. Instead, I let the fabric wrap show.
If you want a little drama, use a thin ribbon hanger. Keep it narrow and long. A wide ribbon can turn sweet into baby shower fast.
I’ve found that faux stems work best outside too. Real flowers wilt, and Orlando weather moves fast. Faux stays cute for weeks, which protects my effort.
Want that “hold on—YOU made that?” reaction? Add one unexpected detail, like a tiny brass bell. Or tie on a linen tag with one simple word. Then walk away and let it look fancy.
These spring crafts hang anywhere. Front doors work, but pantry doors work too. Suddenly, your most boring door looks intentional.
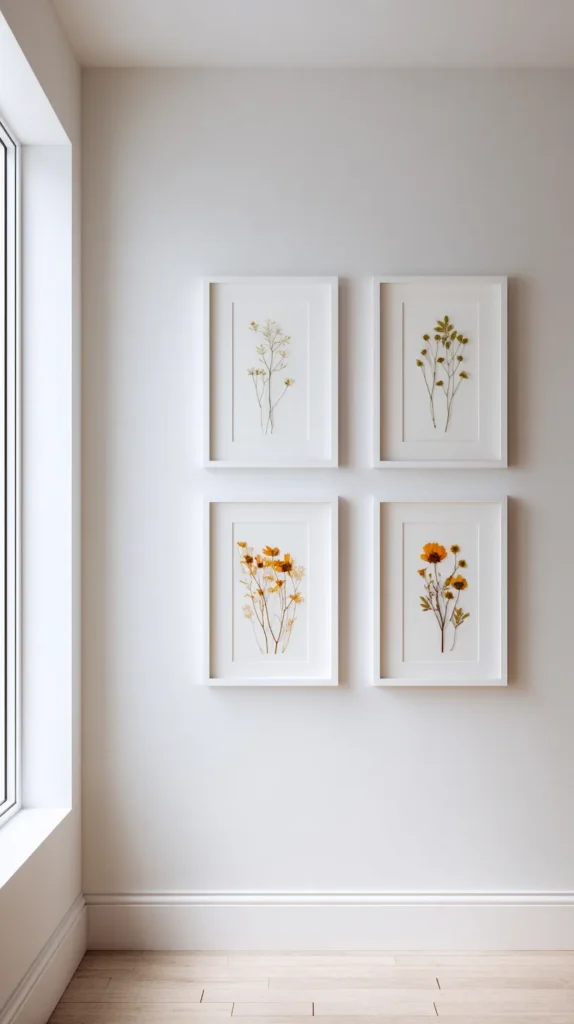
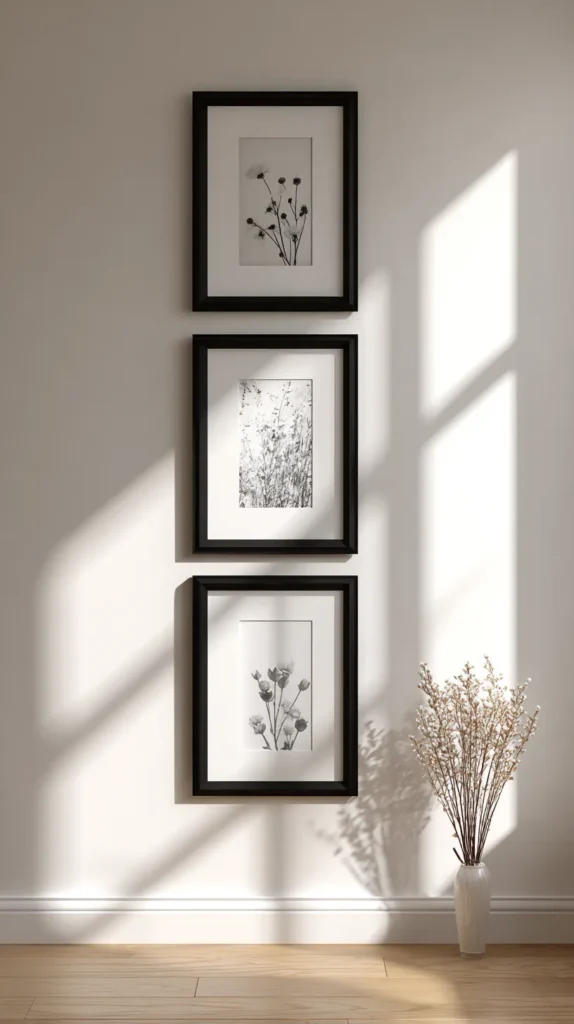
Spring Crafts That Turn Pressed Flowers Into Wall Art
Pressed flowers look like expensive stationery. Yet they cost almost nothing. That math makes me oddly happy.
I press blooms inside a heavy book. Plain paper protects the pages. Two weeks later, I have delicate little treasures.
Then I skip the fancy frames. I buy thin frames from a dollar store instead. After that, I paint them one calm color, like warm white.
Here’s the scroll anchor. Do not use ten flower colors. Limit your palette to two, maybe three. That restraint makes everything look higher-end.
I cut cardstock to fit each frame. Next, I arrange flowers with tweezers. Fingers can tear petals, and I get annoyed fast.
Now comes the designer detail. I leave a lot of blank space. Empty space reads intentional, not unfinished.
If you want text, keep it tiny. I write one word with a fine pen, like March. That little label looks like a gallery tag.
People assume more flowers means more impact. I get the opposite result. One sprig per frame looks curated.
I like a simple layout with three frames in a row. One larger bloom sits in the middle frame. Two smaller sprigs sit on each side.
I seal the paper lightly with spray sealer. Mod Podge can wrinkle paper, which ruins the vibe. Spray keeps the surface smooth.
Also, avoid the kitchen. Steam and grease will dull the flowers. I hang these in hallways or bedrooms instead.
When guests walk by, they slow down. Most guests lean in to look closer. That quiet moment makes the whole wall feel done. And it cost less than a single big print. I use these spring crafts when I want quiet wall style.
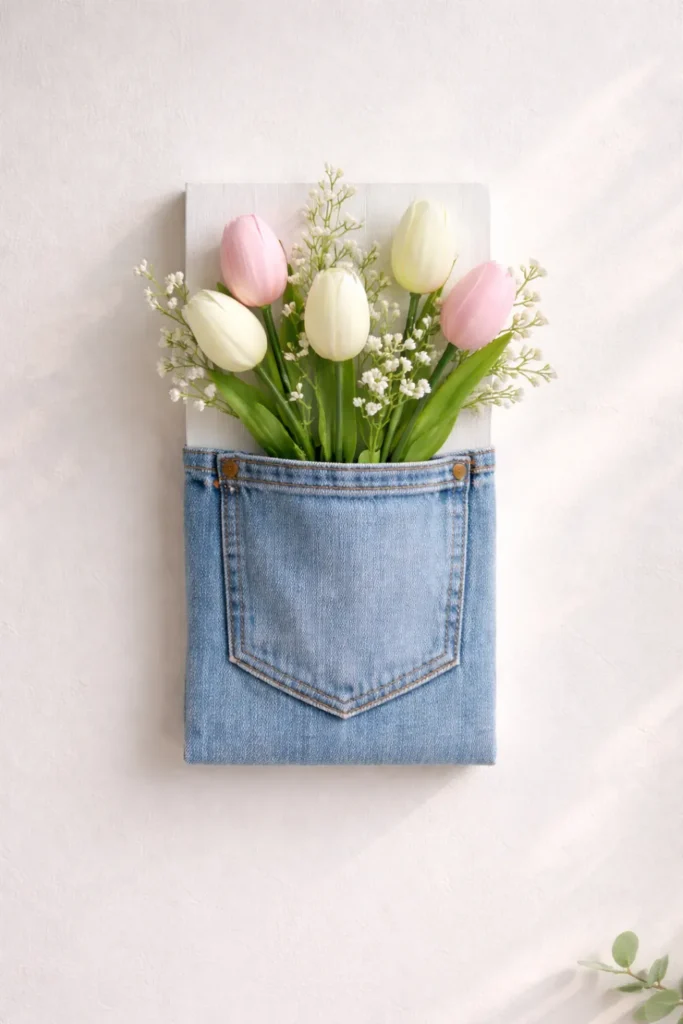
Denim Pocket Wall Planter Chic
Old jeans sit in drawers like guilt with pockets. So I put those pockets to work. I use spring crafts like this to rescue a dead wall fast.
Next, I cut off a back pocket and keep the seam. The seam makes it look finished right away. Then I mount the pocket on a small board.
I use scrap wood when I have it. A cheap cutting board works too. Either way, the base keeps the pocket from sagging.
Here’s my honest take. Real plants inside denim can get gross. Water plus fabric can turn into mildew fast. So I go faux, and I do not apologize.
I tuck in faux lavender or eucalyptus sprigs. Then I add one wooden tag on the front. That tag turns craft into decor.
Paint the board a calm color. Soft white looks clean. Warm tan looks cozy. Black looks modern, but it shows dust.
People think upcycled means rustic. I keep the lines simple instead. Clean paint and simple greenery make it look modern.
Now, placement matters. Laundry rooms need style, but they rarely get it. Entryways also collect clutter like magnets. So I hang this where chaos usually wins.
If you want a scroll-stopping detail, do three pockets. Use three denim shades for contrast. Keep the greenery the same in each pocket. That repetition looks intentional, not random.
I’ve found that small decor beats big decor on a budget. Tiny pieces look curated. Big pieces look pricey, unless you get lucky thrifting.
This pocket planter keeps things tidy and cute. Also, it hides a boring wall fast. And yes, it sparks questions. That is half the fun.

Spring Crafts With Peel And Stick Wallpaper Accents
Peel-and-stick wallpaper sounds dramatic, but it can stay small. My trick keeps it small. You do not need to cover a whole wall.
I use leftover scraps from a single roll. Scraps look useless until you frame them. Then they look like pricey prints.
Here’s what I do. I cut wallpaper into rectangles that fit cheap frames. Then I keep the frames simple, like thin black or white. Instant art, for almost nothing.
You can also line a tray with wallpaper. A thrifted tray can look sad. Wallpaper adds pattern, and pattern looks styled.
Try one of these budget moves:
- Frame three wallpaper pieces as a mini gallery.
- Line the back of a bookshelf for a pop.
- Cover a small storage box lid for a clean upgrade.
- Wrap a planter sleeve for a designer look.
Here’s my spicy opinion. Most spring patterns look better when you limit color. If the print has five colors, it can look busy. So I choose prints with two or three tones.
People think wallpaper must match the room perfectly. I like a gentle clash instead. A tiny contrast makes the space look collected over time.
To keep it sleek, I trim edges with a ruler. Scissors can wobble, and wobble reads homemade. A crisp edge reads expensive.
Also, commit to repetition. Use the same wallpaper in two spots. Maybe a tray and a frame set. That echo makes it look planned.
I’ve found that spring crafts like this work best for renters. It peels off later with less drama. And if you mess up a cut, who cares. You just flip the scrap and cut again.
If you want decor that looks styled quickly, this delivers. It also keeps your budget in a good mood.
Paper Flowers That Look Boutique On A Budget
Paper can look shockingly high-end. Yes, I said paper. Texture and shadow matter more than glitter.
I make oversized paper flowers with cardstock. Then I hang them as wall art, not party decor. That framing changes everything.
Here’s the contrast sentence. Party flowers look busy. Wall flowers look like sculpture.
I choose one flower shape and repeat it. Peonies work, but simple daisies work too. Then I pick one calm color family.
If you want a boutique vibe, go monochrome. Cream looks expensive. Blush looks romantic. Sage looks fresh.
I add depth with curled petals. A pencil helps me roll edges around. That small curve creates shadow, which reads realistic.
People assume paper flowers must look crafty. I’ve found that larger scale looks more modern. Small flowers can look like classroom decor.
For mounting, I use removable strips. I arrange three flowers in a loose triangle. Then I add two paper leaves, not ten.
I set one large flower slightly off-center. Then I place two medium flowers lower and wider. After that, I add a few leaves that point inward.
Now the money-savvy part. Cardstock costs far less than a big canvas print. Also, you can match the exact room color. That custom look makes it feel pricey.
Want a scroll anchor moment? Add one gold-painted center, but keep it subtle. A tiny metallic detail can look like jewelry. Too much shine can look like a craft aisle.
I love this because it photographs well. It also fills an awkward blank wall fast. And when someone asks where you got it, you can smile. I keep spring crafts like this ready for photo corners. Because the answer is paper, and that is hilarious.
Grocery Aisle Centerpiece That Looks Styled
A spring centerpiece can cost a lot. Or it can cost the same as a grocery run. Truthfully, I prefer the second option.
Then I build a market bowl centerpiece. A shallow bowl works best, thrifted if possible. Then I fill it with real produce and one floral element.
Here is the surprising opinion. Fruit can look more stylish than flowers. It adds color, and it looks intentional.
I choose one produce type as the base.
- Green apples look clean.
- Lemons look bright.
- Small oranges look cheerful.
Then I add one bunch of budget flowers. Grocery tulips work great. So do daisies. I keep the flowers low, not tall.
Use these steps in your head, not on paper. Pick a bowl that looks heavy. Choose produce that matches the room tones. Add flowers in one small cluster.
People think centerpieces must be tall. Tall pieces block sight lines and look fussy. Low pieces look relaxed and modern.
If you want extra style, add one ribbon. Tie it around the bowl base. Use linen or cotton, not shiny satin. Shiny ribbon can look like a gift basket.
This also solves a problem. You can eat the produce later. So the decor does not become clutter. That makes my practical side happy.
I’ve found that this works for everyday tables. It also works for a small brunch. No one thinks it is a craft. They think it is a styling choice.
If you want to stretch the look longer, swap produce weekly. Keep the bowl, keep the ribbon, keep the vibe. Then your table looks cared for, without big spending. These spring crafts work for tables and photos. That is the whole point, right?
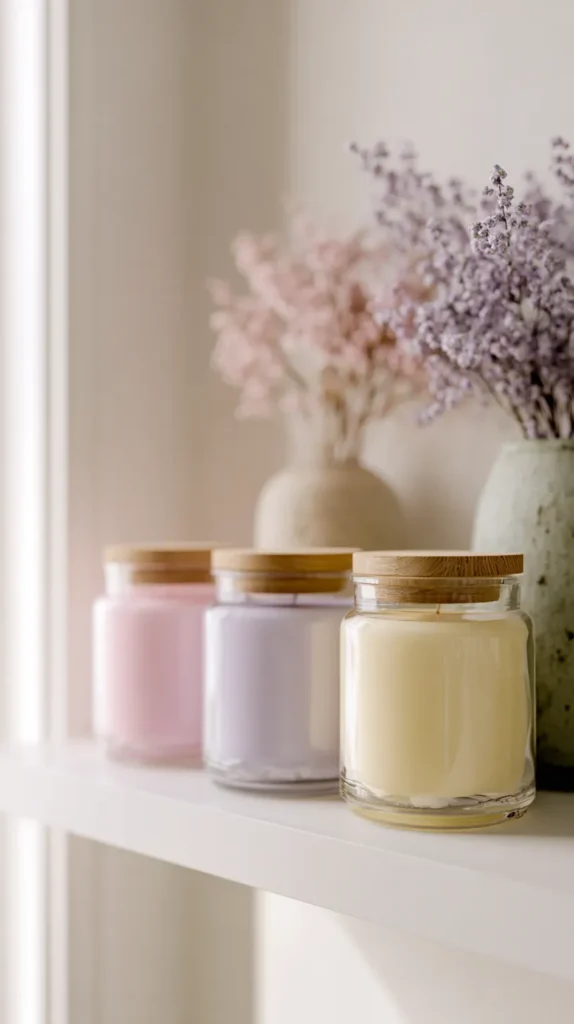
Spring Crafts With Upcycled Candle Jars And Chic Labels
Empty candle jars can look too nice to toss. So I keep them. Then I turn them into matching storage.
I soak jars in warm water to remove labels. After that, I wash them and dry them well. Clean glass always looks more expensive.
Next, I add a simple label. I use kraft paper, white sticker paper, or plain cardstock. Then I write in a neat block style with a paint pen.
Here is the scroll anchor. Do not use curly fonts everywhere. One clean font looks modern. Too many fancy letters can look chaotic.
I like labels like cotton, clips, or tea. Short words look calm. Long labels look like a pantry lecture.
These jars can hold:
- Q-tips and cotton rounds in the bathroom.
- Hair ties and bobby pins on a vanity.
- Pens and scissors in an office corner.
- Tea bags and sweetener packets in a kitchen nook.
Now, add one style upgrade. Paint the jar lid, if it has one. Matte black looks sleek. Soft white looks clean. Brass paint looks rich, if you keep it subtle.
People think storage must hide in drawers. I’ve found that pretty storage can become decor. It turns clutter into styled.
If you want spring color, add one tiny detail. Tie twine around the neck. Slip in a small faux sprig. Keep it minimal, because minimal looks pricey.
I group three jars together, even if they hold different things. That repetition makes it look planned. And it keeps me from buying new containers, which adds up fast.
I love spring crafts that quietly change a room. It looks organized. Plus, it also looks like you have your life together. Even if you do not, which is relatable.
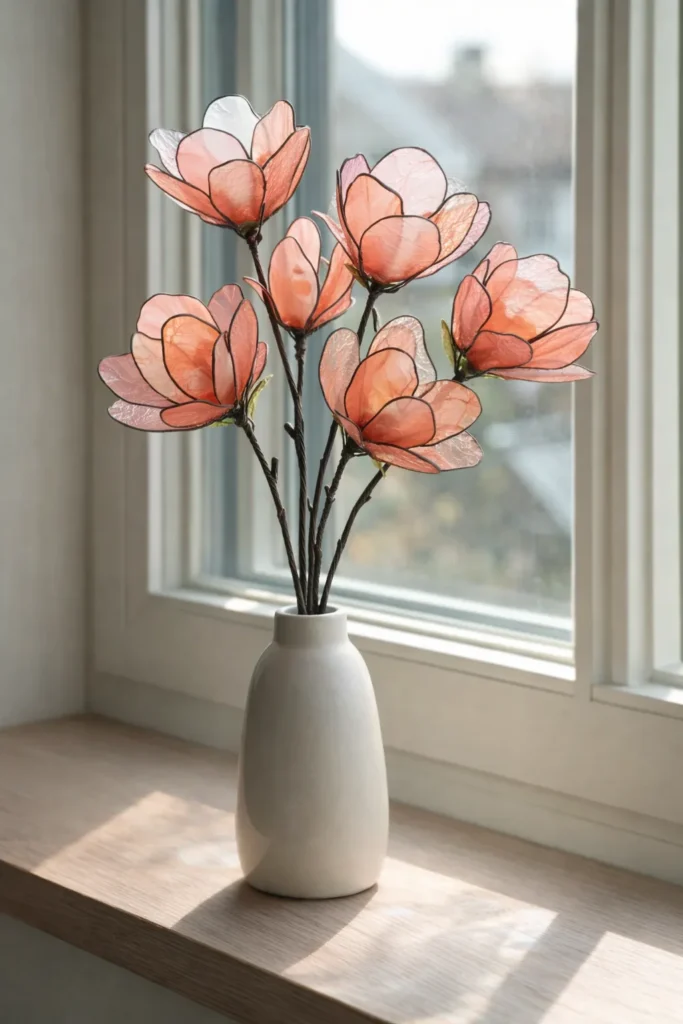
Faux Stained Glass Flowers For Bright Spring Decor
Stained glass flowers look like you paid real money for them. I like that vibe, especially for spring crafts on a budget. Real stained glass tools cost a lot, though. So I use a faux method that still catches sunlight. The goal is simple: translucent color, crisp dark outlines, and stems that sit nicely in a vase.
Here’s the part people miss. The black outlining sells the whole look. Color matters, sure, but the “leading” is what makes it read like stained glass. I keep the palette tight so it looks intentional. One spring shade works best, like pink, coral, or soft yellow.
I’ve found the easiest base is clear plastic sheets or acetate. Some people use shrink plastic, too. Either way, you want clean edges and even lines. Messy edges scream craft table.
Use this flow to make a small bouquet:
- Cut 5–7 simple petal shapes from clear plastic.
- Trace each petal with liquid leading or raised black outliner.
- Let the outline dry fully before adding color.
- Fill sections with translucent glass paint or alcohol ink.
- Add a second thin coat for depth, then let it cure.
- Attach petals to floral wire stems using clear epoxy.
- Wrap the stem base with floral tape for a neat finish.
Now for the little cheat that makes it look expensive. Test the petals in a sunny window before you glue anything. Some pieces glow better than others. Then you build the bouquet from the best ones, like you planned it.
A plain vase finishes the look fast. Busy vases compete with the petals. Simple styling makes the light effect do the talking.
Final Crafty Thoughts
By the time spring hits, I usually want my home to look lighter. I also want my wallet to stay calm. Those two wants can fight, but they do not have to.
I’ve found that small changes keep my motivation up. A painted vase on a shelf can shift my mood. Also, a clean label on a jar can make a bathroom look done.
Some days I start a project for style. Other days I start it because I need order. Either way, I like when the result looks like decor, not a craft table.
Living in Orlando keeps me honest about materials. Heat and humidity punish flimsy choices fast. So I stick with simple textures that hold up.
When I save ideas on Pinterest, I look for one thing. I look for projects that read expensive at first glance. Then I hunt for the budget shortcut that makes it possible.
That shortcut usually hides in restraint. Fewer colors look calmer. Less clutter looks richer. One good detail looks intentional.
I will keep making spring crafts because they give me control. Pollen and surprise rain stay out of my control. However, I can control a corner of my house. And I can make it look stylish without overspending.
If you try one idea, start with the one that makes you smirk. That little spark matters more than perfection. Then let the room brag for you. Because cute and thrifty is a whole personality, and I stand by it.