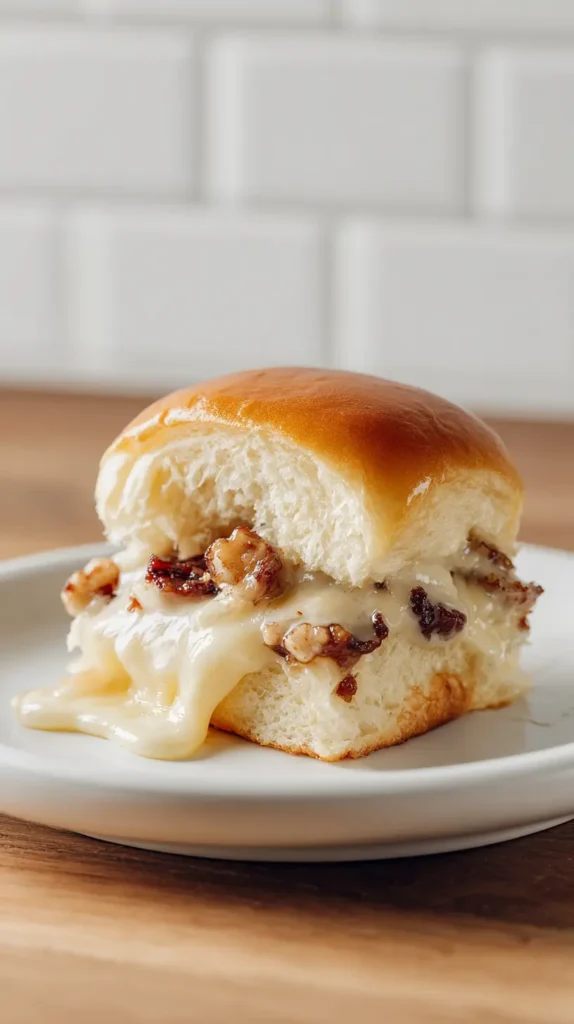
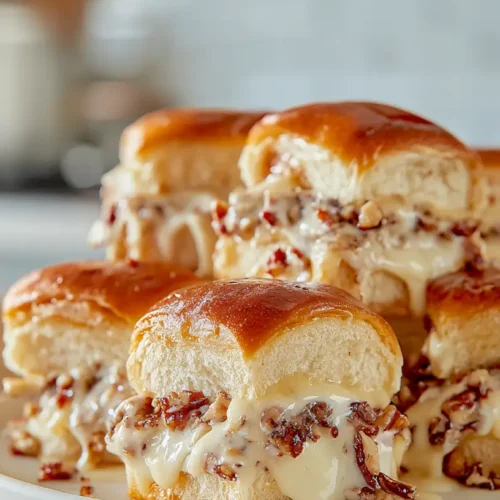
When I say the words brie sliders, what comes to mind? Maybe a fancy appetizer at a holiday party, maybe something you’d spot on a Pinterest board full of cheese pulls and golden buns. Let me just say, these aren’t your average brie sliders—they’re maple bacon pecan brie sliders, and they’ve got a little bit of everything I crave in cold weather food. Living in Orlando, I know fall doesn’t always mean sweaters and crunchy leaves, so recipes like brie sliders bring the cozy season to my kitchen without waiting on the weather.
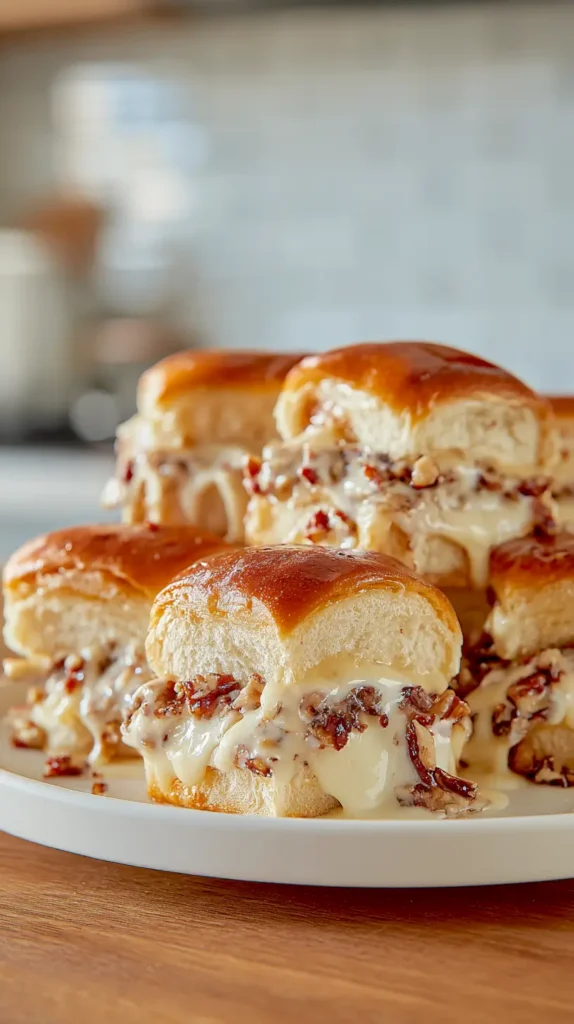
Here’s the picture: gooey brie that melts like butter, crispy bacon glazed with maple syrup, crunchy pecans for a nutty bite, and warm rolls brushed with a maple-butter glaze. Every layer makes sense, and every bite feels like fall or winter comfort. I’ve found that brie is one of those cheeses that goes from subtle to show-stopping the second you pair it with the right partners. Bacon and pecans? Oh yes, it works.
I’m not about making food that takes all day. These sliders are simple to build but taste like you’ve put way more effort into them. The oven does most of the work, and you get to enjoy the reward. These are the kind of sliders you can put out at Thanksgiving, serve at a game day spread, or even bake up on a random chilly Sunday night.
They’re rich, but not in an over-the-top way. The maple drizzle on the bacon plays off the creamy brie, and the pecans sneak in a little crunch. Then there’s the buttery golden top—because you can’t finish sliders without brushing the buns. This recipe is one of those rare ones that’s both cozy and a little classy, which is probably why I keep coming back to it.
Now let’s get into how to make them, because I promise you’ll want these brie sliders on your table soon.

Some of the links on this site are affiliate links, which just means I may earn a small commission (at no extra cost to you) if you make a purchase. You can check out my full disclosure for all the details.
The Ingredients You’ll Need For Brie Sliders
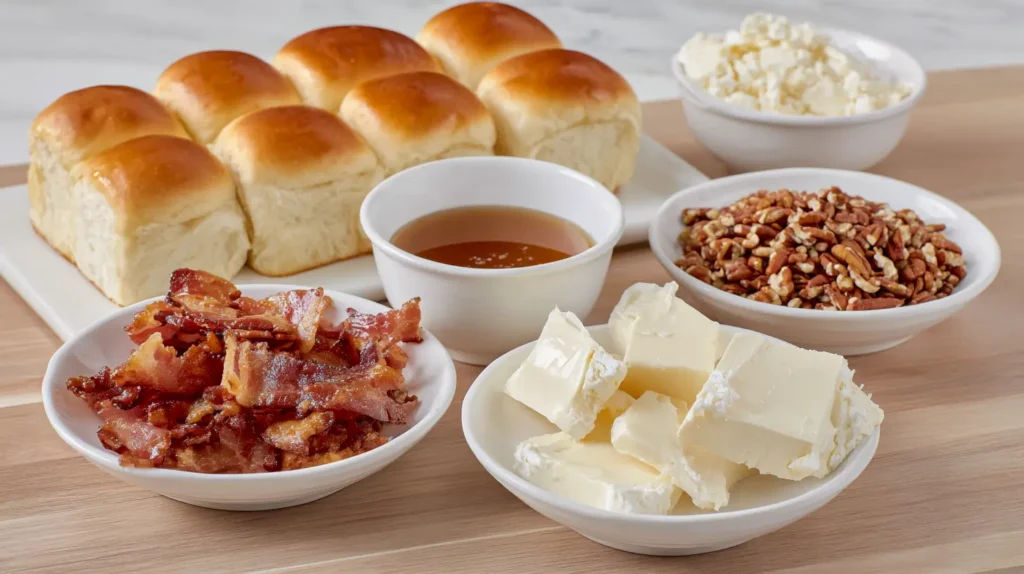
When it comes to brie sliders, the magic starts with simple but thoughtful ingredients. Each one has a role to play, and together they create something indulgent without being fussy.
Here’s what you’ll need:
- 12 Hawaiian rolls (one package)
- 8 ounces brie cheese, rind trimmed if desired, sliced into thin pieces
- 8 slices thick-cut bacon
- 3 tablespoons pure maple syrup, plus 1 tablespoon for glaze
- 1/3 cup chopped pecans, toasted
- 2 tablespoons unsalted butter, melted
- 1/2 teaspoon flaky salt
- 1/4 teaspoon garlic powder
A few notes because details matter. Hawaiian rolls are my pick for sliders because they’re soft and slightly sweet, which pairs beautifully with brie. The brie itself is the star, so don’t skip it. You can leave the rind on for a stronger flavor, or trim it if you prefer it mild. Bacon needs to be thick-cut so it can hold the maple glaze without turning into brittle shards. And the pecans? Toasting them first is non-negotiable—it deepens the flavor and gives them the crunch you want in each bite.
The glaze that brushes the tops of the rolls ties everything together. It’s melted butter with a little maple syrup, garlic powder, and a sprinkle of flaky salt. It turns the rolls golden and adds the finishing flavor that makes these brie sliders unforgettable.
Step-By-Step Instructions For Maple Bacon Pecan Brie Sliders
Sliders sound like a lot, but making these brie sliders is easier than you’d think. Here’s the play-by-play to keep it smooth and stress-free.
- Preheat your oven to 350°F. Line a baking sheet with parchment paper for the bacon.
- Lay the bacon slices flat on the sheet. Brush both sides with two tablespoons of maple syrup.
- Bake the bacon for 20–25 minutes, flipping halfway, until it’s crisp and sticky. Transfer to paper towels.
- While the bacon cooks, slice the rolls in half horizontally, keeping the bottoms and tops intact.
- Place the bottom half of the rolls in a 9×13-inch baking dish.
- Layer the brie slices evenly over the bottom rolls.
- Chop the bacon into bite-size pieces and spread them over the brie.
- Sprinkle the toasted pecans across the bacon layer.
- Top with the other half of the rolls.
- In a small bowl, whisk together melted butter, one tablespoon maple syrup, garlic powder, and flaky salt.
- Brush this mixture generously over the tops of the rolls.
- Cover the dish loosely with foil and bake for 15 minutes.
- Remove foil and bake another 7–10 minutes, until cheese is melted and tops are golden.
- Let them rest for 5 minutes before slicing into individual sliders.
That’s it. No complicated steps, no waiting for dough to rise, no stress. Just layer, brush, bake, and slice. I’ve found that leaving them to sit for a few minutes before cutting makes them hold together better, and the cheese won’t ooze out in one big puddle.
Making Brie Sliders Work On A Budget
Here’s the thing: brie sliders sound fancy. Like, “did you win the lottery and start shopping at that specialty cheese shop?” fancy. But I’m here to tell you, you can pull these off without emptying your wallet. I’ve found that when you shop smart, brie isn’t nearly as expensive as it seems. Discount grocers and even warehouse clubs carry quality brie at a fraction of the price, especially around the holidays when cheese displays are stacked higher than the Christmas trees in the front entrance.
Now let’s talk bacon. Thick-cut strips cost more per pound, but you don’t need a mountain of them. A few well-glazed slices go further than you think. Same goes for pecans. Buy a small bag from the baking aisle, toast them, and suddenly they taste gourmet. It’s like wearing drugstore mascara that performs like a luxury brand—you know the trick, and no one else has to.
Rolls are another place to save. Hawaiian rolls are great, but store-brand sweet rolls usually taste nearly identical. You’re brushing them with maple butter anyway, so they’ll all end up golden, shiny, and irresistible.
The real budget win here is that these brie sliders feel like restaurant food for pennies on the dollar. You’d pay fifteen bucks for two of these at a gastropub, but making a dozen at home? The whole tray costs about what one plate out would. That’s what I love most—pulling off something that looks high-end while keeping it in budget territory. It’s the kind of kitchen win that makes you feel both thrifty and clever at the same time.
Why Maple, Bacon, And Pecans Belong With Brie
It might sound unusual to toss maple, bacon, and pecans together with brie sliders, but there’s logic behind it. Brie has a soft, buttery flavor that acts like a blank canvas. It’s the kind of cheese that shines when paired with bold flavors.
Maple syrup adds sweetness and depth. It brings out the creamy notes in brie without overpowering them. Bacon balances the sweet with smoky and salty. And pecans sneak in nutty crunch that breaks up the richness. Without them, you’d miss that textural surprise.
Here’s how the flavors work together:
- Maple syrup: sweet, earthy, warm
- Bacon: smoky, salty, crisp
- Pecans: nutty, crunchy, toasty
- Brie: creamy, buttery, melty
When layered, they create a balance that feels indulgent but not heavy. It’s like the cheese board version of a slider—every bite hits a different note. I’ve noticed that these flavors also tie directly to the colder months. Maple syrup and pecans scream fall, while bacon and brie bring that cozy, fireside vibe.
The rolls themselves matter too. Hawaiian rolls have a touch of sweetness that echoes the maple without turning it into dessert. If you prefer something more neutral, you could swap in potato rolls, but I think the balance is just right here.
Brushing the tops with a maple-butter mix doesn’t just make them pretty. It adds shine, keeps the bread from drying out, and locks in that warm maple scent that drifts out of the oven. The result? Brie sliders that taste layered, comforting, and seasonal all at once.
Tips For Making The Best Brie Sliders
Making brie sliders isn’t complicated, but a few small details can elevate them from good to incredible.
- Toast the pecans before adding them. Five minutes in a dry skillet makes them extra fragrant.
- Use thick-cut bacon. Thin slices will shrivel and won’t hold the maple glaze.
- Slice the brie cold. Brie is much easier to cut neatly when chilled.
- Keep the rolls intact while layering. It makes assembly faster and slicing smoother.
- Cover with foil for the first bake. It keeps the tops from browning too quickly.
- Don’t skip the resting time. Those five minutes after baking help the cheese settle.
Another small trick? Line your baking dish with parchment before layering. It makes cleanup much easier and helps lift the sliders out in one piece.
For flavor tweaks, you can sprinkle in a few dried cranberries with the pecans for a holiday touch. Or swap the maple syrup in the glaze for hot honey if you want heat. These sliders are flexible, but the maple, bacon, and pecan combo is one I keep returning to because it just works.
If you want to make them ahead, assemble everything except the glaze. Cover the dish and refrigerate for up to 24 hours. When ready to bake, brush on the glaze and pop them in the oven. They’ll taste fresh without last-minute stress.
Serving Ideas For Maple Bacon Pecan Brie Sliders
Brie sliders are versatile. You can serve them in casual settings or dress them up for special occasions. That’s one of the reasons I love them.
Here are a few ways to enjoy them:
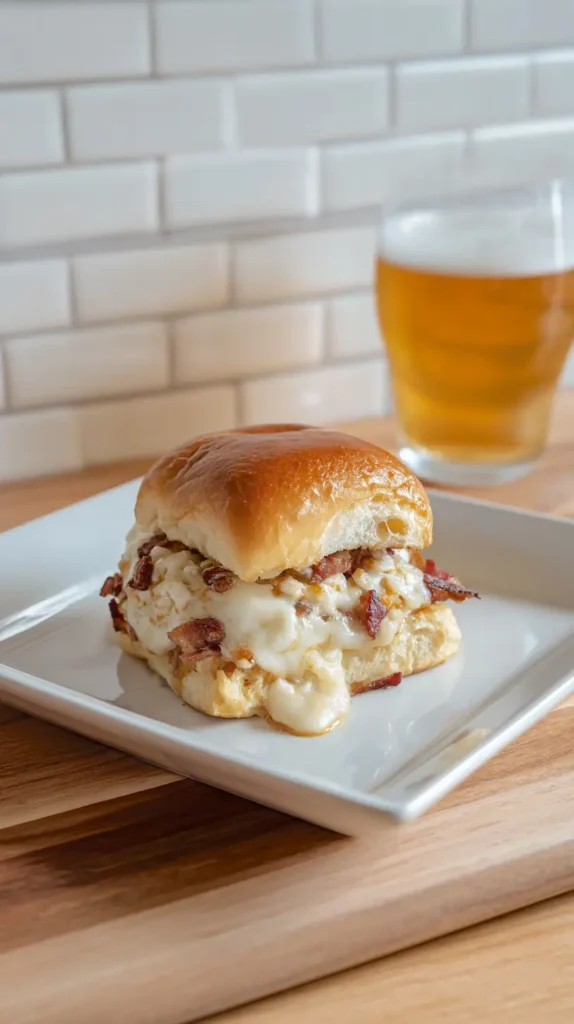
- Game day snack: Serve alongside chips and dips for a hearty football spread.
- Holiday appetizer: Perfect before the big turkey dinner, especially with the maple and pecan flavors.
- Winter brunch: Pair with mimosas or hot cider for something unexpected.
- Cozy dinner: Add a bowl of tomato soup or butternut squash soup on the side.
- Potluck hit: Easy to slice, easy to transport, guaranteed to disappear fast.
Because these brie sliders are rich, you don’t need much else to make them shine. A simple salad with vinaigrette balances out the sweetness, or roasted vegetables can round out the meal.
For serving, I slice the whole tray into 12 pieces and let people grab them straight from the pan. They stay warm longer that way, and you don’t lose cheese all over a serving platter. If you’re feeding a crowd, doubling the recipe works well, and you can bake two trays side by side.
Presentation doesn’t have to be fancy. The golden tops and gooey cheese already look impressive. A sprinkle of fresh herbs like thyme or rosemary before serving adds color and a little extra flavor.
Maple Bacon Pecan Brie Sliders
Ingredients
- 12 Hawaiian rolls one package
- 8 ounces brie cheese rind trimmed if desired, sliced into thin pieces
- 8 slices thick-cut bacon
- 3 tablespoons pure maple syrup plus 1 tablespoon for glaze
- 1/3 cup chopped pecans toasted
- 2 tablespoons unsalted butter melted
- 1/2 teaspoon flaky salt
- 1/4 teaspoon garlic powder
Instructions
- Preheat oven to 350°F. Line a baking sheet with parchment paper.
- Lay bacon slices flat on the prepared sheet. Brush both sides with 2 tablespoons maple syrup.
- Bake for 20 to 25 minutes, flipping halfway, until crisp and sticky. Transfer bacon to paper towels.
- Slice Hawaiian rolls in half horizontally, keeping tops and bottoms connected.
- Place bottom half of rolls in a 9×13-inch baking dish.
- Layer brie slices evenly over bottom rolls.
- Chop bacon into bite-sized pieces. Spread over brie layer.
- Sprinkle toasted chopped pecans evenly over bacon.
- Place top half of rolls over filling.
- In a small bowl, whisk together melted butter, 1 tablespoon maple syrup, garlic powder, and flaky salt.
- Brush mixture generously over tops of rolls.
- Cover baking dish loosely with foil. Bake for 15 minutes.
- Remove foil. Bake an additional 7 to 10 minutes, until cheese is melted and tops are golden brown.
- Remove from oven and let sliders rest 5 minutes before slicing and serving.
Final Thoughts
As a mom of five always on the lookout for budget-friendly wins, I live for recipes that look expensive but aren’t. These sliders are basically culinary catfishing—fancy-looking on the outside, but behind the scenes, they’re cheap, cheerful, and easy enough for a Tuesday night. That’s my sweet spot: festive food that doesn’t eat up half my grocery budget or my sanity.
The maple syrup, smoky bacon, and toasted pecans hit all the cozy notes, and honestly, each bite feels like biting into fall itself. Crunchy, creamy, salty, sweet—it’s like a holiday cheese board shrunk down and tucked into a warm roll. And the smell? Let’s just say if fall had a signature candle, it would smell exactly like this pan baking away in the oven.
What I love most is how these brie sliders don’t box you in. Dress them up for a holiday party, drop them at a game day spread, or slide them onto the dinner table with zero fanfare. They fit in anywhere, like that one friend who manages to charm your grandma and make the kids laugh at the same time.
And yes, they’re the kind of recipe that stops people mid-scroll. Pop them onto a Pinterest board and watch the clicks roll in because these look familiar but with a twist. They feel classic yet clever, which is exactly what makes people want to save and try them.
At the end of the day, maple bacon pecan brie sliders aren’t just finger food—they’re little bundles of happiness disguised as dinner. I’m already plotting excuses to bake another tray, and trust me, once you try them, you will too.