I’ve found that a homesteading garden layout can sound weirdly intense at first. Like someone expects me to churn butter, name a goat, and discuss soil amendments before breakfast. Meanwhile, most of us just want a backyard that grows real food without eating the grocery budget first.
That tension is why I love the layout part so much. It takes the big homestead dream and makes it less dramatic. I stop asking, “Can I do all this?” Then I ask, “Where should the tomatoes go?”
As a mom, I tend to think in zones anyway. Shoes by the door. Snacks where people can reach them. Laundry baskets wherever chaos gathers. A garden works the same way, just with basil, beans, compost, and a few smug zucchini plants.
For a budget-friendly site, this matters even more. A pretty garden is lovely, but a useful garden earns its keep. The goal isn’t perfection with matching cedar beds and fancy labels. Cute, yes. Expensive little garden boutique moment, no thank you.
So, I’m building this around smart zones, cheap wins, and plants that make sense. Some spots need daily access. Others can sit farther back and behave with less attention. There’s also one messy little zone that deserves more credit than it gets.
And once that clicks, the whole yard starts looking less like dirt and more like dinner. That’s when the fun starts.
Some of the links on this page are affiliate links, which means I may earn a small commission if you purchase through them. It never costs you extra. You can always peek at my full disclosure if you’d like the details.
A Budget Homesteading Garden Layout Starts With Zones
A budget homesteading garden layout starts with one basic truth. Your garden should match how you move. Not how a glossy backyard photo wants you to move. Those are different things, and one involves fewer adorable lies.
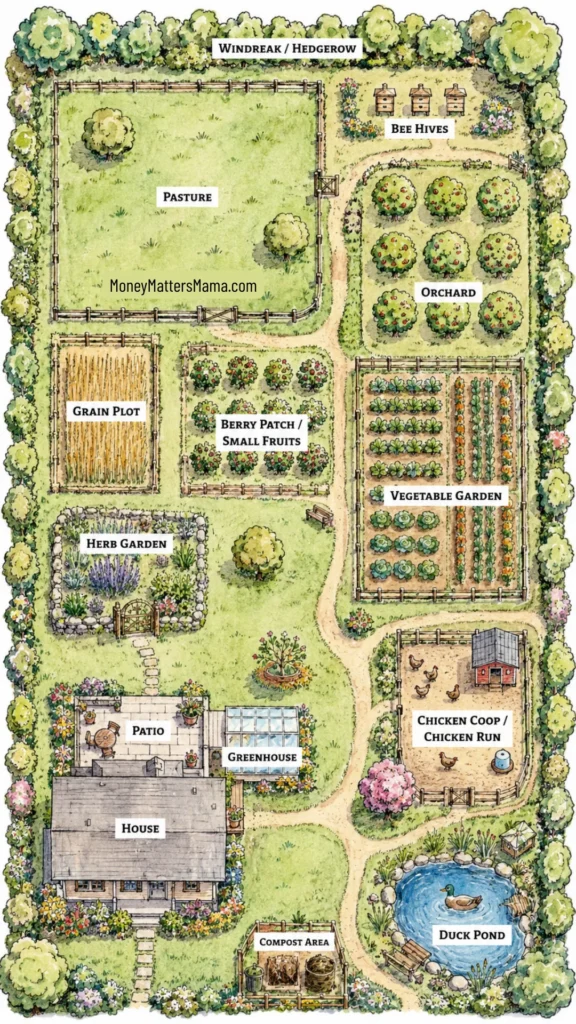
I’ve found that zones make the whole plan calmer. Zone one sits closest to the kitchen or back door. The second zone holds plants you check often.
After that, zone three handles climbers, sprawl, and bigger crops. A fourth zone gives longer-term plants room. Finally, zone five holds compost, tools, mulch, and less-cute money savers.
That sounds fancy, but it’s really just common sense wearing garden boots. Put the needy plants near you. Send the chill plants farther out. Keep the messy stuff where it helps, not where it annoys you every morning.
The common mistake is starting with bed shapes first. I get it, because neat rectangles make our brains happy. Still, a perfect bed in the wrong place becomes garden decor with commitment issues. Nobody wants that.
Instead, start with habits. Where do you walk? Which spot gets sun first? What faucet works without a wrestling match? Can you notice thirsty herbs before they turn crispy and rude?
A small homesteading garden layout can still produce plenty. However, the zones need jobs. That job-based approach saves money because you buy fewer random plants. It also keeps you from building beds you never use.
This is where the budget part gets sneaky good. You’re not shrinking the dream. Instead, you remove wasted steps, wasted supplies, and wasted enthusiasm. That leaves more room for food, and less room for expensive backyard theater. It also makes each dollar explain itself before checkout.
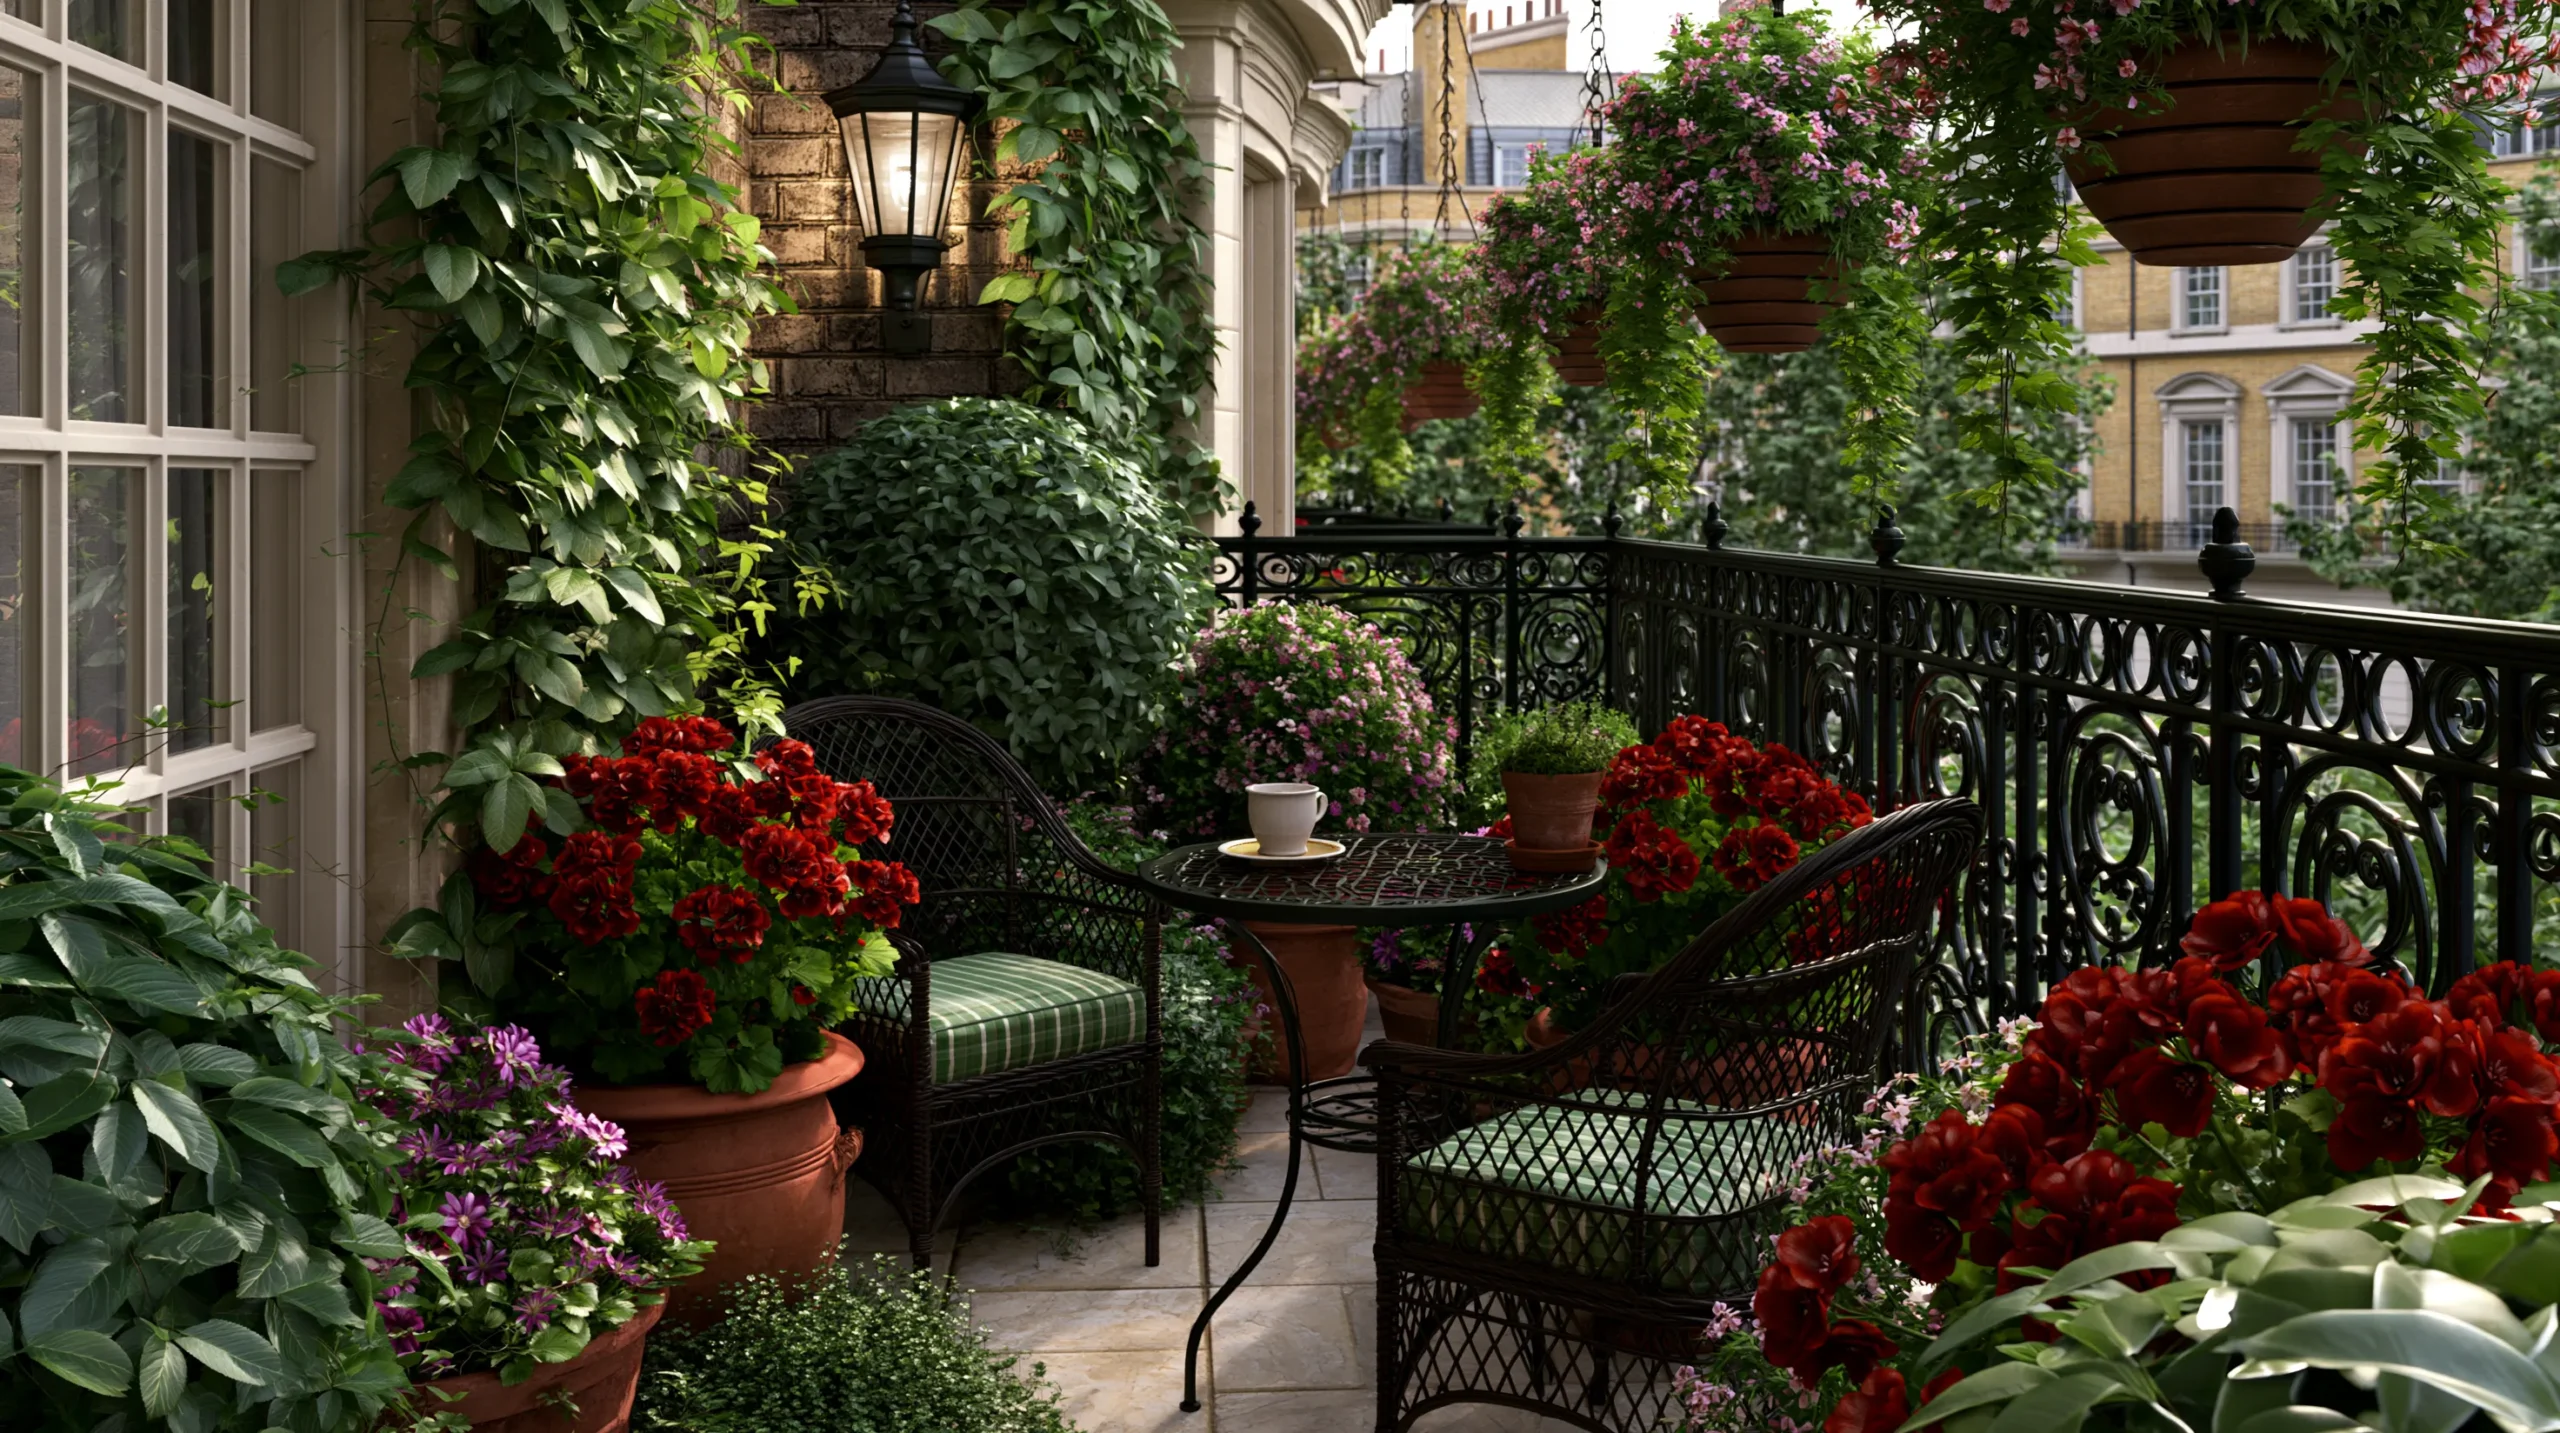
Build Your First Zone Around Daily Grab Food
Zone one should sit close enough that you’ll use it while dinner cooks. I’m talking slippers, messy bun, “I need parsley now” distance. If you have to change shoes, it’s too far. That sounds picky, but it saves food and money.
For this zone, plant the things you touch often. Herbs belong here because store-bought bunches cost too much. Salad greens also make sense because they grow fast and forgive small spaces. A budget homesteading garden layout gets easier when daily plants stay within reach.
Good zone one plantings include:
- Basil, parsley, cilantro, dill, chives, thyme, and oregano
- Cut-and-come-again lettuce, arugula, spinach, and Swiss chard
- Green onions, radishes, nasturtiums, and edible flowers
- A small pot of mint, but only in a container
- Cherry tomatoes near the edge, if the spot gets strong sun
I’d keep this zone tight and cute, not huge. A few pots, one raised bed, or a narrow border can work. However, give yourself good soil here. This is not the place for sad dirt and wishful thinking.
Budget-wise, herbs from seed can save a lot. Still, I’d buy starter plants for slow growers like rosemary or thyme. Some seeds test everyone’s patience, and we have lives.
Here’s the tiny reframe. Zone one isn’t just the pretty kitchen garden. It’s the section that stops small grocery leaks. Every handful of basil or lettuce counts, even when it looks too small to brag about. Plus, it keeps dinner less boring, which is no small gift.
If this bed sits near a door, you’ll notice gaps faster. That means fewer wasted starts and fewer mystery wilts. Even a cheap container can work here. Convenience does more heavy lifting than charm.
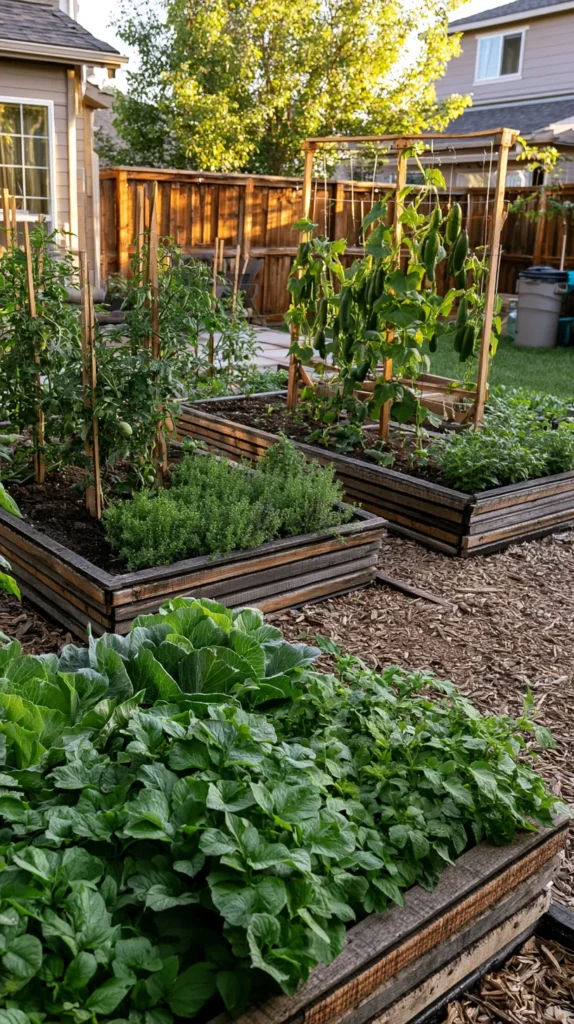
Use Middle Beds For Cheap, Heavy Harvests
Zone two is where the dependable vegetables belong. These crops need more space than herbs, but they still need regular attention. They’re the plants you’ll check while holding coffee and pretending weeds don’t exist. I support that little fiction.
In a homesteading garden layout, zone two should hold the best return crops. Think tomatoes, peppers, bush beans, cucumbers, carrots, beets, kale, and summer squash. These foods can replace real grocery buys, not just decorate a plate. That matters when the budget has opinions.
I’d place these beds where water access stays easy. Also, keep paths wide enough for a basket. A tight path looks efficient until you’re sideways with tomatoes falling everywhere. Then it becomes comedy, but not the useful kind.
This is also where companion planting can earn space. Plant basil near tomatoes, and tuck marigolds at bed corners. Add dill or cilantro near crops that benefit from pollinators. However, don’t turn companion planting into garden astrology. Keep it useful, not mystical.
A simple bed plan works well here. Put tall tomatoes along the north side, if you’re in the Northern Hemisphere. Place peppers in the middle. Add carrots, lettuce, or beets along the front edge. Then use one end for bush beans because they work hard without much drama.
The surprise is that zone two doesn’t need to be huge. Four beds can grow a shocking amount when each bed has a clear purpose. However, one bed filled with impulse plants becomes a green junk drawer. Ask any gardener, and watch the eye twitch.
So, let this zone be boring in the best way. Boring grows dinner. It also keeps the garden from becoming another chore wearing a sun hat.
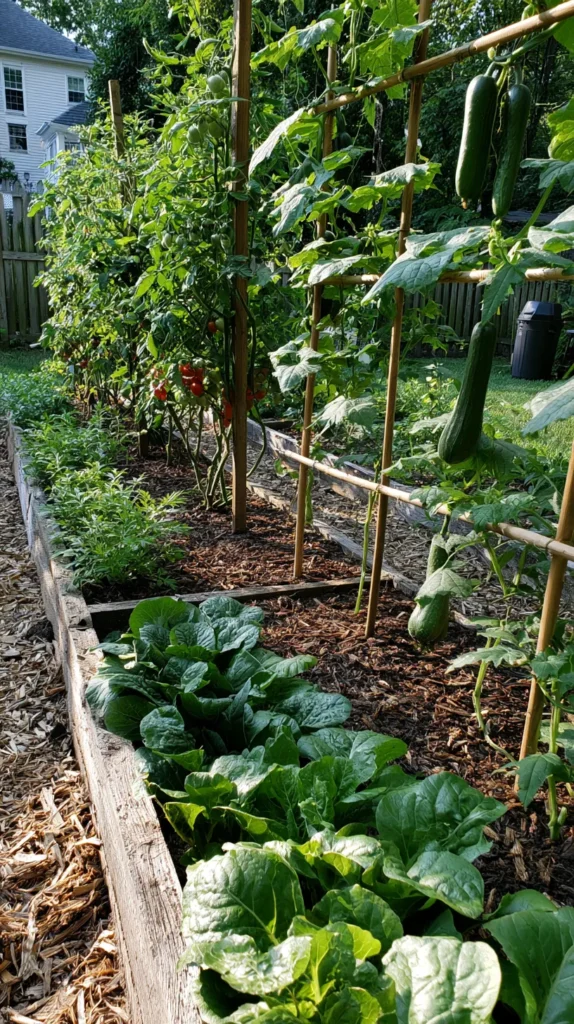
A Homesteading Garden Layout Needs Vertical Drama
A homesteading garden layout gets cheaper when it uses the air. That sounds like garden nonsense, but stay with me. Vertical space can save lumber, soil, water, and precious ground. Plus, it makes the whole garden look more planned than it may be. We love a harmless illusion.
Zone three should hold climbers and plants with big personalities. Put it along a fence, a sunny side path, or the back of beds. This keeps vines from flopping into everything like they pay taxes.
Strong zone three plantings include:
- Pole beans on string, bamboo, or a cattle panel
- Cucumbers on a trellis, especially slicing cucumbers
- Peas in cooler seasons, if your climate allows
- Indeterminate tomatoes on sturdy supports
- Small melons on strong arches, with sling support
- Malabar spinach for hot weather greens
- Grapes, if you want a longer-term vine
Here’s the budget-friendly part. You don’t need a charming iron arch that costs grocery money. Use scrap wood, old fencing, branches, twine, or basic panels. Keep it sturdy, because one heavy cucumber vine can humble a flimsy setup fast.
I tend to notice that people underbuild vertical supports. Then July arrives, and the cucumbers cover half the yard. Not cute. A strong structure looks less dainty at first, but it saves the harvest later.
Also, vertical crops make picking easier. You can see cucumbers before they become baseball bats. Beans hang where you can grab them. Tomatoes get more air, which helps prevent disease.
This section brings the drama, but in a useful way. The garden gets height, shade, harvest, and order. Meanwhile, the ground stays open for more food. That is the kind of math I enjoy.

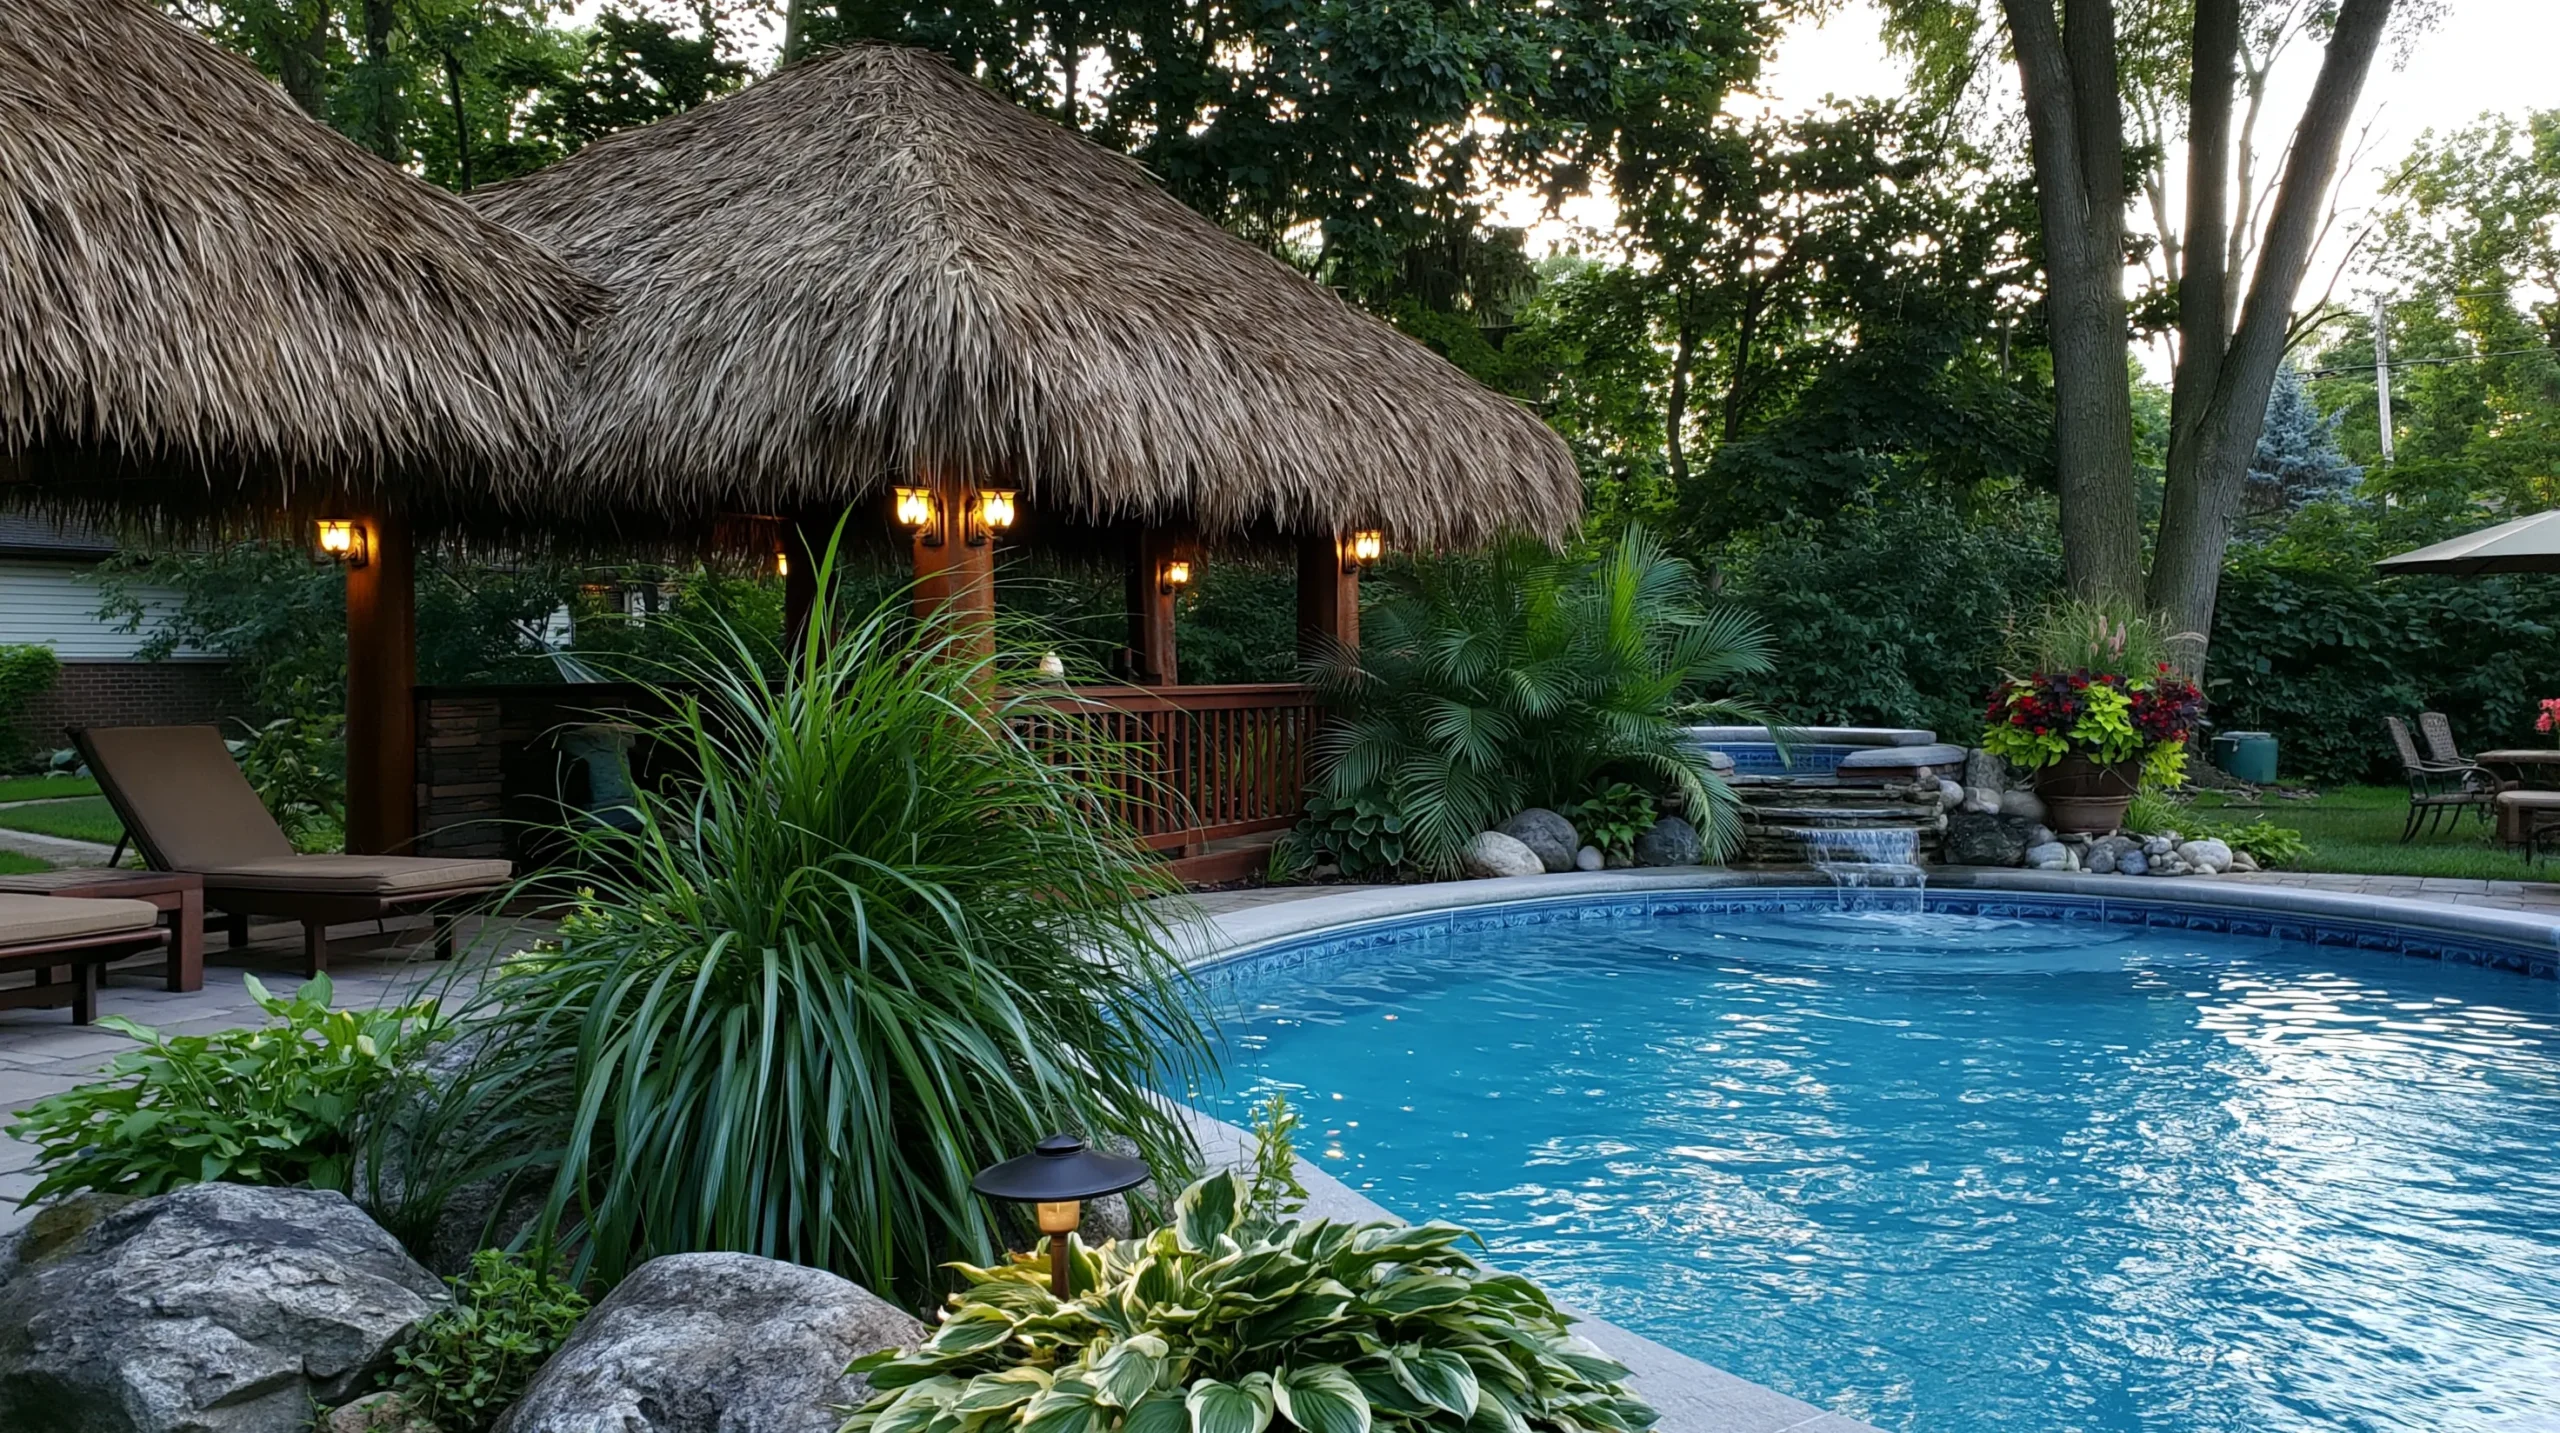
Give Perennials Their Own Quiet Corner
Zone four belongs to plants that stay around. This is where I’d put fruit, berries, asparagus, rhubarb, artichokes, and hardy herbs. These plants don’t need daily fuss, but they do need commitment. Basically, they’re the long-term relationship part of the garden.
A smart homesteading garden layout should separate perennials from annual vegetables. Annual beds get dug, amended, rotated, and replanted. Perennials prefer less chaos. When they share space, someone usually gets annoyed, and it’s often the gardener.
Plant strawberries along edges where they can spread a bit. Place blueberries in acidic soil or big containers with the right mix. Add blackberries or raspberries along a fence with strong supports. Put asparagus in a bed where it can stay for years. Rhubarb likes cooler climates, so check your growing zone first.
Fruit trees can fit here too, especially dwarf varieties. Apples, peaches, figs, citrus, and plums all depend on climate. In Orlando, citrus and figs make more sense than cold-loving fruits. However, the same layout idea works anywhere. Choose what fits your weather, not someone else’s Pinterest board.
Perennials cost more upfront, so start slowly. One berry bush this year beats five dead ones next year. That may not sound glamorous, but dead plants are the worst decor. Also, small starts often settle better than oversized plants anyway.
The reframe here is simple. Zone four doesn’t need instant payoff. It builds grocery savings over time.
While annual vegetables give quick wins, perennials create future ease. That slow payoff is still a budget win, even when it looks quiet at first. The quiet corner is not lazy. It’s patient, which is cheaper than frantic. That saves money without fanfare.

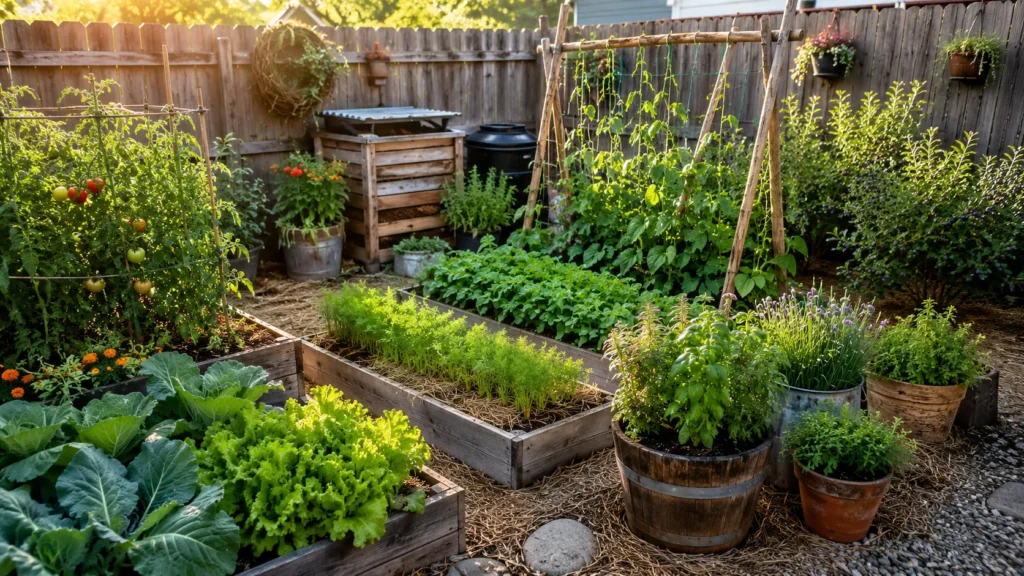
The Messy Zone Is Where Money Gets Saved
Zone five rarely wins beauty contests, and that’s fine. It’s the utility corner, the compost spot, the mulch stash, and the tool zone. Every homesteading garden layout needs one, even if nobody photographs it. Especially if nobody photographs it.
This zone can sit farther from the house, but not too far. If compost turns into a hike, scraps won’t make it there. Then they sit in the kitchen looking guilty. So, choose a place that works with your real habits.
Useful zone five pieces include:
- Compost bins for kitchen scraps, leaves, and garden waste
- Mulch piles with straw, shredded leaves, or wood chips
- Rain barrels, if local rules and roof setup allow them
- Basic tool racks or weather-safe storage bins
- Extra pots, buckets, plant labels, and row cover
- Seed-starting shelves, if you have bright light nearby
This zone saves money because it turns waste into garden support. Leaves become mulch. Scraps become compost. Old containers become seed pots. Suddenly, the garden needs fewer bags from the store.
However, keep this area controlled. Budget-friendly should not mean backyard junk museum. Use pallets, bins, old trash cans with holes, or wire circles. Make the system simple enough that you’ll use it when life gets loud.
I’d also keep a small “plant hospital” here. Struggling starts, divisions, and extra seedlings can wait there. Some recover, and some do not. We honor their journey and move on.
The twist is that zone five might be the least pretty section and the most important. It quietly lowers costs while the tomato beds get all the compliments. I’d rather have compost than another cute sign.
Typical. Very typical. That sign can wait.

Homesteading Garden Layout FAQs For Real Backyards
A homesteading garden layout brings up very normal questions. Because once soil, sun, kids, dogs, heat, weeds, and budgets enter the chat, tidy advice gets suspicious. Real yards need flexible answers, not stiff little garden rules.
How Much Space Do I Need To Start?
Start smaller than your excitement suggests. A 4-by-8 bed, several containers, or one sunny corner can work. Grow herbs, lettuce, tomatoes, peppers, and beans first. Those crops give fast use without requiring a backyard empire.
What Should I Plant In Each Zone?
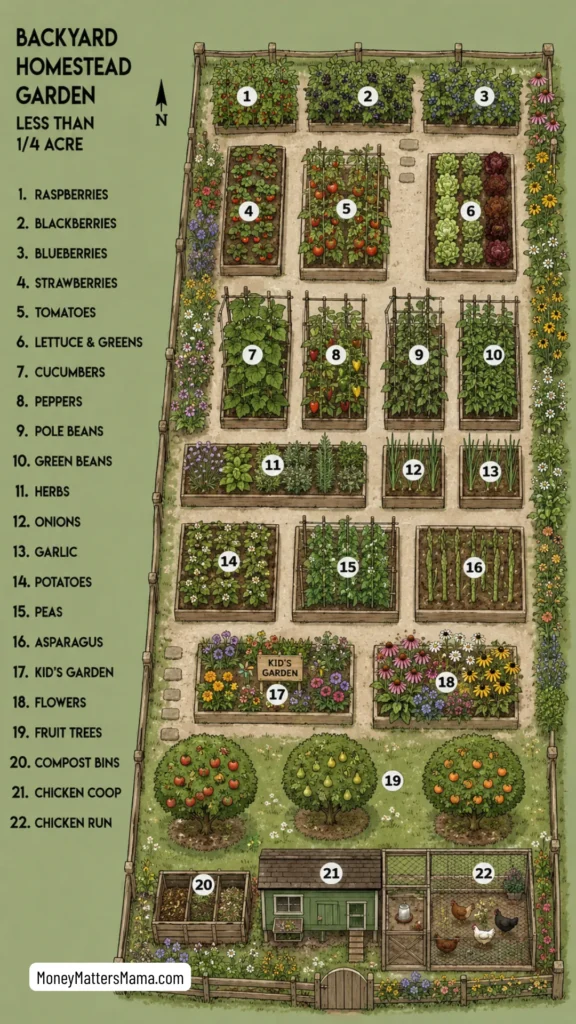
Use zone one for herbs, greens, radishes, and green onions. Fill zone two with tomatoes, peppers, bush beans, cucumbers, carrots, and kale. Put pole beans, peas, cucumbers, grapes, and climbing tomatoes in zone three. Save zone four for berries, asparagus, rhubarb, dwarf fruit trees, and hardy herbs. Keep compost, mulch, tools, and seed supplies in zone five.
What If My Yard Has Weird Sun?
Work with the sun you have. Put tomatoes, peppers, squash, beans, cucumbers, and fruit in the sunniest spots. Use part shade for lettuce, spinach, chard, parsley, cilantro, and mint. Shade doesn’t ruin the plan. It just changes the cast.
How Do I Keep It Budget-Friendly?
Buy fewer starts and more seeds. Use compost, leaves, cardboard, and saved containers. However, spend money on soil where food grows often. Cheap soil can cost more later through weak plants.
What Should I Skip At First?
Skip anything fussy, huge, or expensive for your climate. Also, skip crops your family won’t eat. A garden full of unused produce is just yard guilt with leaves. Start with food you already buy, then expand when the layout earns trust. That keeps the whole plan practical, not precious.

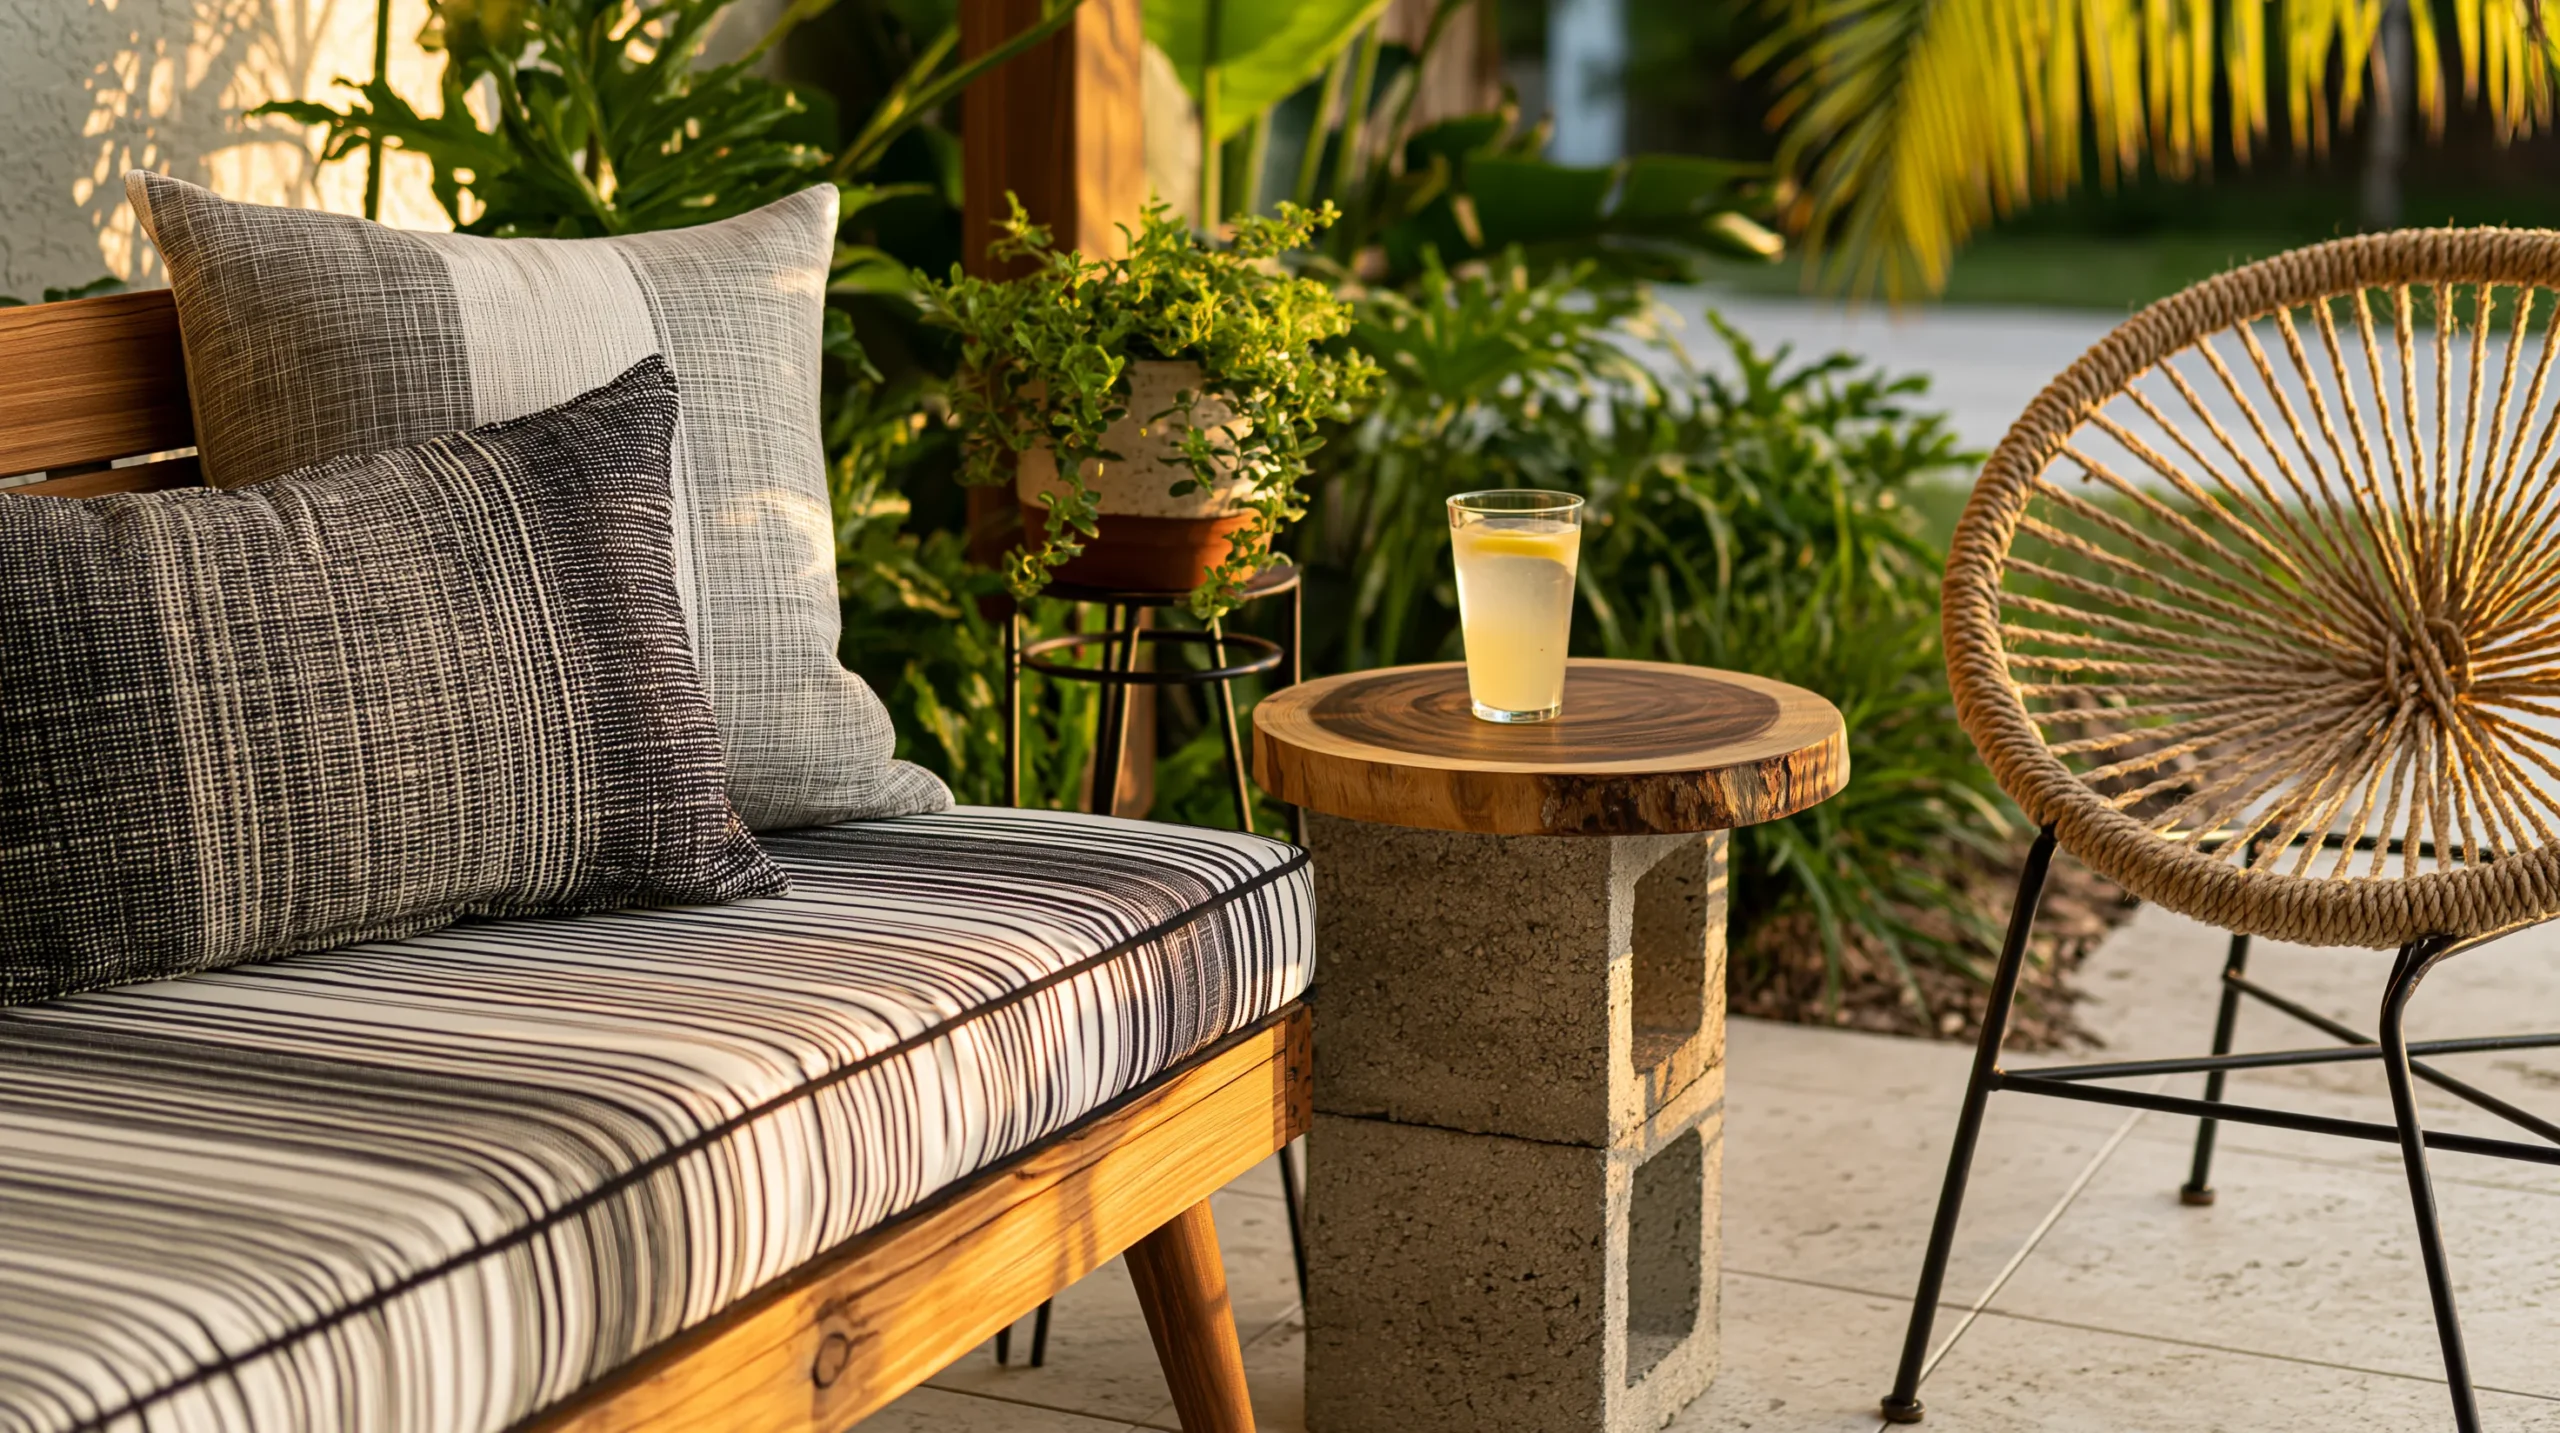
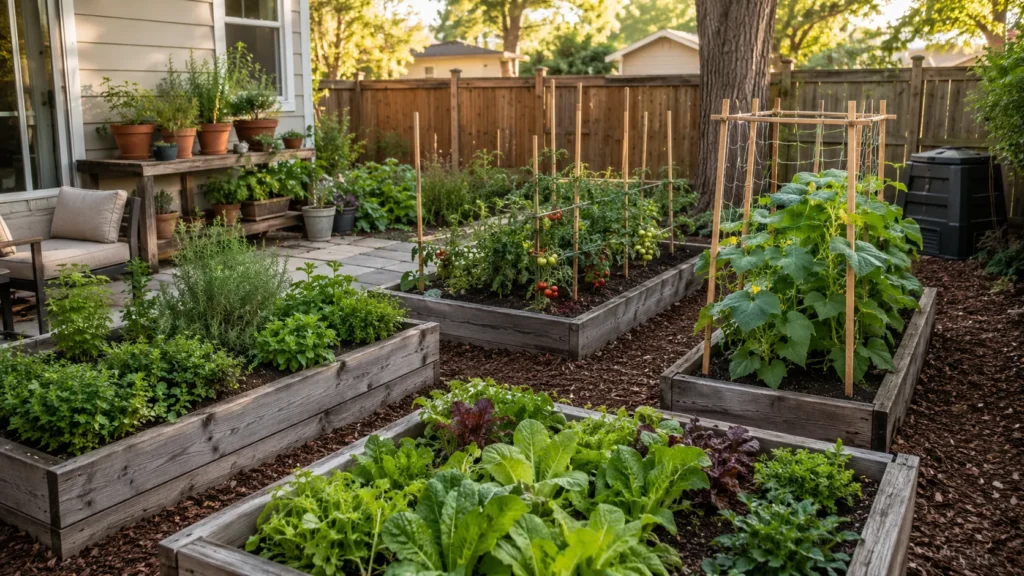
A Pretty Homesteading Garden Layout Can Fit Real Life
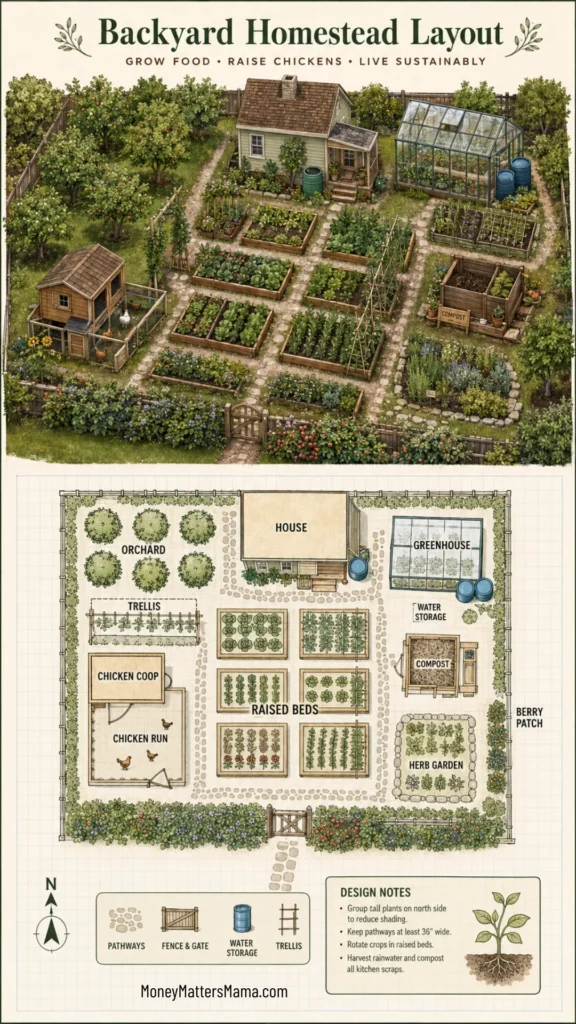
A pretty homesteading garden layout does not require a rich-aunt greenhouse moment. Though, listen, I would admire one. It just needs order, repetition, and a few details that make practical parts look intentional. That’s the whole little secret.
I’ve found that paths do most of the visual work. Use mulch, wood chips, gravel, stepping stones, or cardboard under straw. Suddenly, the garden looks designed. Meanwhile, your shoes stay cleaner, and weeds slow down.
Edges help too. Bricks, logs, old boards, stones, or simple trench edges can define beds. They don’t need to match perfectly. Repetition matters more than matching. That is different, and cheaper.
Planting can also make the layout prettier without costing more. Use basil, marigolds, nasturtiums, dill, calendula, and chives near vegetables. These plants bring color, pollinators, and useful harvests. That beats buying decor that can’t do anything.
Still, the layout has to survive real life. Rushed dinners count. Tired evenings count. Kids, dogs, heat, and weird timing count too. A garden that only works on perfect Saturdays is too high maintenance.
So, place sturdy plants near curious hands. Cherry tomatoes, strawberries, snap peas, and sunflowers make sense. Keep delicate seedlings away from soccer balls, dog paths, and mysterious backyard running. Because yes, the backyard has traffic patterns.
Here’s the assumption I’d toss right into the compost. Practical gardens don’t have to look plain. Budget gardens don’t have to look sad. A tomato bed with marigolds, mulch, and a tidy path can look charming without acting expensive.
The best garden looks good because it works well. Useful is prettier than people admit. That tiny truth saves a shocking amount of money. Fancy loses that round.

Let The Backyard Be A Little Bossy
I like the idea of a garden that earns its place. Not in a harsh way. More like, “Please be pretty, but bring dinner help.” That’s the energy I want from a budget backyard.
A homesteading garden layout makes that possible because it gives every corner a job. Herbs stay close. Vegetables work in the middle.
Vines climb. Perennials settle in. Compost does the unglamorous saving. None of it needs to look perfect to matter.
As a mom, I appreciate anything that makes the day slightly less dramatic. A smart garden can do that in tiny ways. It can hand you basil, lettuce, tomatoes, or green onions without a store run. That may sound small, but small things stack fast.
I also love how garden ideas can start on Pinterest, then turn practical in the yard. A pretty photo can inspire the shape. However, your real budget, sun, water, and time should make the final call. That’s where the plan becomes useful. The whole plan can stay flexible, which keeps the budget calmer.
A sweet spot sits between dreamy and doable. Too dreamy gets expensive. Plain can get boring. Somewhere in the middle, you get food, charm, and sane walkways.
That matters once squash starts blocking paths. I respect a bold vegetable, but not across my walkway. Keep the route clear, and everyone wins.
And that, really, is the quiet little win. Let the backyard be useful, a bit bossy, and just pretty enough to get away with it.