A craft night party sounds sweet until the receipt starts acting dramatic. Paint, ribbon, snacks, glue, cups, tiny trays, and cute napkins add up fast. Suddenly, your “cheap girls’ night” costs like a small appliance. Rude behavior, frankly.
I love a pretty setup, but I also love keeping money where it belongs. In my account. So, I notice which party details do the heavy lifting. Other details just sit there looking expensive. Spoiler: guests remember the laughter, the finished craft, and the snacks.
Nobody remembers whether the napkins came from a boutique paper shop. That truth gives us freedom. It also saves us from buying twelve things labeled “must-have.” Budget peace always counts too, especially at home.
As a mom, I’ve learned group activities work best with simple plans. They need to look fun, stay easy, and avoid ten errands. That same rule fits grown-up craft nights beautifully. Give people something cute to make, then let the night loosen up.
This post covers budget materials, setup steps, and specific craft ideas. Skip stiff. Avoid fussy. Nobody needs to read a tiny instruction packet before touching the glue gun. We’re going for cute, calm, and fun without financial regret.
Because here’s the sneaky little truth about a great craft night. Expensive supplies don’t make the night better. A smart plan, one crowd-friendly project, and a relaxed setup do the heavy lifting. That’s where the fun starts getting good. Also, nobody needs a project that requires a secret password and a crafting passport.

Some of the links on this page are affiliate links, which means I may earn a small commission if you purchase through them. It never costs you extra. You can always peek at my full disclosure if you’d like the details.
Craft Night Party Basics That Look Fancy
A craft night party works best when it has a clear lane. That sounds very adult and responsible, which annoys me slightly. Still, it saves the night from turning into a glitter-covered garage sale.
I’ve found that the best setup starts with one main craft. Skip seven crafts. Avoid a “choose your own creative journey” situation. Too many choices can make people freeze. Add scissors and hot glue, and suddenly everyone needs emotional support.
The trick is picking something guests can finish in one sitting. A cute wreath, painted tote, beaded bracelet stack, or seasonal sign works well. Guests shouldn’t leave with a half-dry project. Nobody wants mild craft trauma in the passenger seat either.
Budget matters here because supplies multiply fast. One ribbon roll seems harmless. Eight ribbon rolls suddenly have opinions about your bank balance. So, start with the craft, then build every detail around it.
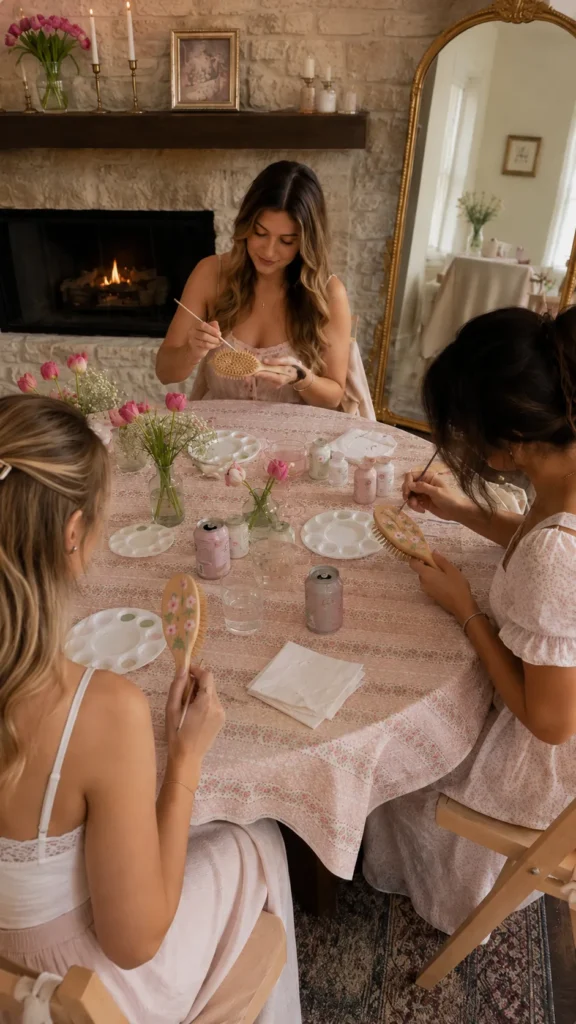
A strong craft night party also needs a loose flow. Guests arrive, grab a drink, chat, craft, snack, admire everyone’s work, and head home happy. That rhythm sounds simple because it should be simple. We are not planning a royal wedding with glue dots.
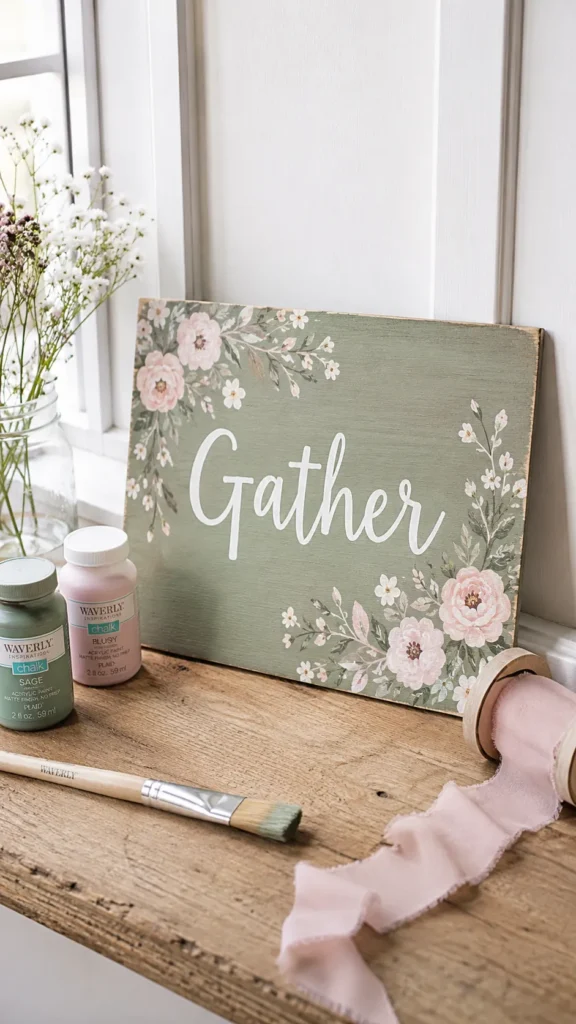
I’d skip the perfection trap. Matching every item can look nice, but it can drain the budget. Instead, choose one color theme and repeat it in small ways. Think blush and cream, sage and white, or black and gold.
Here’s the part people forget. Finished crafts look better when the table stays calm. Clear jars, trays, and small bowls make cheap supplies look intentional. That tiny detail changes everything.
Fancy isn’t always expensive. Sometimes fancy really means the glue sticks have a home.

Budget Materials For A Craft Night Party
Budget materials can make a craft night party look styled, not skimpy. The secret lives in choosing supplies that stretch. One pack of wood rounds can cover several guests. A bundle of faux greenery can also go surprisingly far.
Before buying anything, check what you already own. I know, wildly sensible. Still, most homes hide craft supplies from three hobbies ago. Those ribbon scraps deserve one more shot at glory.
Then shop with a strict list. That keeps the cart from becoming a tiny craft store with wheels. Dollar stores, thrift shops, clearance aisles, and bulk packs can do beautiful work. However, the list has to stay bossy.
Use these budget-friendly materials for a cute setup:
- Kraft paper for the table cover and easy cleanup
- Mason jars for brushes, pencils, beads, and stems
- Paper plates for paint palettes or sorting trays
- Small bowls for buttons, charms, ribbon, and clips
- Twine, raffia, or yarn for texture
- Wood blanks, tote bags, frames, or ornaments
- Acrylic paint in a tight color palette
- Glue sticks, tacky glue, and one watched glue gun
- Printable templates for signs, tags, or patterns
- Thrifted baskets or trays for supply stations
However, don’t buy every cute thing. Cute things are sneaky little budget goblins. Pick materials that support your exact craft. Then stop before the aisle starts flirting.
I’ve found that neutral basics stretch best. White paint, wood pieces, black markers, natural twine, and plain bags work across many themes. Add one seasonal color, and everything suddenly looks planned.
A craft night party doesn’t need premium supplies. It needs supplies that behave, photograph well, and make sense. Nobody should ask, “Wait, what is this for?” while holding a mystery foam shape.

Pick One Craft Before Everyone Gets Crafty Chaos
Choosing one craft can sound boring at first. I get it. We love options. Options make us seem generous, creative, and mildly glamorous.
Then the night starts, and someone wants earrings. Another person wants a wreath. Someone else decides to paint pumpkins. Now you’re answering questions like a stressed art teacher with a snack tray.
One main craft keeps the room relaxed. Everyone works from the same supply zone, so you spend less money. You also spend less time hunting extra pieces. Plus, guests compare results, which makes the night more fun.
A good craft night party project should pass three tests. First, it should look cute when beginners make it. Second, it should use affordable materials. Third, it should dry, set, or pack easily before guests leave.
That last part matters more than people think. Wet paint in a car cup holder is not a favor. It’s a tiny crisis with upholstery. Let’s not invite that villain.
I tend to notice that practical crafts get the best reaction. Guests like taking home something they can use, display, gift, or post. Pretty and useful beats complicated and impressive almost every time.
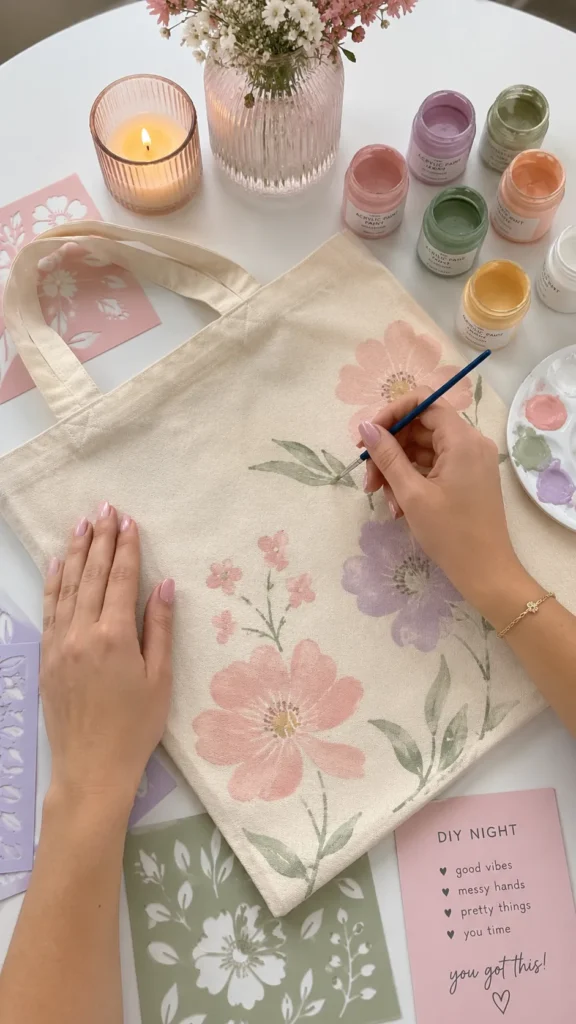
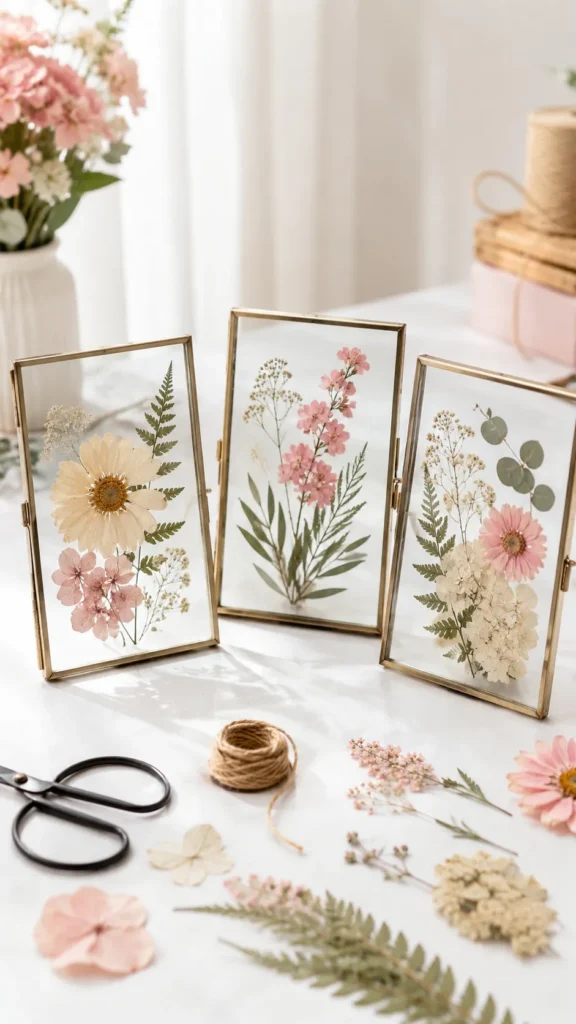
Try painted taper candles, personalized tote bags, seasonal door hangers, bracelet stacks, or pressed flower frames. Mini faux floral arrangements also work well. Each idea seems creative without requiring an art degree.
Also, leave room for personal style. Give everyone the same base, then offer different colors, trims, charms, or patterns. That keeps the budget tight while still giving guests choices.
The common assumption says more options create more fun. I disagree. Fewer choices can make people braver because the path seems clear.
So yes, fewer crafts can create more fun. Weirdly rude, but true.

Easy Craft Night Party Ideas That Don’t Look Cheap
Easy craft night party ideas should look cute on the table and doable after snacks. That is my scientific standard. If the project needs a supply list longer than a grocery receipt, I’m suspicious.
The best ideas use simple bases and little details. A plain object becomes cute with paint, ribbon, beads, stickers, stamps, or greenery. That’s not cutting corners. Instead, that’s knowing where the impact lives.
Here are budget craft ideas:
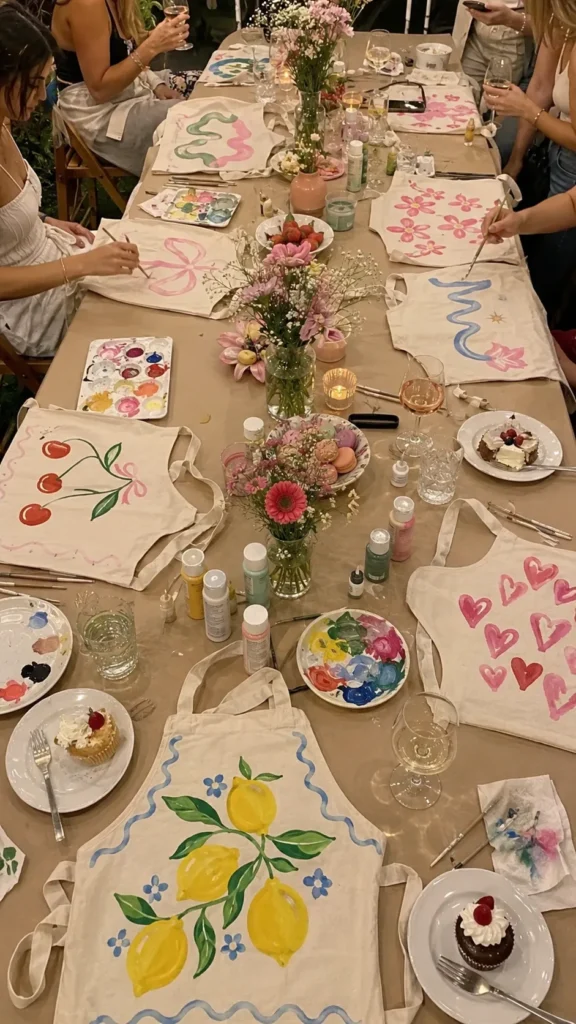
- Painted canvas tote bags with stencils, stamps, or iron-on letters
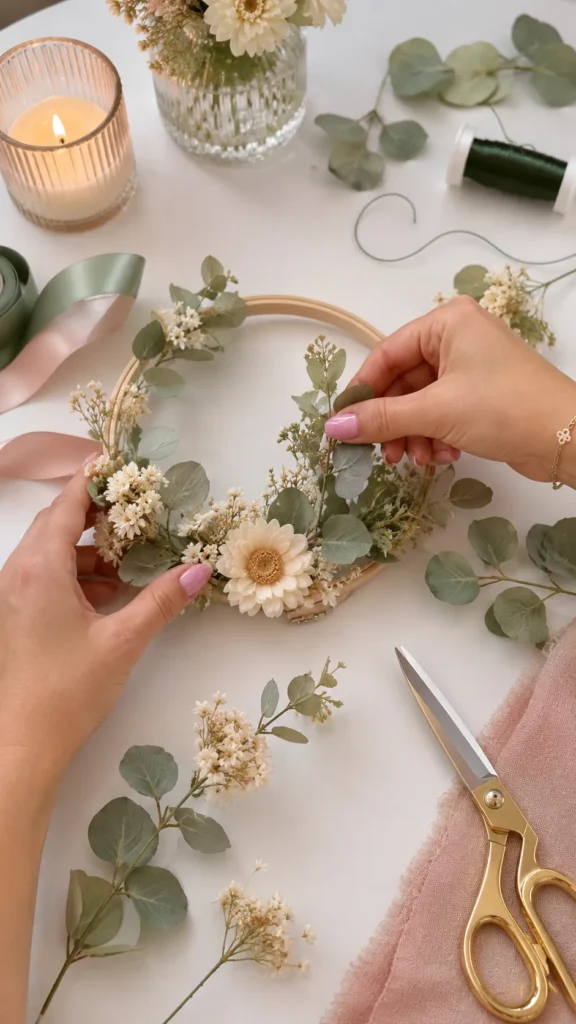
- Mini seasonal wreaths with embroidery hoops and faux stems
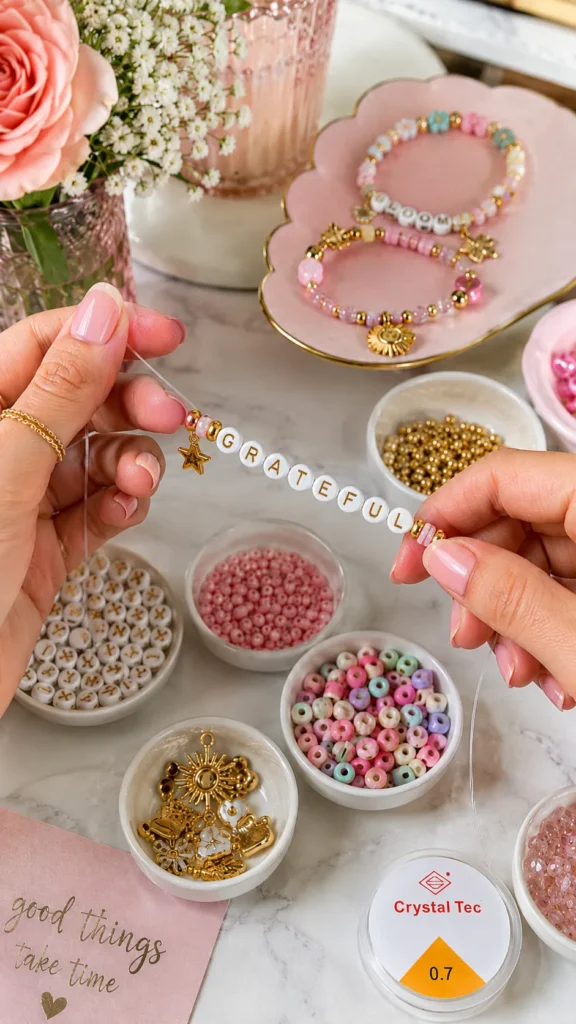
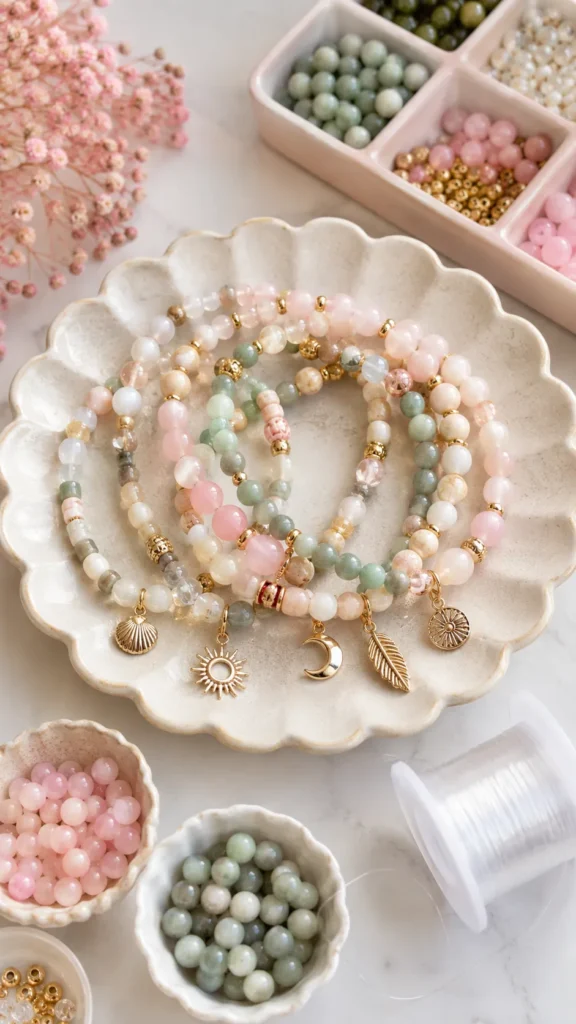
- Beaded bracelets with letter beads, charms, and elastic cord
- Pressed flower frames with thrifted frames and dried blooms
- Painted wood signs with simple sayings or seasonal shapes
- Decorated taper candles with wax pens or soft painted designs
- Custom recipe cards with stamps, pens, and ribbon bundles
- Faux floral jars with thrifted vases and grocery-store stems
- Wine glass charms made with beads and small hoops
- Holiday ornaments using clear balls, ribbon, glitter, or paint
However, every craft needs a budget filter. Ask one simple question. Can guests make this without buying five specialty tools? If not, scoot along, fancy pants.
A craft night party should invite people in, not make them nervous. Simple supplies help everyone relax because the stakes stay low. Nobody wants to whisper, “Am I ruining this?” over a pricey wood cutout.
For a sweet budget trick, pre-cut ribbon and sort supplies before guests arrive. It makes cheaper materials look more polished. Plus, nobody fights a tangled ribbon roll like a dramatic movie villain.
Another smart move involves choosing crafts with forgiving finishes. Distressed paint, layered beads, and natural twine hide tiny mistakes. Perfect lines look nice, but relaxed details look friendly.
Cute doesn’t need complicated. It needs clear, doable, and a little bit clever.

Set Up The Table Like You Meant It
A pretty craft table can make budget supplies look far more expensive. This is deeply unfair and also very useful. Presentation does half the job before anyone even sits down.
Start with kraft paper, butcher paper, or a cheap plastic tablecloth. Kraft paper looks relaxed, hides small messes, and lets you write names right on it. You can also label supplies without printing anything.
Next, place supplies in small groups instead of dumping everything in the center. Brushes go in jars. Beads go in bowls. Ribbon goes in baskets. Paint sits on a tray like it has manners.
A craft night party also needs elbow room. Creative people spread out fast. Give each guest a placemat, paper plate, or tray for their project. That small boundary keeps paint, beads, and glue from creeping everywhere.
Lighting matters more than people think. Overhead lights can make the room look flat. Lamps, battery candles, or string lights soften the setup without adding much cost. Plus, crafts look better in warm light.
Here’s my slightly bossy opinion. Don’t over-decorate the craft table. The supplies already bring color, texture, and movement. Add too much decor, and guests lose space to work.
Instead, decorate around the table. Put snacks on a sideboard, drinks nearby, and finished craft examples at one end. That layout keeps the main area useful and gives the table breathing room.
I’d also keep a small “oops station” nearby. Add wipes, paper towels, extra glue, scissors, and a trash bowl. It sounds boring, but it saves the whole vibe. Small rescue supplies prevent big messy moments.
A cute table should say, “Come sit here.” It shouldn’t say, “Please move twelve tiny pumpkins before painting.”

Simple Steps For Hosting Without Spending All Day
A craft night party gets much easier when the steps stay clear. Not rigid. Just clear enough that you don’t spend the night answering the same question forever.
I’d start planning a week ahead, especially if you need online supplies. Waiting until the last minute invites panic buying. Panic buying loves expensive packs of things you’ll never use again. Truly, it has terrible taste.
Use these simple steps:
- Pick one main craft guests can finish in one night.
- Choose a color theme with two or three shades.
- Make a guest count before buying supplies.
- Check your house for tools, jars, trays, and scissors.
- Buy only missing supplies from budget-friendly stores.
- Prep small pieces, templates, ribbon, or labels early.
- Set up supplies in clear zones before guests arrive.
- Place one finished example on the table.
- Keep snacks and drinks away from glue and paint.
- Create a drying area with wax paper or parchment.
However, don’t turn the steps into a military operation. Nobody came to your house for craft boot camp. The plan should support the fun, not chase it with a clipboard.
I’ve found that a sample craft helps more than long directions. People can glance at it, understand the goal, then make their own version. That keeps questions low and confidence high.
Also, keep cleanup supplies visible. Paper towels, wipes, trash bags, and a small dish for sticky scraps save everyone. Future you deserves kindness.
If kids might join, set out washable supplies and skip the trickier tools. For adults only, keep one glue gun station. That keeps things safer and cheaper.
Simple hosting doesn’t look lazy. It looks calm, and calm costs nothing.
Snacks, Drinks, And Tiny Extras That Keep It Fun
Snacks at a craft night party should be easy to grab and hard to spill. That sounds unromantic, but glue and salsa don’t need a meet-cute. I said what I said.
Finger foods work best because people keep crafting while they snack. Think popcorn, pretzels, cheese cubes, crackers, grapes, cookies, trail mix, or mini sandwiches. Skip anything saucy. Avoid anything that requires a knife and fork.
Drinks should also stay simple. Lemonade, iced tea, mocktails, flavored water, or a casual wine option can all work. Use pitchers or drink dispensers if you have them. If not, pretty cups and a small drink station still look cute.
A budget-friendly snack table can look special with tiny details. Use bowls you already own. Add napkins in your craft colors. Put snacks at different heights with cake stands, cutting boards, or upside-down bowls under fabric.
Here’s the quiet little secret. People love a themed snack, but they don’t need ten of them. One seasonal treat can carry the whole table. Pumpkin cookies, heart-shaped crackers, pastel candies, or red-white-and-blue fruit can set the mood.
Tiny extras can also help the night seem special. Try name tags, playlist cards, mini take-home bags, or a photo spot with finished crafts. None of these need much money.
Still, skip anything that creates more work than joy. That includes complicated favors, fussy labels, and drinks that require muddling. We respect a garnish. A second career is not required. Instead, let one small detail carry the charm.
The common party myth says more extras create more charm. I think thoughtful extras win harder. Fun should stay easy enough to enjoy. Easy usually wins here.
Craft Night Party FAQs For Real-Life Planning
A craft night party always brings a few practical questions. That’s normal. Creative nights sound casual, but the details can sneak up wearing glitter.
Use these quick answers when planning:
- How much should I spend per guest? I’d aim for $5 to $12 per person. Tote bags and bracelets can stay near the lower end. Wreaths, frames, or larger wood pieces may cost more.
- What craft works best for beginners? Painted tote bags, beaded bracelets, and simple ornaments work beautifully. They allow personal style without too many steps. Also, small mistakes usually look charming instead of tragic.
- How long should the party last? Two to three hours usually works well. That gives guests time to arrive, snack, craft, chat, and finish. Anything longer can turn cozy into sleepy, especially on a weeknight.
- Should I ask guests to bring supplies? You can, but keep it clear. Ask each person to bring scissors, a glue gun, or one snack. Avoid random craft supplies because random gets messy fast.
- How do I keep costs low? Choose one project, buy bulk basics, and use what you already own. Also, borrow tools instead of buying them. A craft night party should not require a whole new storage bin.
- What if someone says they’re not crafty? Give them the easiest version of the project. Then remind them that cute beats perfect. Most people loosen up once they see everyone else making tiny weird choices too.
That’s the beauty of it. Nobody needs expert skills when the room seems welcoming. The night works because the pressure stays low. Even the nervous guests usually settle in once supplies start moving. That tiny shift matters a lot.
The Cute Little Crafty Afterglow
I tend to think the best parties send people home with more than a thing. Yes, the thing matters. A cute bracelet, tote, wreath, or ornament gives the night a sweet little souvenir.
But the real win comes from the table talk and shared supplies. Guests notice those tiny bursts of “Wait, yours looks so cute.” Those moments make a craft night party seem warmer than its price tag. Budget-friendly doesn’t mean bare.
It means smart, thoughtful, and free from unnecessary spending drama. As a mom, I also love any gathering that gives people something to do with their hands. It takes pressure off the conversation. Suddenly, nobody has to perform or carry every quiet moment.
Pinterest may show perfect craft tables with matching chairs and sunlight glowing like a movie scene. Lovely. Truly. But real life can look cute with kraft paper, thrifted bowls, and half-finished projects.
I’ve found that small plans make the biggest difference. Pick one craft. Keep supplies simple. Add snacks that don’t cause chaos. Give the table a little charm.
To me, that’s the sweet spot. It looks pretty, but it still respects the budget. And that matters big time to me.
Then let the night be what it wants to be. Friends may talk more than they craft. Someone may choose the boldest ribbon. Another person may decide crooked looks artsy.
That’s the kind of party I can get behind. Low stress, low cost, high cute factor, and enough mess to prove people had fun.