Summer crafts can get weird fast, can’t they? One minute, I’m searching for painted coasters. Then someone expects me to own resin molds, gold leaf, and monk-level patience. No, ma’am. I want cute, bright, cheap, and possible on a normal table.
That is why summer fruit coasters make so much sense. They’re simple, cheerful, and easy to customize. Plus, they give that cute market-table look without requiring fancy tools. Living in Orlando makes summer colors useful almost year-round, so fruit designs fit right in.
I like this idea because it lands in a sweet little craft zone. It works for adults, older kids, party favors, teacher gifts, pool days, and small shops. That same idea also photographs well for Pinterest, which matters more than most people admit.
The best part? You can make these coasters look polished without spending much money. A few blank coasters, acrylic paint, sealant, and careful colors can do a lot. However, one tiny detail changes the whole project. It’s not difficult, but it decides whether these look sellable or slightly suspicious. I’m talking about the finish, not some secret artist trick. That tiny topcoat does more than shine. It makes the craft useful, giftable, and easier to price. Suddenly, the whole idea stops looking like a rainy-day activity. It starts looking like a sweet little summer product. That’s the kind of budget craft I can get behind. It has color, function, and a little “wait, you made those?” energy.
Some of the links on this page are affiliate links, which means I may earn a small commission if you purchase through them. It never costs you extra. You can always peek at my full disclosure if you’d like the details.
Why Painted Coasters Work So Well For Summer
Painted coasters are one of those crafts that look better than the effort required. That is my favorite kind, by a mile. I love a project that gives “cute patio table” without demanding a second mortgage. Summer fruit designs also make the whole thing easier, because the shapes stay simple.
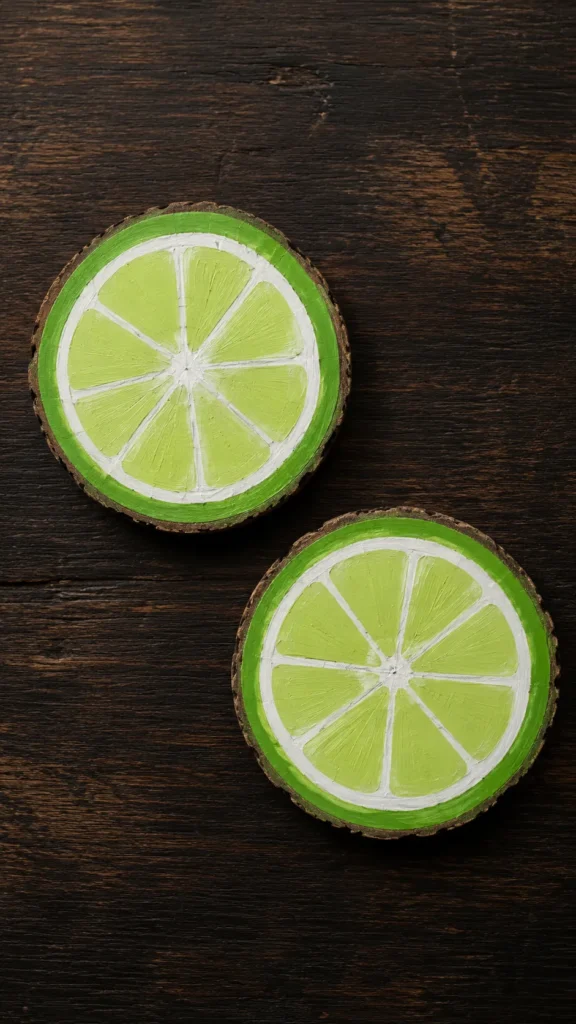
A watermelon slice, lemon round, lime wedge, or kiwi circle needs basic color blocks. You don’t need advanced shading or tiny realistic details. In fact, too much detail can make the coaster look busy. Clean fruit shapes usually look fresher and more sellable.
However, the surface matters more than people think. Wood slices look rustic and summery, while cork coasters look casual. Ceramic tiles can look more modern, but they need careful sealing. Each base gives the same craft a different mood.
Painted coasters also make sense for a budget-friendly site because one supply batch stretches far. A small bottle of acrylic paint can cover many coasters. Black paint handles seeds, white paint handles rind lines, and green paint handles several fruit designs.
That is the sneaky beauty here. You buy a few basics, then make many versions. Lemon, lime, orange, grapefruit, kiwi, and watermelon all come from the same setup. Suddenly, one craft idea turns into a whole summer collection.
The assumption says simple crafts look cheap. I disagree with my whole sunscreen-covered heart. Simple crafts look cheap when colors clash, edges smear, or the finish stays dull. With clean lines and sealant, these can look ready for lemonade duty. That matters when one idea needs to do several jobs. A coaster can be decor, gift, and product. Better yet, it stays small enough to batch without making your house look robbed.
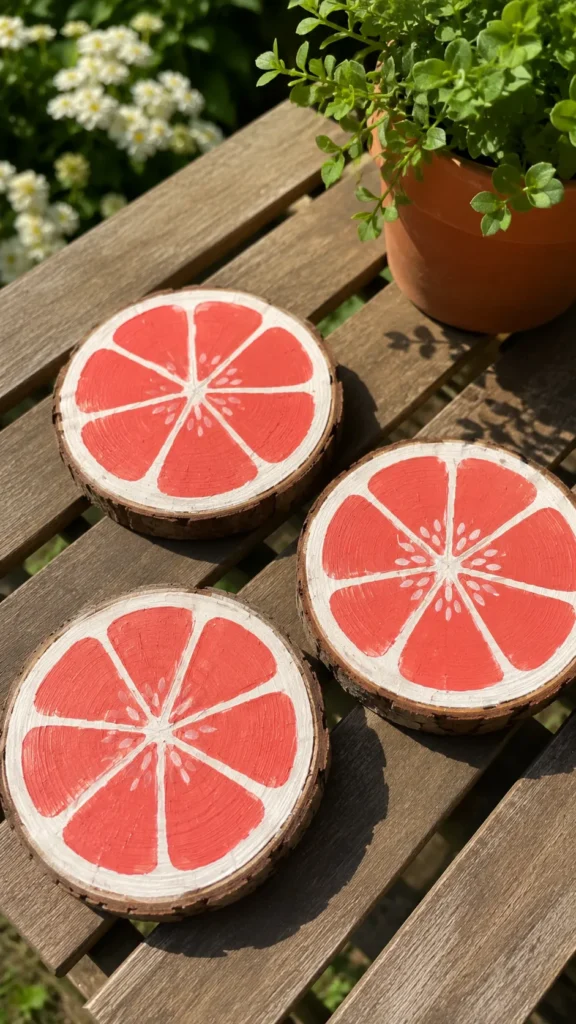
Supplies For Budget-Friendly Painted Coasters
Supplies can make or break painted coasters, but they don’t need to get fancy. I tend to notice that craft costs climb when every detail gets a special product. For this project, the goal is simple. Buy flexible supplies, then use them across several fruit designs.
Start with blank coasters that fit your budget and style. Wood rounds give a rustic summer craft vibe, in a good way. Cork coasters cost less and stay lightweight. Plain ceramic tiles can work too, especially with brighter paint. For a higher-end look, choose coasters with smooth edges. Rough edges can still work, but they need sanding.
For paint, acrylic craft paint works well. Choose fruit colors first, then add a few detail shades. You don’t need thirty bottles. Nobody needs a paint drawer with emotional baggage.
Useful supplies include:
- Blank wood, cork, or ceramic coasters
- Acrylic paint in fruit colors
- White and black acrylic paint
- Small flat paintbrushes
- Detail brushes or paint pens
- Painter’s tape for clean edges
- Pencil for light guide marks
- Clear water-resistant sealant
- Felt pads or cork backing
- Twine, raffia, or ribbon
That list looks longer than the work. Most supplies cover several sets, which keeps each finished coaster cheap. However, don’t skip the sealant. That step separates cute painted coasters from coasters people can use.
If you plan to sell them, keep materials consistent. Use the same coaster size across each set. Match the finish, backing, and packaging. Small details make handmade items look intentional instead of random.
Budget crafts still need boundaries. Spend where it matters, especially on sealant and clean bases. Then save on extras that don’t change the final result much. Fancy charms, extra labels, and matching tissue paper can wait. A clean set of painted coasters comes first.
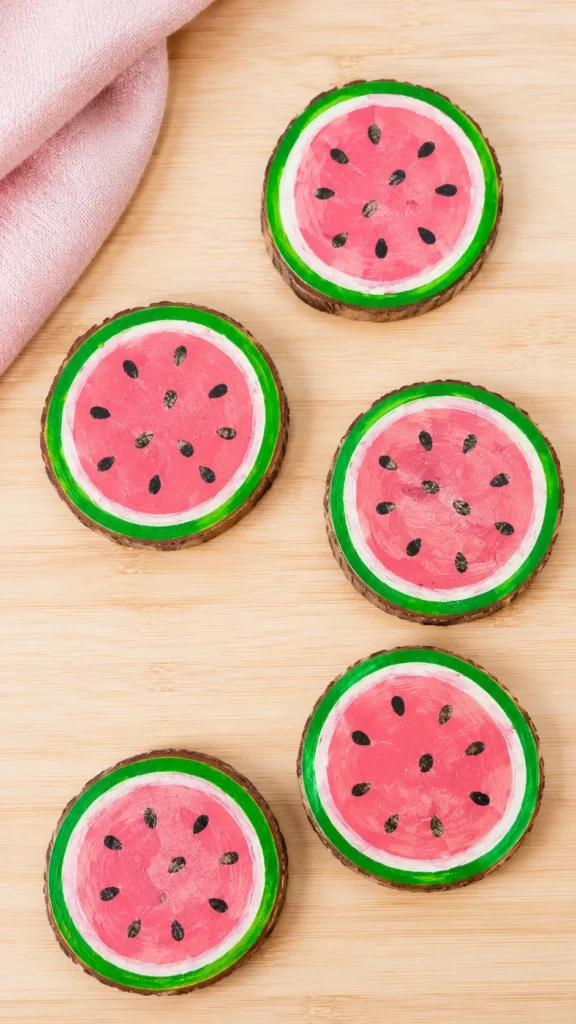
Choose Fruit Designs Before The Paint Comes Out
I know the temptation. You open the paint, grab a brush, and let your crafty spirit steer. Cute idea. Also, danger. Fruit coasters look best when the set makes sense before the first brushstroke.
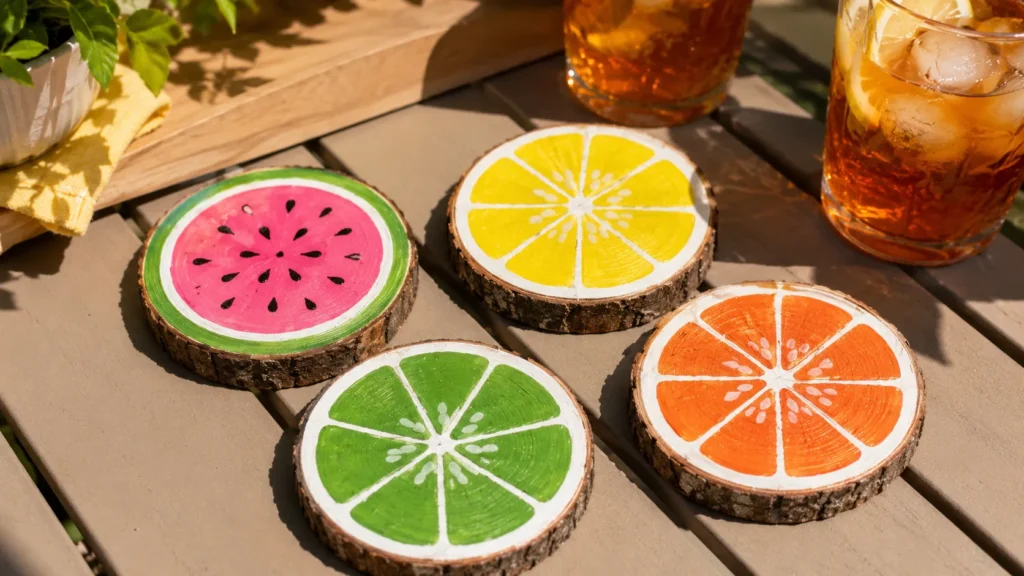
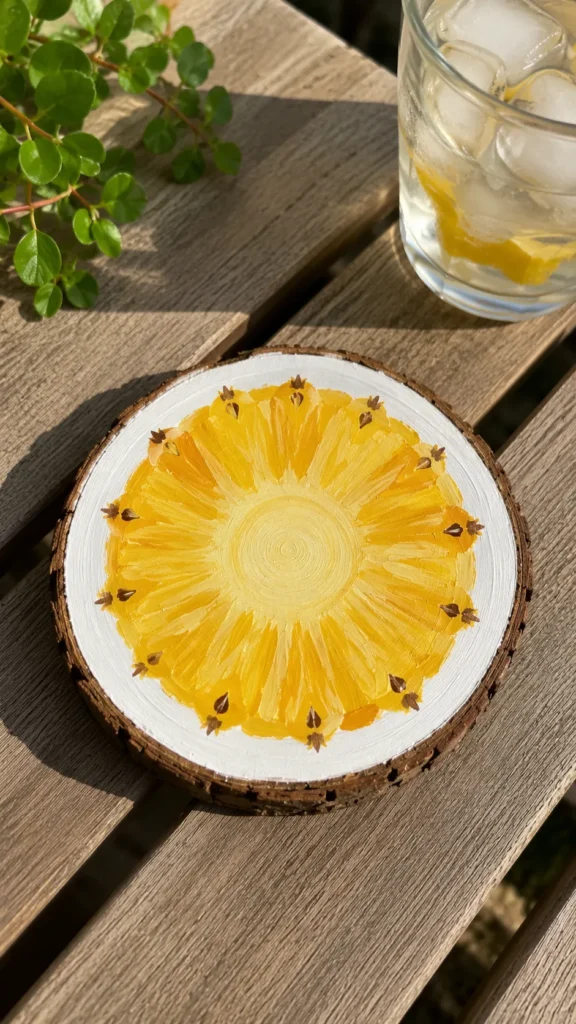
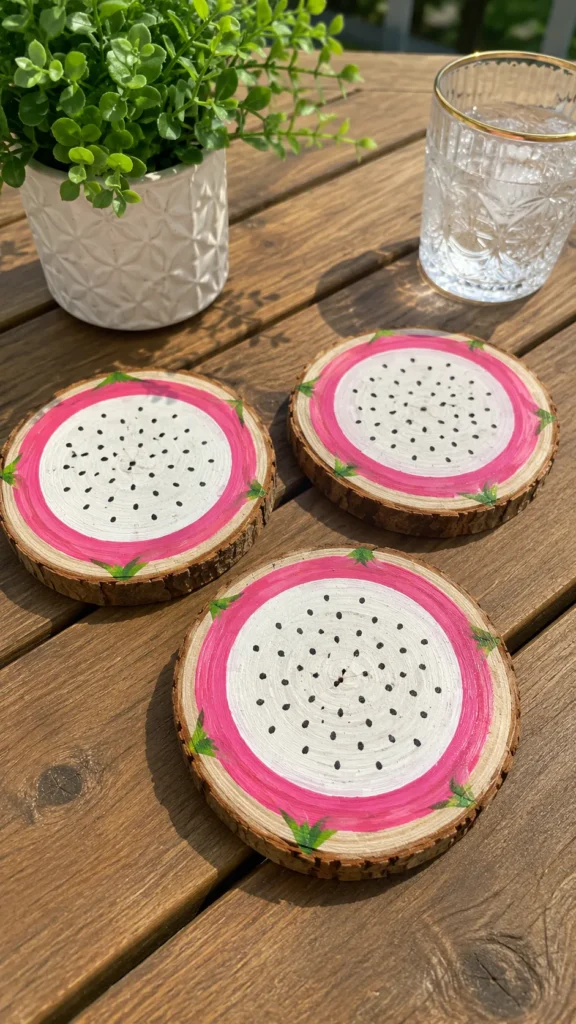
Pick a theme before painting. A citrus set could include lemon, lime, orange, and grapefruit. For a tropical set, use watermelon, kiwi, pineapple, and dragon fruit. Meanwhile, a classic summer set could mix watermelon, lemon, lime, and strawberry.
The trick is balance. Painted coasters look more polished when the colors repeat across the set. Watermelon and strawberry both use pink or red. Lemon, lime, and orange share the same round shape. Kiwi adds green, white, and black without getting too chaotic.
Here is where the common assumption needs a tiny shove. More designs do not always make the set better. Too many fruit types can make the collection look scattered. Four strong designs usually beat eight random ones. This is also where budget wins. Fewer designs mean fewer paint colors, fewer mistakes, and fewer half-used supplies.
I’d pick one main shape style too. Round fruit slices work best for round coasters. Wedges look cute on square coasters. Half-moon slices can work, but they need careful spacing. Otherwise, they can look unfinished, and nobody wants sad fruit geometry.
Before painting, sketch each design on scrap paper. Keep the details big enough to paint cleanly. Tiny seeds, tiny leaves, and tiny lines can turn on you fast. Bigger details photograph better, too.
Once the designs look like a set, the project gets calmer. That little planning step saves paint, time, and at least one dramatic sigh. It also makes your painted coasters look like a planned set, not a fruit salad meeting.
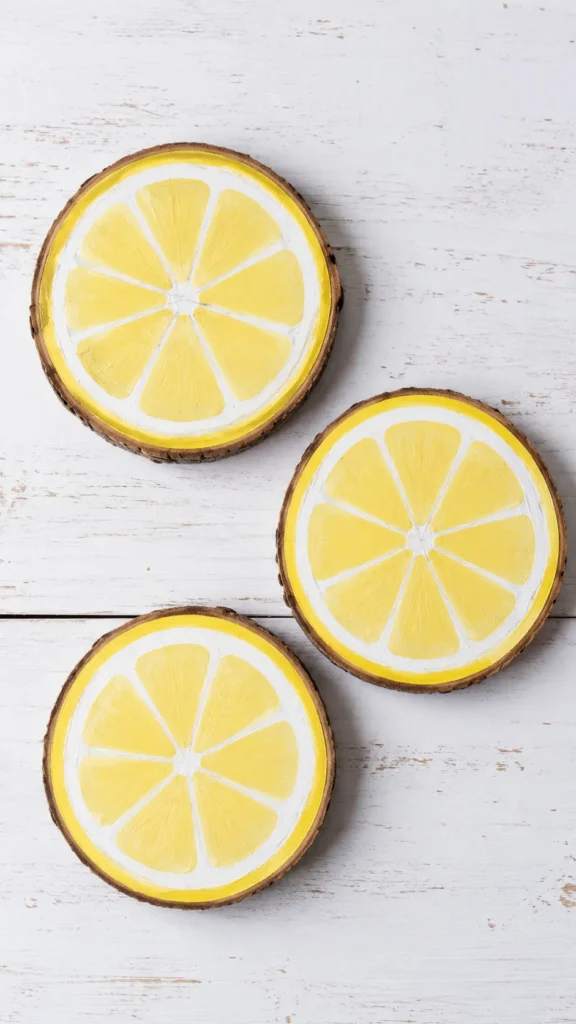
How To Make Painted Coasters Without Overthinking It
This is where painted coasters become very doable. They do not need complicated technique. Instead, they need clean layers, dry time, and solid sealant. That’s it. Summer craft drama can take several seats.
Start with dry, clean coaster blanks. If you use wood slices, brush off dust first. When you use ceramic tiles, wipe them with rubbing alcohol. For cork, keep paint light so it doesn’t soak in too heavily. This prep sounds boring, but it saves the finish. A clean base gives paint a smoother place to land.
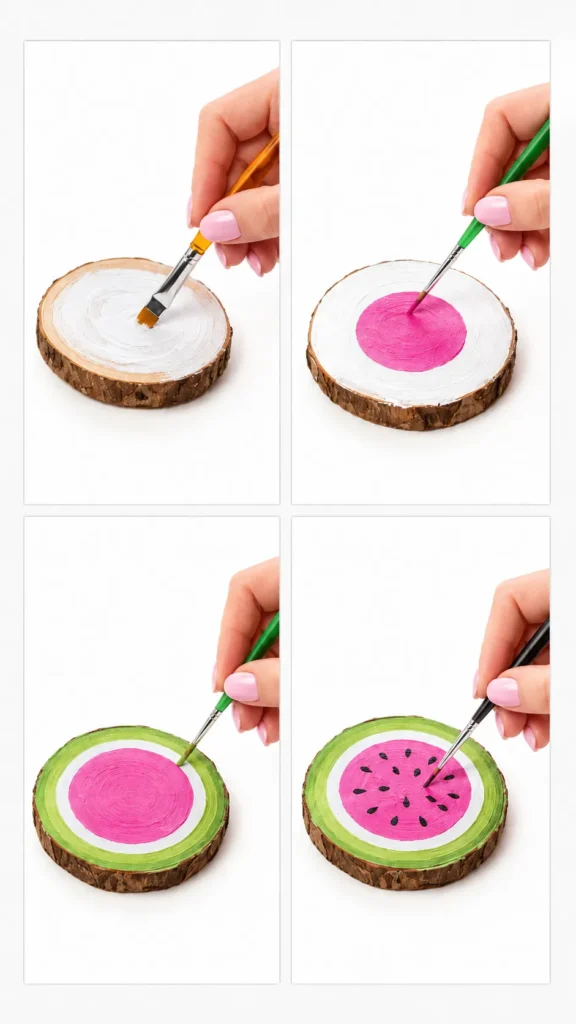
Follow this simple order:
- Lightly sketch the fruit shape with pencil.
- Paint the largest background color first.
- Let that layer dry fully.
- Add rind lines, citrus sections, or kiwi centers.
- Use a detail brush for seeds.
- Let the full design dry overnight.
- Add two thin coats of sealant.
- Place felt pads underneath, if needed.
Thin layers matter. Thick paint can bubble, peel, or dry with odd ridges. However, thin paint looks cleaner and gives you more control. It also helps the coaster surface stay flatter.
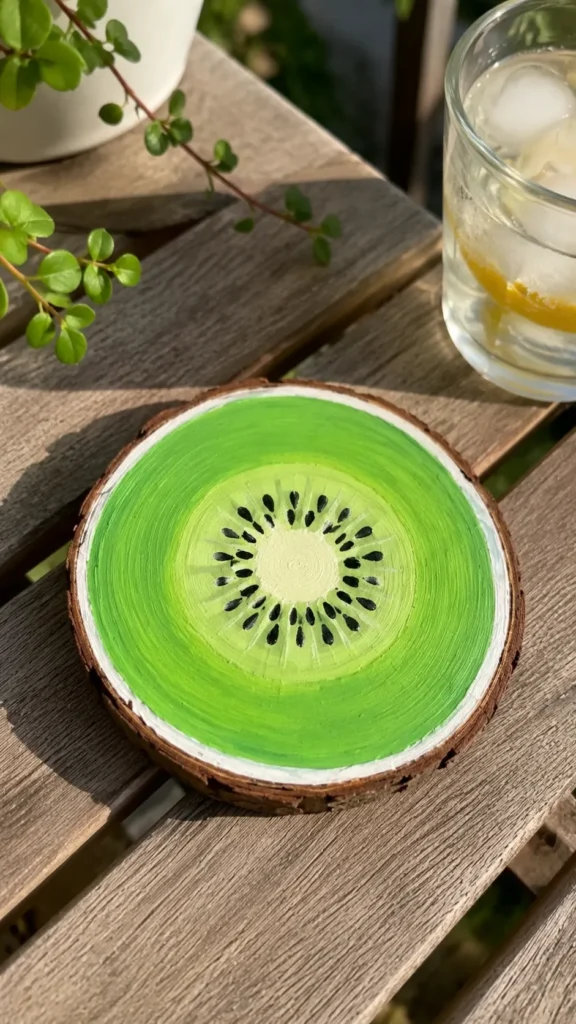
For watermelon, paint the center pink or red first. Then add white and green rind rings. For lemon, paint yellow first, then add pale segment lines. With kiwi, start green, add a pale center, then dot tiny black seeds.
A glossy finish looks cute, but satin can look more modern. Either works if the sealant resists water. Painted coasters need protection because cold drink condensation has no manners. It will find every weak spot. That is why the top, sides, and edges need attention. Painted coasters should handle real drinks, not just pose for pictures.
Do not rush the drying time. That step lacks glamour, and naturally, it matters most.
Painted Coasters That Look Sellable, Not Sloppy
Painted coasters can lean crafty in two very different directions. One direction says “sweet handmade gift.” Another says “camp table after snack time.” Both have charm, sure. However, only one sells without a long explanation.
The difference usually comes from edges. Clean edges make the coaster look finished. Messy edges make every other detail work harder. Painter’s tape can help on square coasters, but round fruit designs need slower brushwork. I’d rather do fewer designs well than rush a full orchard badly.
Color also changes everything. Bright colors look summery, but neon shades can look harsh. Softer fruit colors often photograph better. Think watermelon pink, lemon yellow, lime green, orange peel, kiwi green, and grapefruit coral. That palette gives variety without making the set scream.
Another quiet upgrade is the underside. Add cork backing, felt pads, or a simple painted bottom. Nobody will stare at it first, but they will notice during use. A clean underside says, “Yes, this was made with a plan.”
Packaging does a lot, too. Stack the finished painted coasters, tie them with twine, and add a small tag. Keep the tag short. “Summer fruit coaster set” works. “For lemonade, iced tea, and patio drinks” works even better.
Here’s the twist. A handmade item doesn’t need to look machine-made. It needs to look cared for. That goal takes less stress and gives a better result.
If a brush mark shows slightly, fine. When sealant drips down the side, fix it. Handmade charm and sloppy finishing are neighbors, but they are not twins. I’d keep the fruit shapes playful, then make the finish crisp. That contrast makes painted coasters look relaxed and still worth buying.
Summer Fruit Combos That Look Cute Together
Fruit sets need a little styling brain, but not the exhausting kind. I like picking combinations that share colors, shapes, or a summer theme. Otherwise, painted coasters can start looking like leftovers from five different craft nights. Cute? Maybe. Cohesive? Not quite.
For a set of four, choose one strong color story. Citrus looks bright and clean. Melon and berry designs look playful. Tropical fruit designs look bolder, especially for pool party tables. There is no need to paint every fruit under the sun. A tighter set usually looks more expensive. Funny how doing less can make a craft look more thought-out.
Try these simple combinations:
- Watermelon, lemon, lime, and orange
- Lemon, lime, grapefruit, and orange
- Watermelon, strawberry, kiwi, and lemon
- Pineapple, kiwi, dragon fruit, and watermelon
- Lemon, blueberry, strawberry, and peach
- Grapefruit, orange, lemon, and blood orange
Yes, blueberry can work, even though it’s not a slice. Paint a simple blue coaster with tiny pale highlights. Then pair it with softer fruit colors. It gives the set a cute farmers market mood without getting complicated.
However, I’d avoid mixing too many shapes in one set. One wedge, one circle, one whole fruit, and one pattern can look confusing. A shopper should understand the theme in two seconds. Pinterest users move fast, and so do craft booth browsers.
For selling, name the sets clearly. “Citrus Splash” sounds cute, but “Painted Citrus Coaster Set” explains faster. You can still add charm in the description. Mention summer parties, porch drinks, pool days, or hostess gifts. Those uses help buyers picture the coasters at home.
The best fruit combo is not always the fanciest one. Often, the simplest set photographs best and causes the least paint-related muttering.
How To Earn Money With Painted Coasters
Painted coasters are one of those tiny crafts that can become surprisingly giftable. That matters because people don’t always buy handmade items because they need them. Sometimes they buy them because they solve a cute little problem. A hostess gift. A teacher gift. A pool party favor. A porch table upgrade. A “this is adorable, toss it in the cart” moment.
For a budget-friendly craft, I’d keep the selling angle simple. Make small sets, photograph them well, and package them like a finished gift. A stack of four fruit coasters tied with twine already looks more special than loose coasters in a bin. Add a tiny tag, and suddenly they look ready for a summer birthday, lemonade stand table, or patio basket.
Good places to sell them include:
- Local craft fairs
- Facebook Marketplace
- Etsy
- Church bazaars
- Teacher gift groups
- Summer vendor markets
- Pool party favor listings
- Bridal shower favor listings
Pricing depends on your supplies and time, but I’d start with sets. Single coasters can work, but sets feel easier to gift. If each coaster costs about $1 to $2 to make, a set of four could sell for $12 to $20. More polished sets with sealed finishes and cute packaging could land around $18 to $28.
The smart move is to create themed sets. Try “Watermelon Picnic Set,” “Citrus Summer Set,” “Tropical Fruit Set,” or “Pool Day Coaster Set.” That makes painted coasters easier to search, gift, and photograph. And, yes, cute names help. People love a tiny product with a tiny personality.
Mistakes That Make Fruit Coasters Look Messy
The biggest mistake is rushing. I know, thrilling news. Still, rushed paint makes cheap supplies look cheaper. Nobody wants to hear that drying time matters, but it really does. When layers don’t dry, colors drag into each other. Then the lemon lines go blurry, and the watermelon rind gets weird.
Another mistake is using too much paint. Thick paint looks satisfying at first because it covers fast. Then it dries unevenly and leaves raised spots. For painted coasters, thinner coats usually look smoother and last better.
Watch for these common problems:
- Painting details before the base layer dries
- Using marker that smears under sealant
- Skipping a test seal on one coaster
- Adding glitter that sheds or looks rough
- Forgetting to seal the coaster edges
- Using too many colors in one set
- Leaving the coaster bottom unfinished
- Packaging before the sealant cures
That marker issue deserves attention. Some paint pens and markers bleed when sealant hits them. Test first on scrap wood or the back of one coaster. Annoying? Yes. Better than ruining a full set? Deeply yes. I’d rather sacrifice one test coaster than watch four painted coasters become craft casualties.
Edges also matter more than expected. Seal the top, sides, and any exposed wood rim. Drink condensation loves finding weak spots. A coaster may look done, but moisture checks every shortcut.
One more thing: don’t make the seeds too perfect. Perfectly spaced seeds can look stiff. Slightly varied seeds look more natural, but keep them neat. That balance gives the fruit design life without turning messy.
The goal is not perfection. Aim for cute, clean, useful, and ready for a sweaty glass of lemonade. If that sounds simple, good. Simple is the whole point, and it sells better than clutter. Besides, summer tables already bring plenty of color. The coasters just need to join the party.
FAQs About Summer Fruit Coasters
What kind of paint works best for fruit coasters? Acrylic craft paint works well for painted coasters. It gives bright color, dries fast, and costs very little. However, always seal it after painting. Paint alone will not handle wet glasses for long. For wooden painted coasters, seal the rim too. That edge can absorb moisture before the top shows trouble.
Can I use wood slices for coasters? Yes, wood slices work well if they sit flat. Check each piece before painting. Wobbly coasters look cute in photos, but they can annoy people during use.
Do painted coasters need sealant? Yes, they need sealant if anyone will use them with drinks. Choose a clear water-resistant sealant. Add thin coats instead of one heavy coat.
Can kids help make these? Yes, kids can help with base colors and simple fruit shapes. Adults should handle sealant, cutting, sanding, or any strong-smelling product. That keeps the project simple and safer.
What fruit designs are easiest? Watermelon, lemon, lime, orange, and grapefruit are the easiest. Their round slice shapes fit most coaster blanks. Kiwi looks cute too, but the small seeds need a steadier hand.
Can I sell painted fruit coasters? Yes, you can sell your own handmade designs. Avoid copying another maker’s exact artwork, packaging, or listing photos. Create your own fruit style, colors, and product names. That keeps the set more original. It also makes your photos and listings easier to recognize.
How should I price them? Start by adding supply costs, packaging, fees, and time. Then compare similar handmade coaster sets. Cheap is not always better. Clean coasters with good photos can support a better price, especially in summer.
The Little Summer Craft That Deserves A Spot On The Table
I like crafts that earn their keep. Painted coasters do that in the cutest possible way. They sit on a table, catch cold drink rings, and add color without taking over the room. That is a lot of work for a tiny circle.
For a budget-friendly project, this one has range. You can make it playful for kids, polished for gifts, or styled for a small handmade shop. It can also keep the supply list sane, which matters. Nobody needs a craft that costs more than dinner.
As a mom, I tend to appreciate projects that don’t require clearing an entire weekend. This one can happen in short chunks. Paint the base colors one day. Add details later. Seal everything once the designs dry. That rhythm makes the craft less fussy.
Pinterest also loves a bright, clear craft idea. Fruit shapes, summer colors, and practical use all work well together. A stack of lemon, lime, kiwi, and watermelon
coasters looks cheerful fast. Add a pitcher, a cute glass, and boom. The photo already understands the assignment.
My favorite part is how forgiving the idea stays. A slightly uneven rind can still look handmade. One bold color choice can become your style. With clean sealant and simple packaging, these tiny coasters can look giftable without acting fancy.
Sometimes the smartest summer craft is the one that holds the drink. Quietly useful, cute on a table, and cheap enough to make again? That’s my kind of summer win.