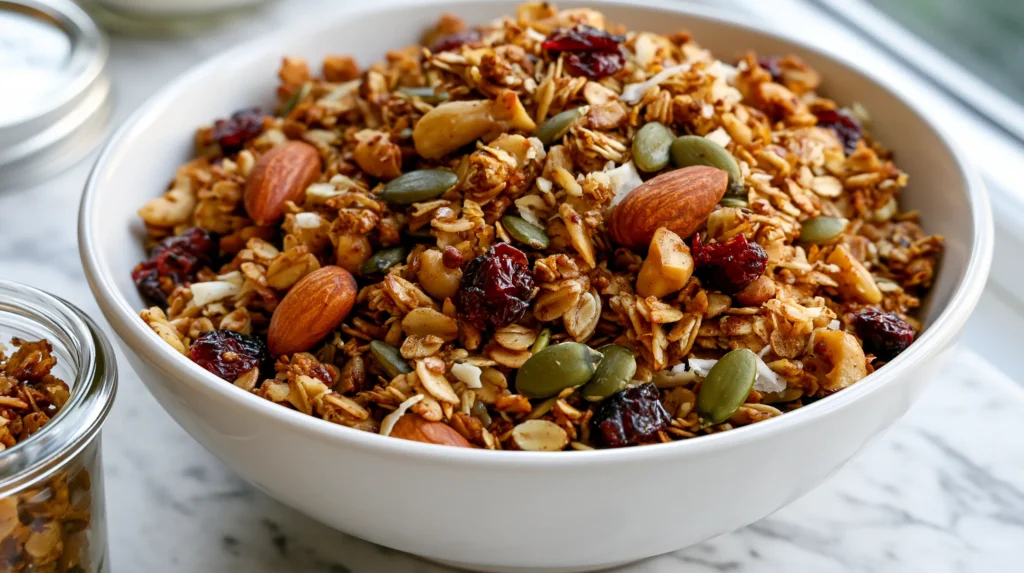
There comes a grocery moment when homemade granola stops sounding precious and starts sounding practical. One minute, you’re reaching for a cute bag with rustic lettering. Then the price tag blinks back like it pays rent. That little bag has big nerve. Suddenly oats look less boring and more like a financial strategy with cinnamon.
I love a food that lets me feel clever without requiring a tiny culinary diploma. Homemade granola sits right in that sweet spot. It feels cozy, costs less, and gives breakfast a little main-character energy. Also, it does not require a gadget, a secret handshake, or one of those pans nobody owns.
As a mom living in Orlando, I notice grocery prices can get dramatic fast. Breakfast snacks vanish even faster. So, when I can turn plain oats into something crunchy, sweet, and useful, I’m listening. Tiny savings add up, especially when snacks vanish. I’m also side-eyeing the store-bought bag that costs more than my patience. That feels useful, not precious, thank goodness.
The best part is how flexible this whole thing can be. You can keep it simple, make it nutty, or add coconut. Or skip coconut, go chocolate, go fruit, or stay cinnamon cozy. However, the real trick is not the flavor. The real trick is making it taste expensive. Your budget can stay calm, which feels like a tiny breakfast miracle.
And yes, there is one tiny granola rule that changes everything.
Some of the links on this page are affiliate links, which means I may earn a small commission if you purchase through them. It never costs you extra. You can always peek at my full disclosure if you’d like the details.
Why Homemade Granola Feels Fancy But Saves Money
Homemade granola works a funny little trick. It turns a basic pantry ingredient into something from a boutique breakfast shelf. That is rude, in the best way. Oats are humble, cheap, and perfect for a glow-up.
Store-bought granola can be tasty, sure. Yet many bags run small, sweet, and weirdly expensive. You open one, blink twice, and half the bag is gone. That is not breakfast. Instead, it becomes a crunchy disappearing act.
I’ve found that homemade granola works because it gives you control. You choose the sweetness, the crunch, and the add-ins. More importantly, you control the cost per batch. That matters on a budget-friendly site, because breakfast should not cost like a luxury purchase.
Here’s the reframe I love. Granola looks like a treat, but it can work like a meal helper. It can stretch yogurt, top fruit, bulk up oatmeal, and save sad snack time. Even boring leftovers from the fridge seem intentional. Suddenly plain vanilla yogurt looks planned.
The other win is waste control. When you make homemade granola, you can use what you already have. A half bag of almonds can go in. Pumpkin seeds can move out of the pantry. That last scoop of coconut can finally get used.
Still, fancy does not mean fussy. This recipe keeps the base simple and lets the texture do the heavy lifting. Sweet, salty, crisp, and toasty beats complicated every time. Also, nobody needs nineteen specialty seeds before breakfast. I said what I said. The oat base covers plenty. That is useful when mornings already arrive loud. No coupon required. And no clipping required.

The Homemade Granola Ingredients That Matter Most
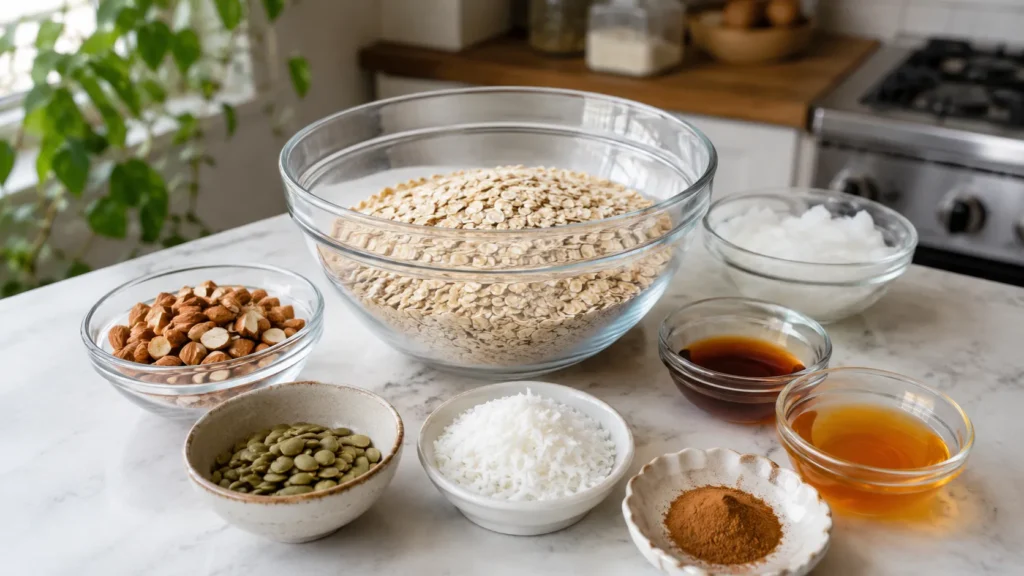
A good batch starts with basic ingredients, not a cart full of boutique extras. Homemade granola should feel flexible, not like homework with raisins. The goal is crunchy, golden, lightly sweet, and useful all week. Your pantry should do most of the work.
This recipe makes about 6 cups, or roughly 12 servings. The prep time is 10 minutes. Baking takes 22 to 28 minutes. Overall, the batch feels very doable. Cooling takes about 30 minutes, which is annoying but important. More on that little drama later.
Use this simple ingredient list as your base:
- 4 cups old-fashioned rolled oats
- 1 cup chopped nuts, such as almonds, pecans, or walnuts
- 1/2 cup unsweetened shredded coconut, optional
- 1/2 cup pumpkin seeds or sunflower seeds
- 1 teaspoon ground cinnamon
- 1/2 teaspoon fine salt
- 1/2 cup honey or pure maple syrup
- 1/3 cup melted coconut oil or neutral oil
- 2 teaspoons vanilla extract
- 1 cup dried fruit, added after baking
Old-fashioned rolled oats matter here. Quick oats can turn dusty, and steel-cut oats stay too hard. That is not rustic. Basically, that is jaw exercise. Rolled oats give homemade granola the right flat shape for crisp edges.
The sweetener does more than sweeten. Honey gives a chewier crunch, while maple syrup tastes warmer and lighter. Oil helps the oats crisp instead of drying out. Salt keeps the whole batch from tasting flat. Tiny ingredient, big opinion.
Dried fruit waits until the end. If you bake it the whole time, it can get tough. Tough raisins are not the goal. Add fruit after cooling, and everything stays better.

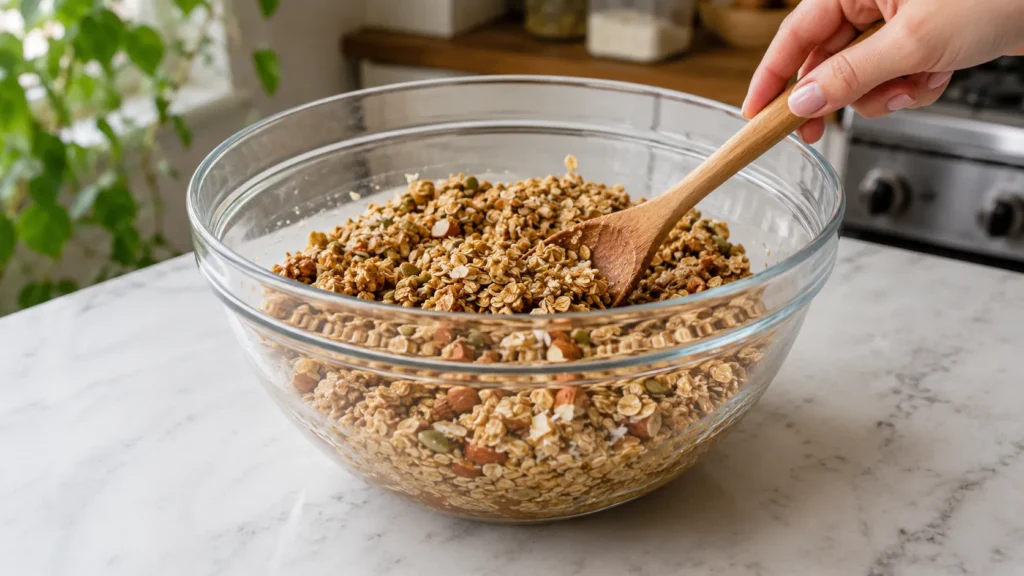
Homemade Granola Process Without Kitchen Drama
The process for homemade granola is easy, but it has a few sneaky details. Nothing scary. No forehead wrinkle required. Yet these tiny choices decide whether you get loose crumbs or those lovely snackable clusters.
Preheat the oven to 325°F. Line a large rimmed baking sheet with parchment paper. That sheet needs edges, because loose oats scatter fast. I do not recommend testing that theory on your oven floor.
Here’s the full process:
- Add the oats, nuts, coconut, seeds, cinnamon, and salt to a large bowl.
- Whisk the honey or maple syrup, melted oil, and vanilla in another bowl.
- Pour the wet mixture over the oat mixture.
- Stir until every oat looks lightly coated and glossy.
- Spread the mixture onto the prepared baking sheet.
- Press it down firmly with a spatula for better clusters.
- Bake for 22 to 28 minutes, stirring once around the halfway mark.
- Press the granola down again after stirring.
- Remove it when the edges look golden, not dark.
- Let it cool completely on the pan before breaking it apart.
- Stir in the dried fruit after the granola cools.
That cooling step can feel silly. It is not silly. The granola crisps as it cools, which feels unfairly delayed. You may look at it hot and think you failed. Give it time before you make a dramatic judgment.
Also, watch the edges near the end. Homemade granola can go from golden to too dark quickly. The center may look softer, but trust the edges. This is where patience beats panic. Once everything cools, the texture catches up. The delay creates some breakfast suspense. Annoying, yes, but useful.

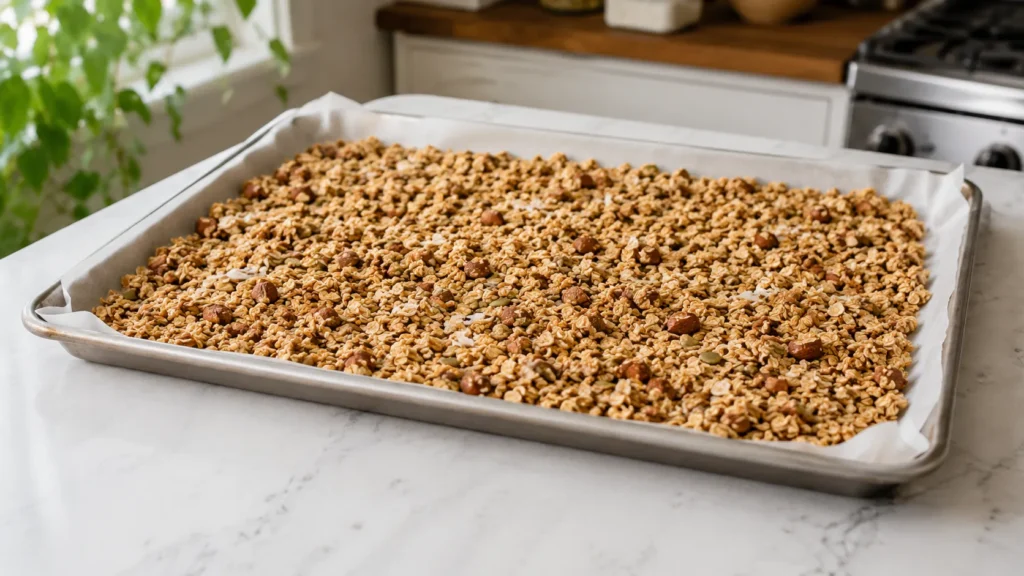
The Cheap Little Tricks That Make It Better
Granola gets expensive when every add-in costs too much. However, a homemade batch gets smarter when you treat add-ins like accents. You do not need a parade of pricey extras. Instead, aim for balance, texture, and one good flavor direction.
Nuts taste wonderful, but they can raise the cost fast. So, I like using one cup total, not three competing handfuls. Chopped nuts stretch farther than whole nuts. They also spread crunch through every bite. That feels more generous without spending more.
Seeds help, too. Pumpkin seeds and sunflower seeds often cost less than nuts. They add crunch, protein, and that nice little toasted flavor. Plus, they make the batch look more loaded. A budget win that looks like effort? Very into that.
Coconut can go either way. Unsweetened shredded coconut adds flavor without making the batch too sweet. Yet you can skip it and still get great results. That is the beauty here. A homemade batch should not trap you with pantry rules.
Another trick is using the dried fruit wisely. A full cup gives plenty of chewy bites. Raisins, cranberries, chopped apricots, or dates all work. Still, buy what you will use elsewhere. A budget recipe stops being budget-friendly when one ingredient becomes a permanent pantry ornament.
The biggest money-saving move is making a repeatable base. Once you love the oats, oil, sweetener, and salt balance, you can change the extras. That keeps breakfast interesting without buying five new bags every week. Simple does not mean dull. Sometimes simple just has better manners. It also repeats well, which matters on busy weeks. Pantry confidence beats fancy packaging every single time.

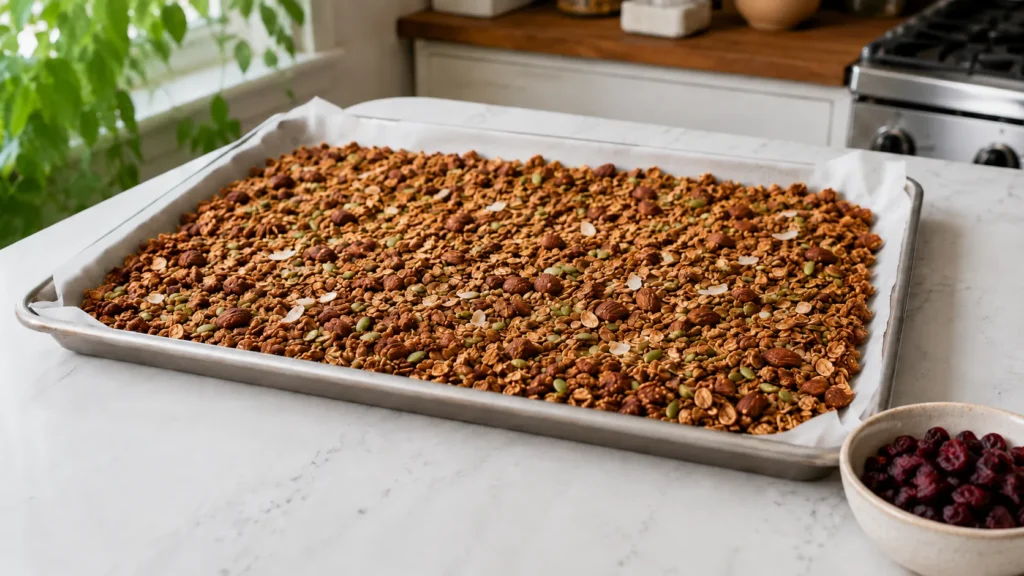
Homemade Granola Texture Is All About Tiny Choices
Texture is where homemade granola gets a little sneaky. Most people think flavor carries the whole batch. Flavor matters, of course. But texture decides whether you sprinkle it politely or eat clusters straight from the jar.
For bigger clusters, press the oat mixture firmly onto the pan before baking. Then stir only once. I know, stirring feels productive. Resist the urge to fuss. Too much stirring breaks up the pieces before they can set.
After the halfway stir, press everything down again. This feels strangely bossy, but it works. The oats bake together in a thin sheet, then cool into crisp pieces. Once cooled, you can break them into chunks. That is the payoff.
For looser granola, spread the mixture more lightly and stir twice. This makes smaller pieces that pour better over yogurt or fruit. Neither version is wrong. The real question is whether you want clusters for snacking or crumbs for topping. That choice changes how you use the batch later. Choose your breakfast personality.
Parchment paper also helps. It keeps sticky sweetener from gluing itself to the pan. Cleanup becomes less tragic, too. I support fewer dishes whenever possible. No breakfast should create a sink situation before 9 a.m.
The final texture depends on cooling. Hot granola can seem soft, which tricks people into overbaking it. I know this looks suspicious at first. Then it cools into bitter little rocks. Very rude. Pull it when it looks golden, let the pan sit, and let time finish the job. The wait pays off with cleaner clusters. Small move, big crunch. Worth it every time.

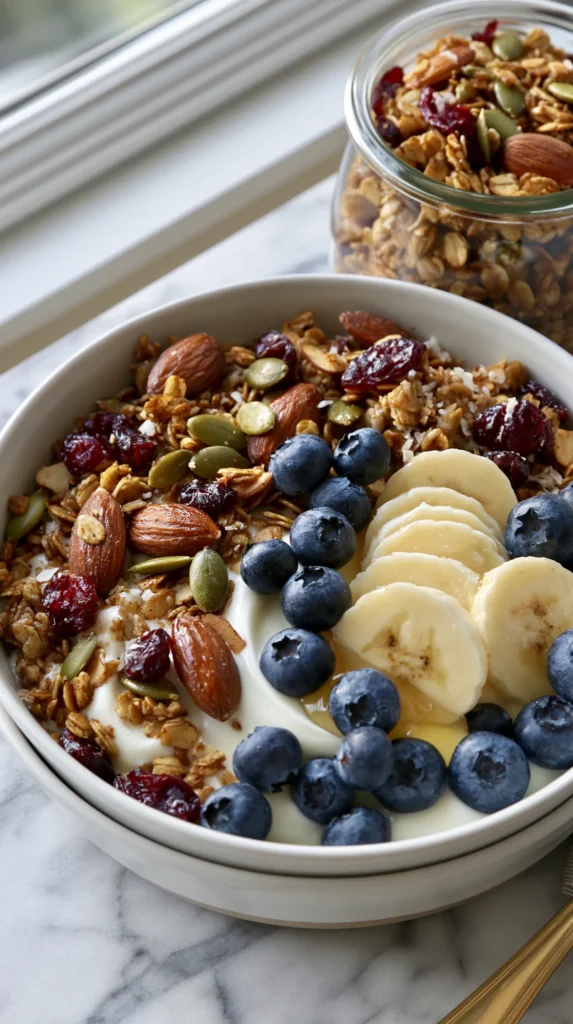
Serving Suggestions That Stretch Breakfast
Homemade granola works because it does not belong to one breakfast. It jumps between meals, snacks, and tiny “I need something crunchy” moments. That matters when you want food to stretch. A jar of granola can carry a lot of little hunger emergencies.
Here are my favorite ways to serve it:
- Sprinkle it over plain Greek yogurt with sliced bananas.
- Layer it with vanilla yogurt and berries for quick parfaits.
- Add it to smoothie bowls for crunch and staying power.
- Spoon it over baked apples or warm peaches.
- Serve it with milk like cereal when the morning feels rushed.
- Pack small portions with dried fruit for a snack mix.
- Add it to oatmeal when oatmeal needs a personality boost.
- Use it over cottage cheese with honey and cinnamon.
- Sprinkle it on pancakes instead of extra syrup.
- Serve it with peanut butter toast and sliced apples.
The yogurt option is the budget hero. Plain yogurt usually costs less than tiny flavored cups. Add homemade granola, fruit, and a drizzle of honey. Suddenly it looks like something from a café with aggressive plants.
Snack portions also help. Granola can vanish fast when everyone grabs from the jar. Use small containers if you need it to last. Not because we lack joy. Because math exists, and math has no mercy.
A common assumption says granola must be “healthy” because oats appear. Not always. Some versions pack lots of sugar and oil. This one keeps sweetness steady, not wild. That makes it more useful across breakfast, snacks, and toppings. Even picky mornings get a backup plan. You get comfort without turning it into dessert.
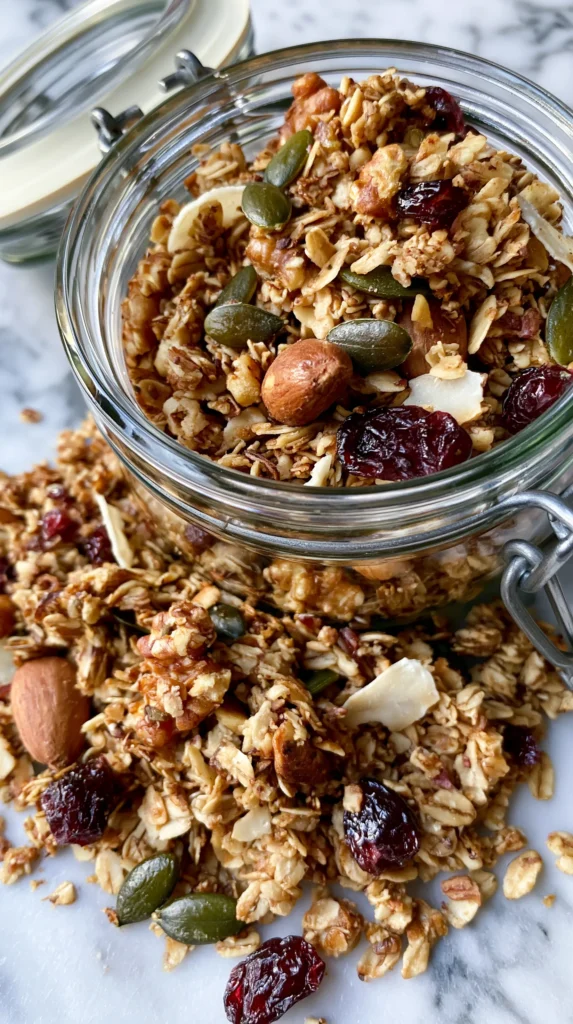
Flavor Twists For Every Pantry Mood
Once the base works, flavor changes get fun. This is where homemade granola becomes less recipe and more breakfast mood board. Still, I like keeping flavors clear. A batch with twelve competing ideas can taste confused. Nobody asked for pantry jazz.
For a cozy cinnamon version, use the base recipe as written. Add a pinch of nutmeg if you want a warmer taste. Keep the dried fruit simple with raisins or cranberries. It tastes familiar, easy, and not too sweet.
For a chocolate version, skip the coconut if you want. Add two tablespoons of unsweetened cocoa powder to the dry ingredients. After cooling, stir in mini chocolate chips. Do not add chocolate chips before baking. Melted chocolate can get messy fast, and not in a cute way.
For a tropical batch, use coconut, chopped dried pineapple, and cashews. Maple syrup works well here. Add the fruit after baking, as usual. The result tastes bright without needing fresh fruit on hand.
For a fall-ish batch, use pecans, cinnamon, dried cranberries, and chopped dates. A tiny pinch of cloves can work, but go easy. Cloves can dominate the whole batch fast.
Here is the surprise. You do not need a totally new recipe for each flavor. Instead, use one steady base and a few smart swaps. That saves money and brain space. Homemade granola becomes a template, which is very convenient for tired shoppers.
The only rule is to keep the wet ingredients steady. Change the nuts, seeds, spices, and fruit. That keeps the texture steady while flavors move around. Then let the oven do its very low-drama job. Very low effort.
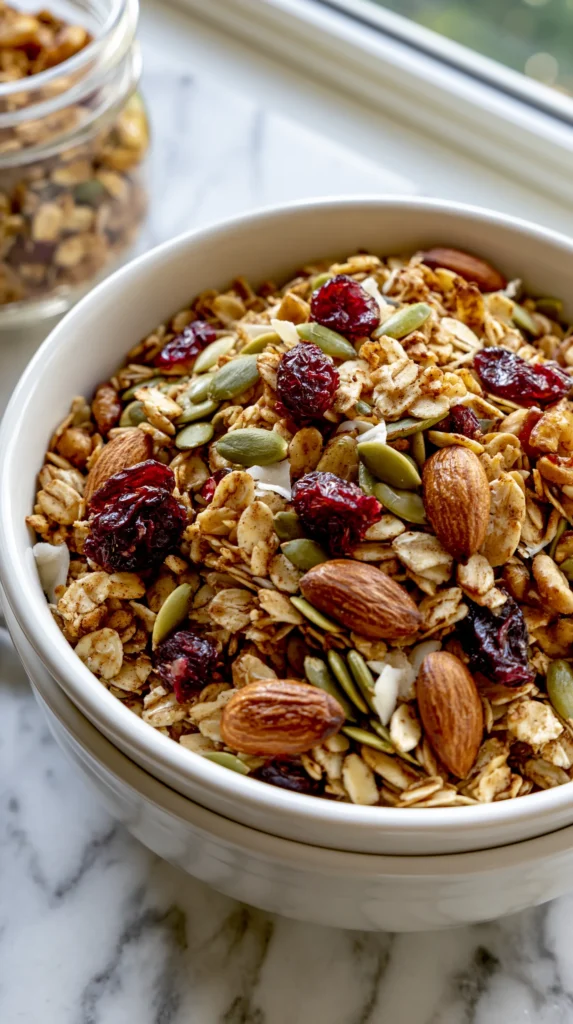
FAQs Before You Burn Oats For Sport
Granola questions usually show up right when the baking sheet enters the oven. That timing feels deeply personal. So, let’s clear up the usual worries before the oats brown too far. Homemade granola is forgiving, but the method still matters.
Here are the questions I tend to notice most:
- Can I make this without nuts? Yes, you can use extra seeds instead. Try sunflower seeds, pumpkin seeds, or more coconut.
- Is this recipe gluten-free? It can be, if you use certified gluten-free oats. Oats often face cross-contact during processing.
- Can I use quick oats? I would not. Quick oats create a softer, crumbly texture instead of crisp clusters.
- Why did my granola get too dark? The oven may run hot, or the pan sat too long. Check early near 22 minutes.
- Why is my granola not crunchy yet? It may still be warm. Let it cool fully before judging the texture.
- How should I store it? Use an airtight jar or container. Keep it at room temperature for up to two weeks.
- Can I freeze it? Yes, freeze it in a sealed bag for up to three months. Thaw it at room temperature.
- Can I reduce the sweetener? Yes, but clusters may not hold as well. Start by reducing two tablespoons.
One more thing, because this matters. Use a light-colored baking sheet if you have one. Dark pans brown the edges faster. That can be helpful for some recipes, but granola likes a gentler approach. Breakfast should not require defensive driving.
If the batch tastes flat, add a little more salt next time. Not a lot. Just enough to wake up the cinnamon and sweetener. Salt is tiny, but the effect gets dramatic.
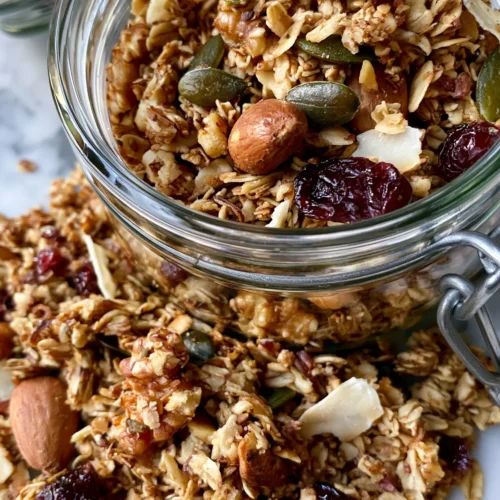
Homemade Granola
Ingredients
- 4 cups old-fashioned rolled oats
- 1 cup chopped almonds pecans, or walnuts
- 1/2 cup unsweetened shredded coconut optional
- 1/2 cup pumpkin seeds or sunflower seeds
- 1 teaspoon ground cinnamon
- 1/2 teaspoon fine salt
- 1/2 cup honey or pure maple syrup
- 1/3 cup melted coconut oil or neutral oil
- 2 teaspoons vanilla extract
- 1 cup dried fruit added after baking
Instructions
- Preheat the oven to 325°F.
- Line a large rimmed baking sheet with parchment paper.
- Add the rolled oats, chopped nuts, shredded coconut, pumpkin seeds, cinnamon, and salt to a large mixing bowl.
- Whisk together the honey or maple syrup, melted coconut oil, and vanilla extract in a separate bowl.
- Pour the wet mixture over the dry ingredients.
- Stir until all of the oats are evenly coated.
- Spread the mixture evenly onto the prepared baking sheet.
- Press the mixture down firmly with a spatula to encourage clusters.
- Bake for 22 to 28 minutes.
- Stir the granola once halfway through baking.
- Press the granola down again after stirring.
- Bake until the edges are golden brown but not dark.
- Remove the baking sheet from the oven.
- Let the granola cool completely on the baking sheet.
- Stir in the dried fruit after the granola has completely cooled.
- Break the granola into clusters.
- Store in an airtight container at room temperature for up to 2 weeks.
The Pantry Win I’ll Happily Brag About
I love when a recipe solves more than one little problem. Homemade granola does that quietly. It uses cheap oats, clears pantry bits, upgrades yogurt, and gives breakfast crunch. Plus, the kitchen smells like you planned something charming. That is a nice bonus for very little effort.
As a mom in Orlando, I appreciate any breakfast that works before the day gets loud. Some mornings need a real meal. Other mornings need a jar, a spoon, and a fast decision. Granola fits both moods without asking for much.
There is also something satisfying about skipping the store-bought version. Not forever. I’m not declaring a grocery aisle feud. But when a homemade batch costs less and tastes fresher, I do get a tiny victory moment. A tasteful one, obviously. Mostly.
This is the kind of recipe that looks pretty in a jar and useful in real life. That combination always gets me. It is Pinterest-friendly, pantry-friendly, and weeknight-friendly. More importantly, it does not pretend breakfast needs to become a whole personality.
I’ve found that the best budget recipes earn repeat status because they remove friction. They save money without making life feel smaller. Those recipes stretch food without tasting like compromise. That is the sweet spot.
So yes, keep the oats boring at first. Add the cinnamon, syrup, oil, and salt. Let the edges turn golden. Then wait for the cool-down, because that is where the crunch shows up with receipts.