Somewhere between folding laundry and refreshing Pinterest for the fortieth time, I found pom pom crafts for adults. I have not been the same since! There’s something almost rebellious about grown women gluing fuzzy balls onto things with zero purpose attached. No worksheet, no lesson plan, no grade attached to any of it. Just glue, color, and a satisfaction I forgot existed.
As a mom, my craft closet stays hostage to kid projects most years. Reclaiming a corner of it for myself seemed almost illegal, in the best way. This one, at least, wasn’t getting hijacked by a school project.
I’ll admit I expected something cute but forgettable, like most trends that fade by Tuesday. What I found instead was a whole world of texture and color. Real home decor hides inside a bag of craft store pom poms. That bag costs less than your latte.
I didn’t expect a hobby this cheap to also look this good. It turns out low stakes and high results can absolutely coexist.
So if you’ve scrolled past pom pom crafts for adults, assuming they’re just kid stuff, stick around. I promise this version skips the pipe cleaners, mostly. It also skips most glue gun burns (okay, maybe one small burn). Let’s get into why this fuzzy little trend deserves more credit than it’s getting.
Some of the links on this page are affiliate links, which means I may earn a small commission if you purchase through them. It never costs you extra. You can always peek at my full disclosure if you’d like the details.
Why Pom Pom Crafts for Adults Are Suddenly Everywhere
Pom pom crafts for adults did not appear out of nowhere. Crafting has quietly become one of the biggest stress-relief trends around. Pom poms happen to be the easiest way in. They’re soft, they’re cheap, and they don’t require any skill you don’t already have.
Here’s the assumption I want to flip: pom poms aren’t just for preschool crowns anymore. Pinterest boards are flooded with pom pom garlands, wall art, and furniture accents right now. Somehow, they look expensive but cost almost nothing. That gap between appearance and price is basically this whole website’s mission.
So, I’m not exaggerating about that gap, either. A finished pom pom garland photographs like it cost real money. Plus, nobody scrolling past your living room photo will guess otherwise.
I’ve found that craft trends split into two camps. One camp needs a whole studio setup before you start anything. The other camp works fine at your kitchen table in twenty minutes.
Pom pom crafts live firmly in that second camp. That’s exactly why busy adults keep picking them up. Most of us still want something to show for an evening besides a finished show.
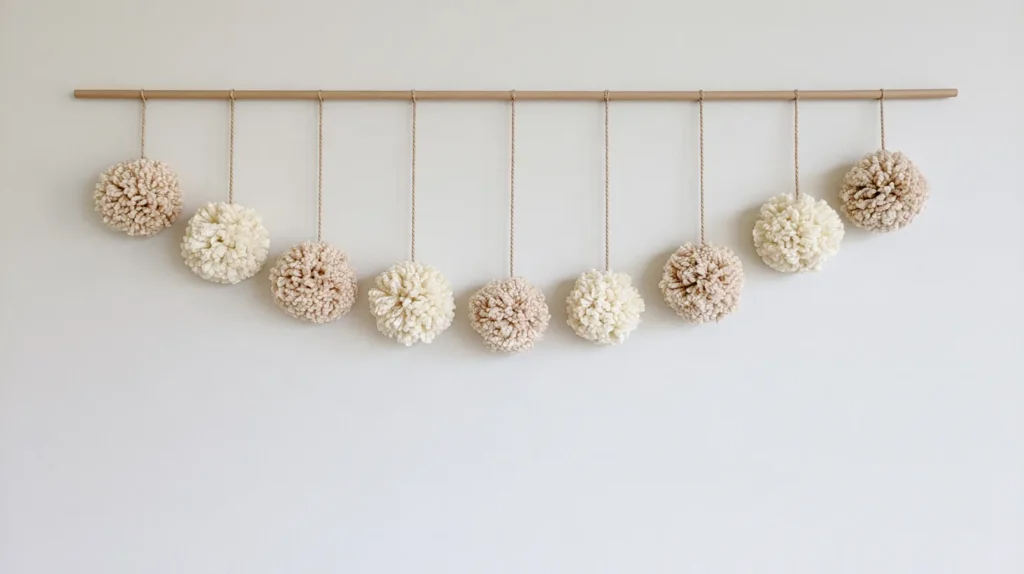
You might be picturing a lumpy mess of yarn balls glued onto cardboard. Fair, based on what most of us made in third grade! But swap the cardboard for a wood dowel. Pick a color palette that matches your living room already. Suddenly, the whole thing looks intentional instead of accidental.
The rise of this trend lines up with something bigger, too. Adults want hobbies that don’t live entirely on a screen. Pom pom crafts give your hands something to do while your brain rests. That might explain why so many of us keep buying bags of them with no real plan.
My Pom Pom Tutorial for People Who Skipped Kindergarten Crafts
Let’s talk technique for a second. A pom pom tutorial doesn’t need to sound like a chemistry lecture. You wrap yarn around something round, like a fork or your own fingers. Then you tie the middle tight and cut the loops open.
That’s genuinely most of it. I’ve found that the fork method works best for smaller pom poms. A pom pom maker, that little plastic arm contraption, gives more even results. Plus, neither option requires a trip to a specialty store.
That matters if you want to keep this hobby cheap. Nobody needs another monthly subscription just to glue yarn balls. Keeping costs low is basically the whole point around here.
Here’s the part nobody tells you about pom poms. The trimming step is where the real magic happens. A shaggy, uneven blob turns into a round, tidy sphere. You just go back in with sharp scissors and snip stray strands.
It’s like giving your craft a little haircut. Weirdly, that part is oddly satisfying.
Here’s a tension point, since I promised you one. Thicker yarn makes fluffier pom poms every time. Thinner yarn gives you denser, more polished results instead. Neither choice is wrong, but they look completely different.
So pick your yarn based on the actual project. Don’t just grab whatever’s already sitting in your stash. I tend to notice that people rush the tying step.
That’s usually why a pom pom falls apart later. Tie it tighter than seems necessary, trust me on that one. Once you’ve made two or three, your hands find the rhythm. The whole process turns almost meditative after that.
By the third pom pom, you stop overthinking the whole method. That’s usually when it starts to seem like an actual hobby, not a chore.
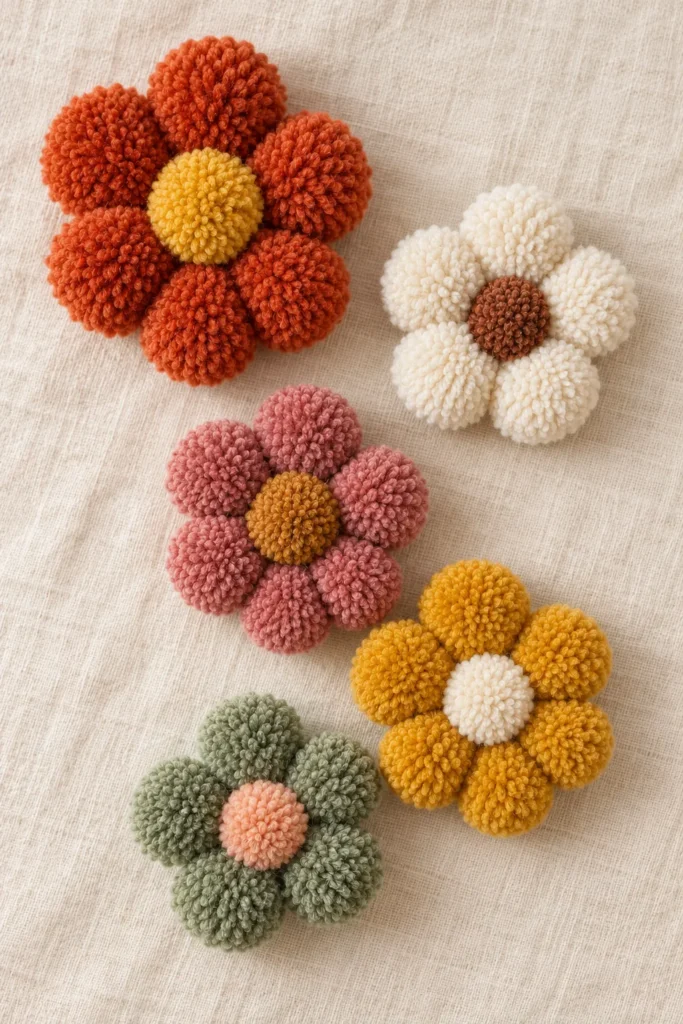
Pompom Flowers That Don’t Scream Preschool Project
Pompom flowers are the most underrated corner of this craft world. Attach a few pom poms to floral wire. Wrap the stems in green tape. You’ve got a bouquet that never needs water. It never dies right before a dinner party, either.
The contrast here surprised me. Fake flowers usually read as cheap somehow. Pompom flowers read as charming instead. Maybe it’s the texture, or maybe it’s the effort everyone assumes went into them.
I also love that pompom flowers never need trimming or watering schedules. You just set them down and forget about them completely. Still, that’s the opposite of every real plant I’ve ever owned. Half of mine end up ignored on a windowsill by week two.
A few ways to use them beyond a basic vase:
- Cluster small pom pom flowers into a napkin ring for a table setting
- Attach one stem to a gift as a reusable bow
- Build a mini flower wreath for a front door
- Mix two or three yarn colors per bloom for a layered look
- Use wire stems so the flowers can bend and pose
Some people worry pompom flowers look too crafty for a real table setting. I disagree completely, especially once color comes into play.
What I like most is how forgiving this project is. There’s no wrong shade of yarn to pick. Nobody expects botanical accuracy from a pom pom anyway.
A single pompom flower also works as a cheerful gift topper. It replaces a bow without costing anything extra.
If you want an easy way into pom pom crafts for adults, start here. Flowers use minimal supplies and stay low-stakes. You get an actual finished piece in under an hour.
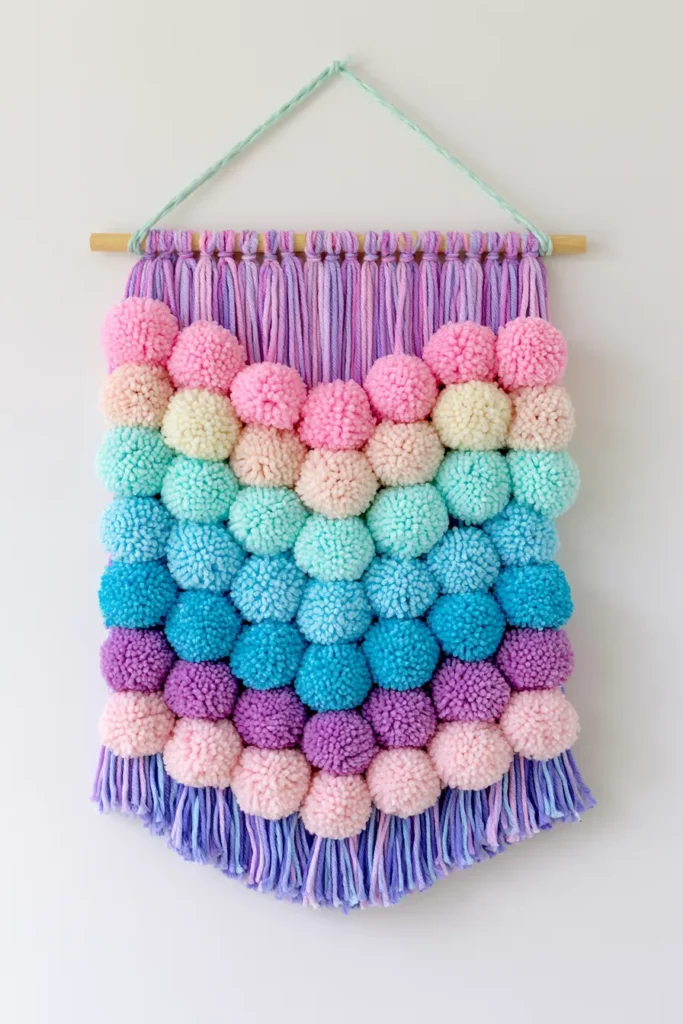
Pom Pom Art Ideas Worth Framing
Pom pom art ideas get dismissed before anyone even tries them. That seems unfair to me. Glue pom poms in a pattern onto a canvas. Frame it, and you’ve made real wall art. It looks boutique, not craft-aisle.
Here’s the reframe: art doesn’t require paint or a steady hand. Texture counts just as much. Dimension counts too. A wall piece made of fuzzy spheres is still art. That’s true even if it took an hour, not a semester.
I like art that doesn’t take itself too seriously. Pom pom art fits that description perfectly. Plus, it’s playful without looking sloppy or unfinished.
Some pom pom art ideas worth trying:
- An ombre canvas that fades light to dark in one color family
- A geometric pattern using two contrasting colors
- Oversized pom poms mounted individually for a gallery-wall look
- A monogram or initial shape outlined in pom poms
- Layered pom poms in different sizes for texture
Framing matters more than people expect with this craft. A cheap frame from a thrift store instantly elevates the whole piece. Skip the frame, and it can read as unfinished instead.
I’ll admit the ombre version took longer to plan than expected. Sorting yarn by shade takes more time than it sounds. Once the colors were set, the gluing moved fast.
What surprises people most is scale. A small canvas with tiny pom poms looks delicate. An oversized canvas with chunky pom poms reads as bold. Same idea, completely different vibe, depending only on size.
Either version works for a rental, too, since nothing gets glued to a wall. You just hang it and take it right along when you move. That flexibility matters more than people admit when decorating on a budget.
Pom Pom Crafts for Adults That Actually Look Expensive
Pom pom crafts for adults have one real superpower. They consistently look pricier than they are. A finished project can pass for a boutique purchase. Almost nobody guesses the real price tag.
I’ve tested this theory on actual guests, more than once. Nobody has ever asked if my garland came from a dollar store. That silence tells you everything about how convincing this craft really is.
I tend to notice this most with home accents. Add pom pom trim to a plain pillow cover. It instantly reads as a designer piece. That basic pillow cover usually costs almost nothing.
A handful of upgrades that punch above their price:
- Pom pom trim glued along curtain edges for an instant custom look
- A chunky garland strung across a mantel or shelf
- Coasters made from felt circles topped with one pom pom
- A pom pom-trimmed tote bag or basket liner
- Oversized floor pom poms stacked in a corner as decor
Curtains get the most compliments out of everything on this list. People assume trim like that comes from a designer showroom. So it never occurs to anyone that a glue gun was involved.
The math here is kind of wild. A bag of pom poms and a glue gun run under fifteen dollars total. The finished pieces still look like a home decor catalog.
Color restraint changes the expensive look the most. Stick to two or three shades instead of a rainbow. That choice costs nothing extra to make.
Texture also does a lot of the heavy lifting here. Pom poms add dimension that flat fabric or plain wood just can’t fake. That’s the real secret behind the expensive look, more than the color ever is.
DIY Pompoms: Tools You Need vs Tools You Don’t
DIY pompoms get an oversold supply list constantly. Craft stores want you to believe in a specialty kit. Most of what you need sits in a drawer already.
A fork works fine for small pom poms. Cardboard circles work for medium ones. A plastic pom pom maker handles a big batch best. None of these options costs more than a few dollars.
I’ve tried all three methods more than once. Each one produces a slightly different pom pom shape and density. So pick whichever matches the mood of your specific project.
The cardboard method is basically free, too. Just cut up an old cereal box instead. Here’s a tool that earns its spot completely: a hot glue gun.
Craft glue dries too slowly for most pom pom projects. It also soaks into yarn instead of bonding it fast. A glue gun sets almost instantly instead. That matters when you’re attaching dozens of pom poms at once.
Yarn versus pre-made pom poms comes down to time versus cost. Buying pre-made saves you hours of work. Making your own costs less per pom pom. It also gives you more control over size and color.
I lean toward pre-made for big projects. Homemade works better for smaller, custom pieces. One tool I’d skip entirely: fancy pom pom kits. You’re paying for packaging more than materials there.
Save that money for extra yarn instead. More colors always beat a fancier box on the shelf. That’s just budget crafting logic, plain and simple.
A basic bag of yarn covers almost everything here. Add a glue gun and sharp scissors, and you’re set. No upsell required for this hobby. A cheap pair of scissors works just as well as an expensive one.
Pom Pom Crafts for Adults on a Budget
Pom pom crafts for adults on a budget is my favorite sentence to type. This hobby genuinely costs less the more you get into it. That’s rare for any hobby at all.
Most hobbies get pricier as you get better at them. Better yarn, better tools, better everything, all with a bigger price tag attached. Pom pom crafting somehow runs in the opposite direction entirely.
A basic bag of pom poms runs a couple dollars at most stores. Yarn costs even less if you make your own. Leftover scraps from other projects work just fine here. Nothing about this craft demands top-shelf materials.
Even a beginner kit from a big box store costs very little. Still, you really don’t need premium anything to get a great result here.
I’ve found that dollar stores hide great pom pom supplies. Felt sheets, floral wire, and glue sticks show up there too. A whole project can come together for under ten dollars, sometimes less.
Compare that to buying finished home decor instead. A store-bought garland or trimmed pillow can run forty dollars easily. Making the same thing yourself costs a fraction of that. You also get to pick the exact colors you want.
That price difference adds up fast across multiple rooms. Decorating an entire home this way costs far less than a single store-bought piece elsewhere.
There’s also a reuse factor nobody talks about enough. Old, unraveled pom poms can become something brand new. That’s not something you can do with most store-bought decor. So if budget crafting is the goal, pom pom crafts for adults deliver the most per dollar. That math alone keeps me coming back to this hobby.

Pom Pom Crafts for Adults: An Idea for Every Room in the House
Pom pom crafts for adults don’t have to live in one spot. Once you notice where texture could help, pom poms show up everywhere. Living rooms tend to be the easiest starting point. A garland or trimmed pillow fits almost any style already there.
Even one small accent can shift how a whole room reads. So you don’t need to redecorate everything at once.
From there, the ideas spread room by room fast.
A quick room-by-room breakdown:
- Living room: garlands along a shelf, pom pom trim on pillows
- Bedroom: a pom pom curtain tieback or trimmed blanket edge
- Kitchen: coasters or a small hanging garland near a window
- Bathroom: pom pom trim added to a hand towel
- Home office: a small framed pom pom art piece
Hallways count too, even though people usually forget them. A narrow console table can hold a small vase of pompom flowers easily. That’s an often-overlooked spot worth filling.
What surprised me is how differently each room reads. A chunky garland reads as cozy in a living room. That same garland can seem cluttered in a small bathroom. Scale really does need to shift by space.
I tend to notice that kitchens need smaller, subtler accents. Those rooms already carry a lot visually. Bedrooms and living rooms can handle bolder versions instead.
This is the whole point of pom pom crafts for adults. One simple technique, endless application across every room. You’re not learning eight skills to decorate eight rooms. Instead, you’re repeating one technique, adjusted slightly each time.
Start with just one room if the whole list seems like too much. You can always add more once the first project turns out well.
How to Make a Pom Pom Tassel Wall Hanging
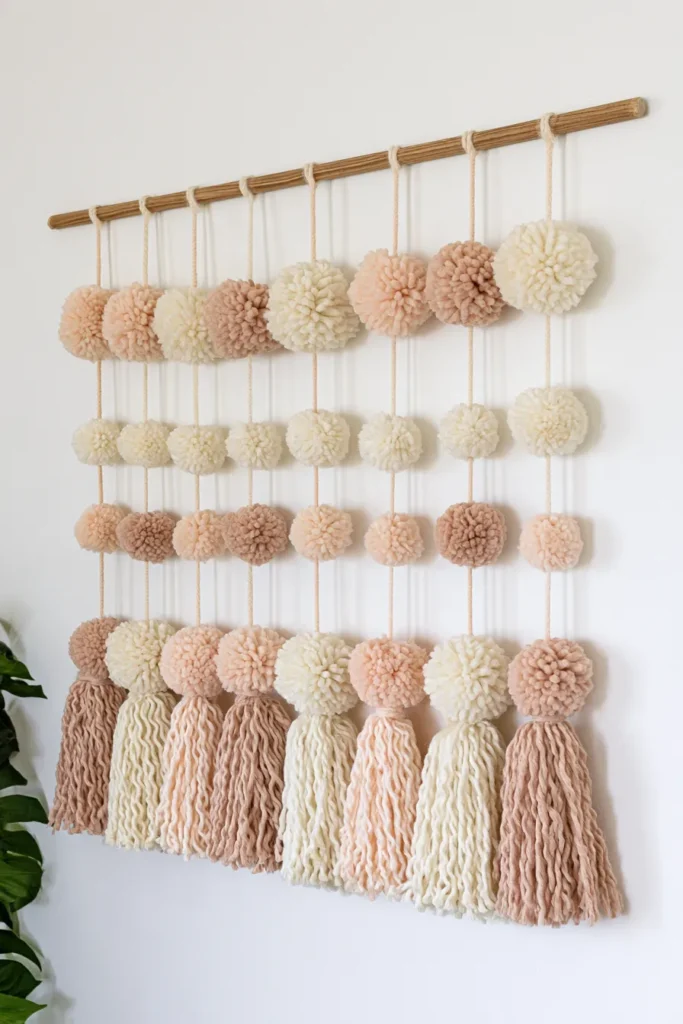
This project turns a handful of pom poms into real statement decor. Neutral shades give it a soft, boho look. Bright shades turn the same technique into something bold and playful instead.
What you’ll need:
- A wooden dowel or thin branch, about 12 to 18 inches long
- Yarn in two to four coordinating colors
- A pom pom maker or a piece of sturdy cardboard
- Sharp scissors
- Cotton cord or thin rope for hanging strands
- A hot glue gun
How to make it:
- Make 25 to 30 pom poms, trimming each one into a tidy round shape.
- Cut eight to ten lengths of cord, each about two feet long.
- Tie each cord to the dowel using a simple loop knot.
- Glue pom poms onto the cords in a pattern, working row by row.
- Leave some cord bare between rows for visual breathing room.
- Add loose yarn tassels below the last pom pom on each strand.
- Trim the tassels evenly, then tie a cord loop to both ends of the dowel for hanging.
Color choice changes the whole personality of this project. A tonal, neutral palette reads as calm and grown-up. Meanwhile, a rainbow palette reads as cheerful and a little maximalist. Both use the exact same steps, so pick whichever mood matches your space.
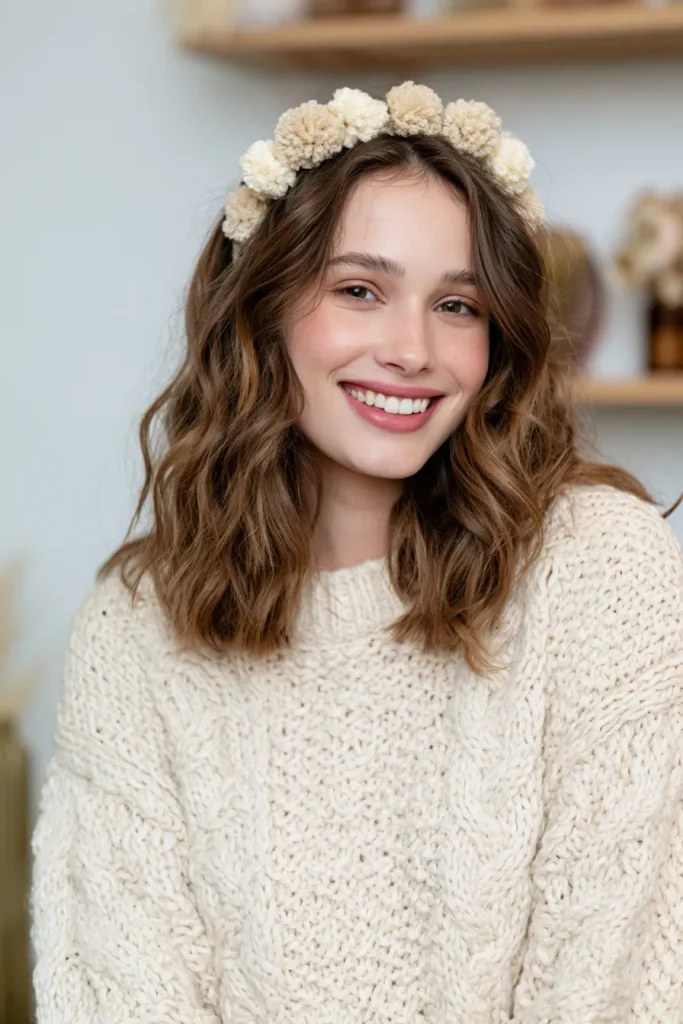
How to Make Pom Pom Flowers and a Flower Crown
Pom pom flowers are one of the fastest wins in this entire craft category. A flower crown just strings several of them together onto a fabric or wire base.
What you’ll need:
- Yarn in petal colors plus one contrasting center color
- A pom pom maker or fork
- Floral wire or a fabric headband base
- Felt circles for backing (optional, for extra hold)
- Hot glue gun and scissors
How to make it:
- Make one small, tightly trimmed pom pom for the flower center.
- Make five or six slightly larger pom poms for the petals.
- Trim the petal pom poms flatter on one side so they sit close together.
- Glue the petals in a circle around the center pom pom.
- Glue the finished flower onto a felt circle for a sturdier base.
- For a crown, glue three to five flowers directly onto a headband, spacing them evenly.
A single flower works fine on its own for a gift topper or napkin ring. Meanwhile, a full crown just repeats that same flower a few more times.
How to Make a Pom Pom Keychain
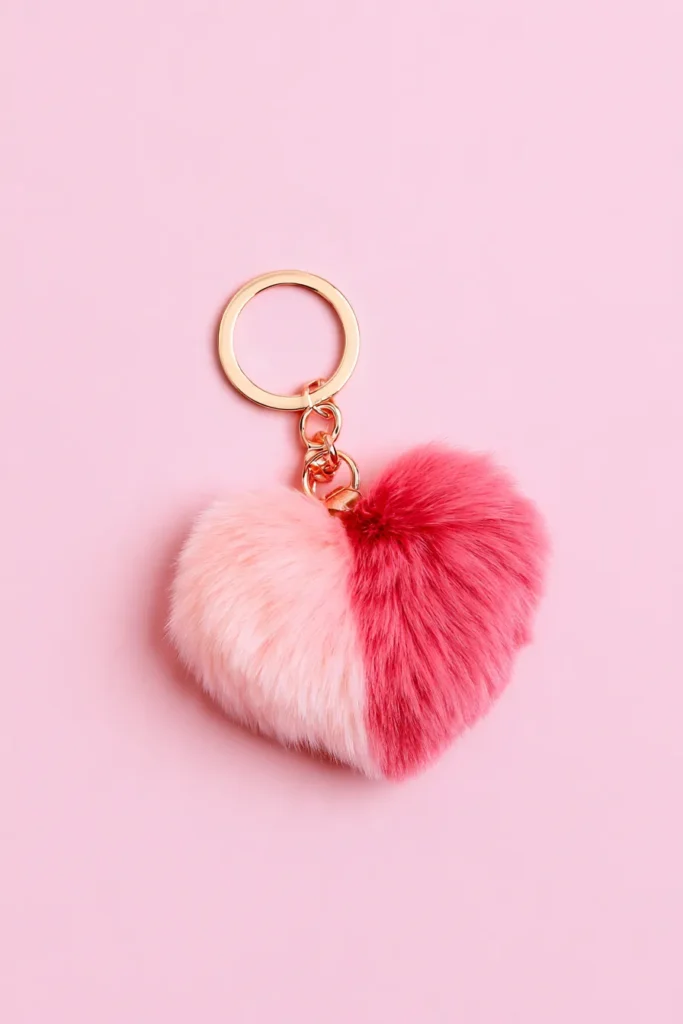
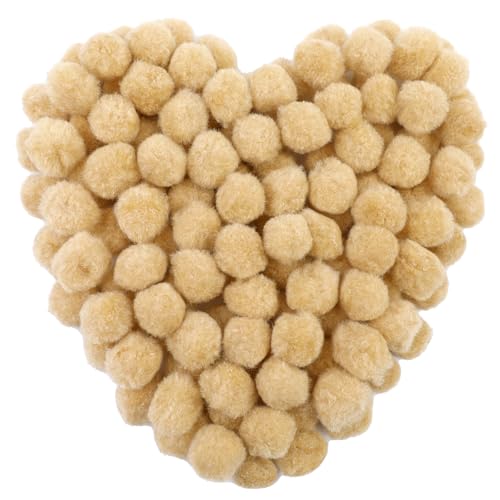
This is the fastest project on this whole list. It’s also great for using up small yarn scraps. Two colors glued together create the heart shape shown here.
What you’ll need:
- Yarn in two coordinating colors
- A pom pom maker or fork
- A keychain ring with a short chain attachment
- Hot glue gun and scissors
How to make it:
- Make two medium pom poms, one in each color.
- Trim both pom poms so their flat sides can sit together.
- Glue the two flat sides together, angling them slightly to suggest a heart shape.
- Once dry, trim any stray strands for a cleaner outline.
- Glue or wire the finished pom pom onto the keychain hardware.
This one takes less than fifteen minutes, start to finish. It also makes a genuinely nice small gift.
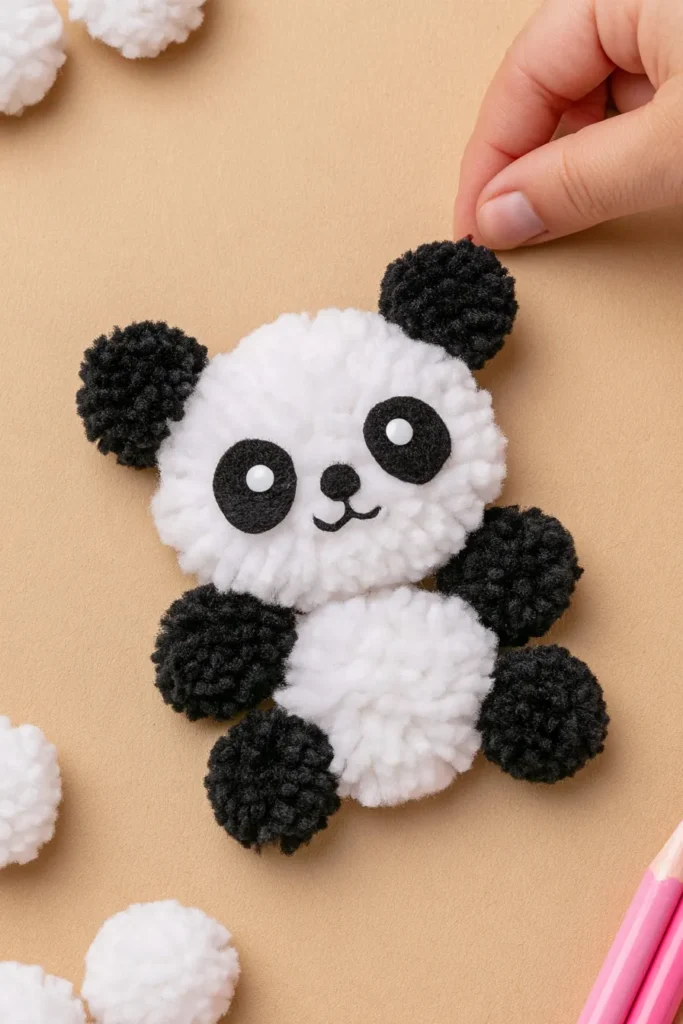
How to Make a Pom Pom Panda
This one takes a little more patience than the others, but nothing about it is actually hard. It’s really just several small pom poms assembled into one shape.
What you’ll need:
- Black and white yarn
- A pom pom maker in two sizes, or a fork for smaller ones
- Black felt for the eye patches and nose
- Hot glue gun and scissors
How to make it:
- Make one large white pom pom for the head and one for the body.
- Make four small black pom poms for the ears and paws.
- Trim the white pom poms into rounder, denser shapes.
- Cut small oval eye patches and a tiny nose from black felt.
- Glue the ears onto the head and the paws onto the body.
- Glue the felt eye patches and nose onto the face.
- Glue the head to the body once everything else has fully dried.
Let each piece dry completely before assembling the next one. Rushing this step is the most common reason a panda ends up lopsided.
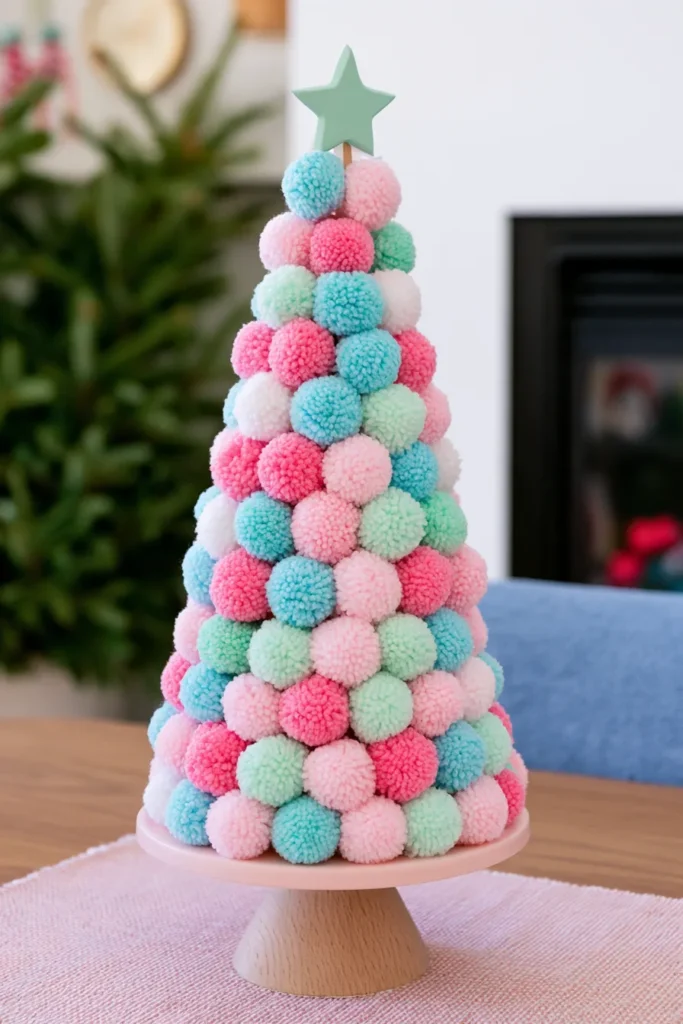
How to Make a Pom Pom Christmas Tree
This centerpiece looks impressive on a table, but the technique behind it is genuinely simple. It’s just dozens of small pom poms glued onto a cone shape.
What you’ll need:
- A foam or cardboard cone base
- Yarn in three or four holiday colors
- A pom pom maker for consistent sizing
- Hot glue gun and scissors
- A small star or topper piece
How to make it:
- Make a large batch of small, evenly sized pom poms in your chosen colors.
- Starting at the base, glue pom poms around the cone in a tight ring.
- Work upward in rings, mixing colors as you go for a speckled look.
- Trim any pom poms that stick out further than their neighbors.
- Continue until the entire cone is covered, working up to the point.
- Glue a small star or topper onto the very top.
Building this in rings, rather than randomly, keeps the shape looking neat. Budget-wise, this project costs far less than a store-bought version.
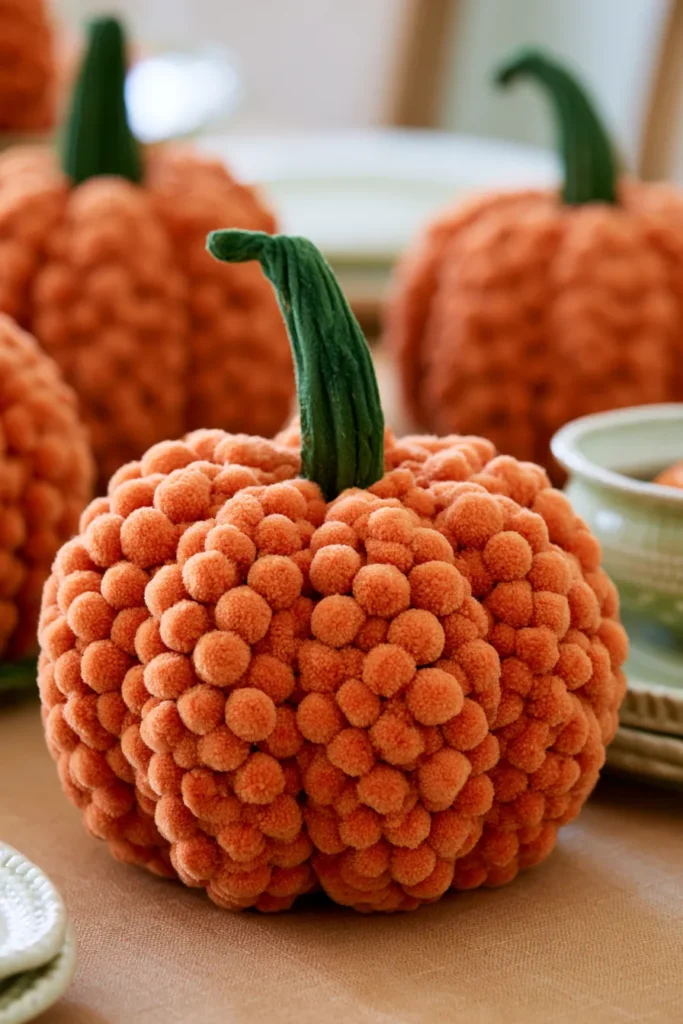
How to Make a Pom Pom Pumpkin
This one uses the exact same ring technique as the Christmas tree, just shaped differently. The result looks surprisingly close to a real, textured pumpkin.
What you’ll need:
- A round foam or cardboard base
- Orange yarn in one or two shades
- Green yarn or ribbon for the stem
- A pom pom maker for even sizing
- Hot glue gun and scissors
How to make it:
- Make a large batch of orange pom poms, all roughly the same size.
- Glue them onto the round base, starting at the bottom and working up.
- Keep pom poms tightly packed so no base shows through the gaps.
- Leave a small gap at the top for the stem.
- Twist or braid green yarn into a short stem shape.
- Glue the stem into the top opening once the base is fully covered.
A slightly darker shade near the top adds depth without much extra effort. This project stores flat and easily comes back out again next fall.
FAQs
Do I need special tools to start pom pom crafts for adults? A fork, cardboard circle, or basic pom pom maker gets the job done. Then a hot glue gun handles almost every attaching step.
How long does a typical project take? Small projects, like a flower or a coaster, usually take under an hour. Bigger pieces, like a full garland or a framed canvas, might take an afternoon depending on size.
What’s the cheapest way to get pom pom supplies? Dollar stores and clearance sections at craft stores are your best bet. A full project can often come together for under ten dollars. Occasionally a craft chain runs a sale that beats even the dollar store.
Can I use pom poms I already have from old projects? Yes, and I’d recommend it. Reusing leftover pom poms keeps costs low. It also gives half-finished craft stashes an actual purpose again. This is a great way to use up random craft leftovers, too.
Do pom pom crafts hold up over time, or fall apart fast? They hold up well if you tie the center tight. Use a hot glue gun instead of craft glue. Loose ties are usually the real culprit behind unraveling.
Is this craft beginner-friendly, or is that just marketing? It’s genuinely beginner-friendly. There’s no steep learning curve and barely any equipment needed. Any real mistake just trims away with scissors. That’s part of why it works so well for a first-time crafter.

Consider This Your Pom Pom Permission Slip
Here’s where I’ve landed after this whole pom pom rabbit hole. This isn’t really about the craft itself. It’s about giving yourself permission to make something just for fun, with zero productivity goal required.
As a mom, most of my making-things time goes to other people’s projects. School events and craft emergencies eat up plenty of it too. Carving out an evening for pom pom crafts for adults was different. It meant reclaiming a small piece of my own time.
I’ve been saving half these ideas on Pinterest already. I want to revisit the ombre art canvas before the season changes again. That’s usually how a good craft works. You finish one project and start planning the next.
This whole trend keeps proving itself worth the shelf space. Plus, every finished piece earns its spot somewhere in the house.
What I keep coming back to is how little this hobby asks of you. Low cost, low pressure, and a genuinely satisfying result wait at the end. Not many crafts promise all three at once. Even fewer deliver on it. That combination is genuinely rare in any creative hobby.
If you’ve been hunting for a low-stakes way to make something again, consider this your official permission slip. That’s the whole point of starting something just for you. Grab a bag of pom poms and skip the pressure entirely. See what you end up making. Your future Pinterest board will thank you.