Let’s talk about homemade whipped cream. It’s one of those things that seems like a “fancy” step, right? Like something only people with lots of time or a chef’s kitchen would bother with. But once I found out how simple—and cheap—it actually is, I was all in.
Making your own whipped cream at home saves money. It also tastes so much better than the stuff in a can or tub. I’m talking rich, fluffy, melt-in-your-mouth good. And you don’t need anything fancy to make it happen. A bowl, a whisk or mixer, and some heavy cream. That’s it.
This post is going to show you everything. I’ll walk through how to make it, what you can add to switch it up, how to store it, and even how to use it in fun ways. It’s one of those little frugal swaps that feels small but adds up. Cans of whipped topping aren’t cheap, especially around the holidays. But a carton of cream? It goes a long way.
And don’t worry—this is all written in plain talk. No complicated steps. I’m not a chef. I’m just sharing what I’ve learned along the way. If you’ve never made whipped cream before, this will make it easy. If you’ve made it but want to save money and stretch it further, I’ve got you covered too.
So if you’re looking for a sweet little budget-friendly upgrade in your kitchen, stick around. Homemade whipped cream might be the simplest thing that makes your desserts feel special, without spending extra. Let’s get into it.
This site includes affiliate links; you can check the disclosure for more details.
What You Need to Make Homemade Whipped Cream
You only need a few basic things. This isn’t a complicated recipe. You probably already have most of it in your kitchen.
Here’s what you’ll need:
- Heavy cream or heavy whipping cream
- Granulated sugar (or powdered sugar)
- Vanilla extract (optional, but recommended)
- A mixing bowl
- A whisk, hand mixer, or stand mixer
That’s it. You don’t need any fancy tools. A metal bowl helps the cream whip faster if it’s cold, but it’s not required.
Let’s break down the amounts:
- 1 cup heavy cream
- 2 tablespoons sugar
- ½ teaspoon vanilla
This makes about 2 cups of whipped cream, which is enough for a pie, a batch of cupcakes, or a tray of strawberries.
Helpful tips before starting:
- Chill your bowl and beaters. Pop them in the fridge or freezer for 10–15 minutes.
- Use cold cream. Straight from the fridge is best.
- Don’t overmix. Once it holds stiff peaks, stop.
If you go too far, you’ll start turning it into butter. That’s not what we’re going for here.
You can use a whisk by hand, but it’ll take some arm power. A hand mixer or stand mixer makes it much easier and quicker.
This is one of those things where homemade really beats store-bought. It’s fresher, tastier, and cheaper. One carton of cream can make several batches of homemade whipped cream for less than a single can of spray topping.

Step-by-Step: How to Make It the Easy Way
Okay, let’s break it down. This is the part where people get nervous, but it’s really not hard. I’ll walk you through it.
- Pour the cream into a cold bowl.
Start with one cup. You can double it if you need more. - Add the sugar and vanilla.
You can taste and adjust if you want it sweeter. Some people use powdered sugar for a smoother texture. - Start mixing.
Use a hand mixer on medium speed. If you’re whisking by hand, just keep going steadily. - Watch for soft peaks.
You’ll see the cream thicken. When you lift the beater or whisk, the cream should barely hold its shape. - Keep going until stiff peaks form.
Now it should stand up when you lift the whisk. That’s when you stop. Don’t go past this point.

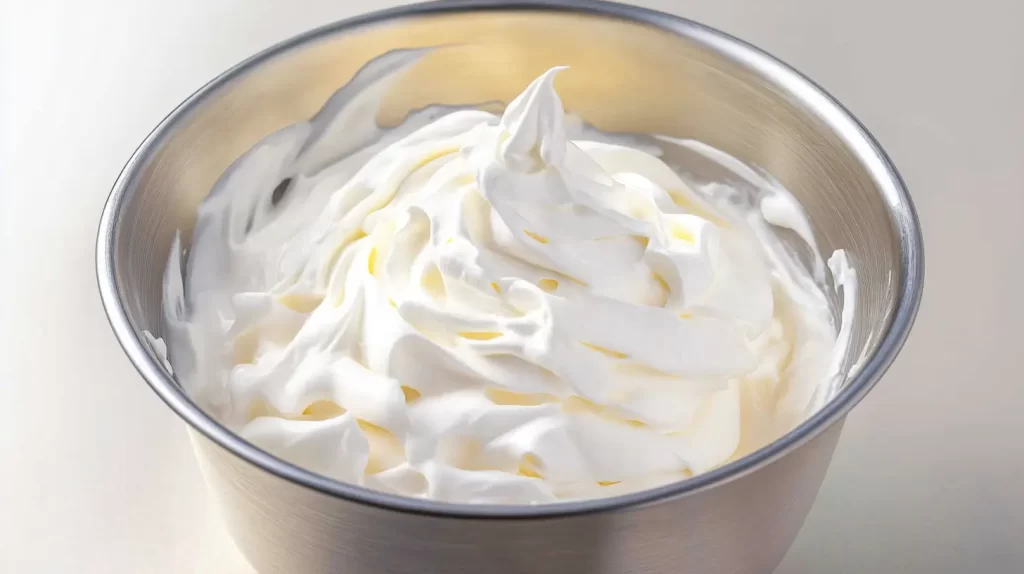
That’s it. You just made homemade whipped cream. It should be fluffy and smooth. You can spread it, dollop it, or pipe it if you want to get fancy.
And remember:
- You can flavor it (more on that in the next section).
- You can make it ahead (I’ll show you how to store it).
- You can adjust the sweetness.
Making this just once will show you how quick and easy it really is. Plus, you’ll skip all the chemicals and weird ingredients in the pre-made stuff.

Flavor Ideas to Mix It Up
Homemade whipped cream doesn’t have to be plain. You can have fun with it. A few easy swaps or additions can turn a basic topping into something special.
Here are some flavor ideas:
- Cinnamon: Add ¼ teaspoon with the sugar.
- Cocoa powder: One tablespoon for chocolate whipped cream.
- Almond extract: Just ¼ teaspoon adds a nice twist.
- Lemon or orange zest: Fresh and bright.
- Maple syrup: Use instead of sugar for a rich, warm flavor.
- Peppermint extract: Great around the holidays.
You can also add crushed cookies, sprinkles, or mini chocolate chips after whipping.
Here are a few flavor combos to try:
- Chocolate whipped cream + crushed Oreos
- Lemon whipped cream + fresh berries
- Maple whipped cream + pecan pie
- Peppermint whipped cream + hot cocoa
Some people like to use powdered sugar instead of granulated sugar for a smoother result. Either works, but if you’re piping it onto cupcakes, powdered is better.
This is where you can get creative without spending much. Just small additions, using what you already have in your pantry.
And every time you make homemade whipped cream this way, it becomes more fun. You’ll start mixing and matching without thinking twice.

How to Store It Without It Melting
Let’s be honest. The worst part of whipped cream is when it turns into a soggy mess. Luckily, there are a few ways to keep your homemade whipped cream fluffy and fresh.
Here’s what works:
- Store it in the fridge, tightly covered, for up to 24 hours.
- Re-whip it lightly if it softens. A quick whisk can bring it back to life.
- Use gelatin to stabilize it if you want it to last longer.
To stabilize whipped cream:
- Sprinkle 1 teaspoon of unflavored gelatin over 2 tablespoons of cold water.
- Let it sit for a few minutes to bloom.
- Warm it in the microwave for 5 seconds.
- Add to your cream while whipping, right as it starts to thicken.
That will help it hold its shape for a full day or even two.
Some other tips:
- Don’t leave whipped cream out for more than 30 minutes.
- If using it on a cake, frost it close to serving time.
- Avoid storing it next to strong-smelling foods like onions or garlic.
If you want it to last longer, stabilized whipped cream is your best bet. You don’t need to do this every time. But for parties or make-ahead desserts, it’s worth it.

Ways to Use Homemade Whipped Cream
This is the fun part. Once you’ve made it, you’ll want to use it on everything. And honestly? You can.
Here are some tasty ideas:
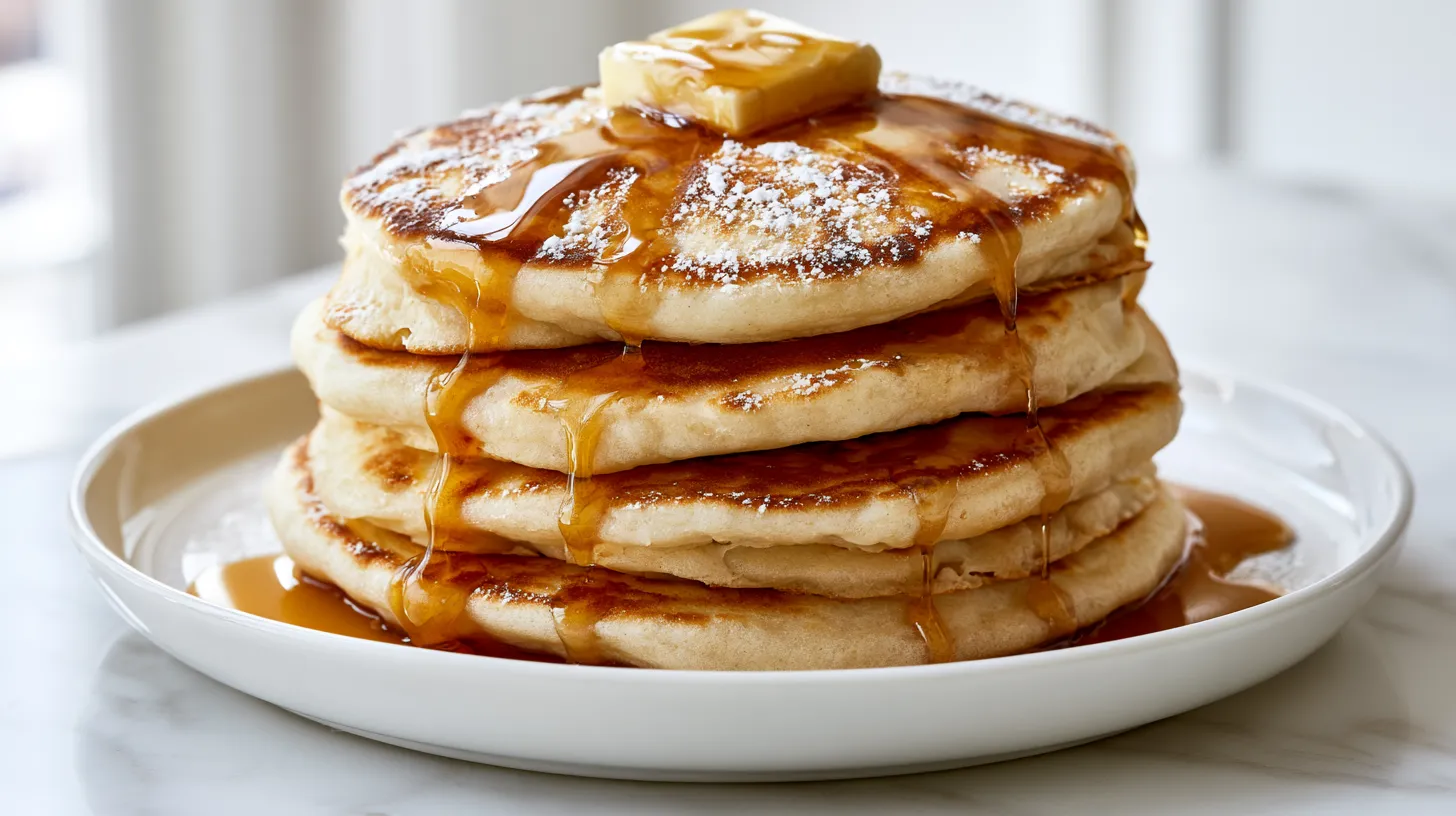
- On pancakes or waffles
- With fresh berries
- On top of hot cocoa
- Spooned over pie or cake
- Layered in a trifle
- With pudding or yogurt
- On milkshakes or smoothies
- Stuffed into crepes
- As a dip for fruit or graham crackers
You can also freeze small dollops on a baking sheet and pop them on hot drinks later.
It makes everything feel a little more special. Even a bowl of strawberries feels like dessert with a spoonful of whipped cream on top.
Want to get more out of one batch?
- Use a piping bag to control portions.
- Mix it with Greek yogurt for a lighter, more filling option.
- Dollop on top of toast with jam for a sweet breakfast.
This is a fun, low-cost way to add a little treat to your day. And once you have it in your fridge, you’ll keep finding reasons to use it.

Stretching Your Grocery Budget with Homemade Whipped Cream
Let’s talk money. A tub of store-bought whipped topping costs around $3 to $5. Spray cans? Same story. And they don’t last long.
Now compare that to a $2.50 carton of heavy cream. You can make twice as much whipped cream from it, with better flavor and fewer ingredients.
Here’s how to stretch that even more:
- Buy cream in bulk and freeze portions for later.
- Use only what you need and store the rest for another day.
- Make stabilized whipped cream to reduce waste.
It also lets you avoid the extra trips to the store when you run out of the pre-made kind. One less thing to forget on your list.
More budget-friendly tips:
- Use coupons or look for sales on heavy cream.
- Store whipped cream in a reused container to avoid using disposable tubs.
- Mix it into other ingredients, like pudding or yogurt, to stretch it even further.
And if you host during holidays or birthdays? Making your own saves a ton. One batch can cover several desserts. And no one’s going to miss the canned kind, trust me.
Homemade whipped cream is one of those little tricks that makes a big impact. You’re saving money, eating better, and avoiding waste. That’s what frugal living is all about.

Homemade Whipped Cream
Ingredients
- 1 cup cold heavy whipping cream
- 2 tablespoons granulated sugar
- 1/2 teaspoon vanilla extract
Instructions
- Place a mixing bowl and beaters or whisk in the fridge or freezer for 10 to 15 minutes to chill.
- Pour the cold heavy whipping cream into the chilled bowl.
- Add the granulated sugar and vanilla extract to the cream.
- Using a hand mixer, stand mixer, or whisk, begin beating on medium speed.
- Watch closely as the cream thickens and soft peaks begin to form.
- Continue beating until stiff peaks form, stopping the mixer occasionally to check the texture.
- Do not overmix or the cream will turn grainy and start to become butter.
- Once the whipped cream holds its shape firmly and looks smooth and fluffy, it’s ready to use.
- Serve immediately, or store covered in the refrigerator for up to 24 hours.
- If storing, re-whip lightly before serving if the cream softens.

Final Thoughts on Homemade Whipped Cream
Let’s wrap it up. I covered a lot, so here’s a quick recap on why homemade whipped cream is a smart, budget-friendly choice:
- You only need three ingredients: heavy cream, sugar, and vanilla.
- It takes less than five minutes to make.
- You can whip it by hand or with a mixer.
- It tastes way better than anything store-bought.
- It costs less and goes further.
You can also:
- Add flavor with cocoa, spices, or extracts.
- Use gelatin to make it last longer.
- Freeze dollops for later use.
- Store it safely in the fridge for up to a day.
There are so many ways to use it:
- As a topping for fruit, desserts, or breakfast.
- Mixed into other foods to stretch portions.
- Served as a dip or filling.
- Added to drinks like coffee or hot cocoa.
Plus, if you’re sharing recipes or ideas on Pinterest, this is one of those quick wins that gets attention. Everyone loves easy, frugal kitchen swaps—especially ones that taste this good.
If you’ve never made homemade whipped cream before, now’s the time. It’s easy, fast, and budget-friendly. And once you do it, you’ll wonder why you ever bought the canned stuff.
Save the recipe. Try a flavor twist. Enjoy the savings. Homemade whipped cream is a little upgrade that feels like a treat but fits your budget.
Want to make something feel homemade and special without spending extra? This is the way.