Fall doesn’t really arrive in Orlando. It’s still 88 degrees outside, and I’m already buying pumpkins like the leaves are about to turn. That’s just how it works down here. The season shows up in my head long before it shows up on the thermometer. That’s why I love to start on fall Halloween crafts even if the weather doesn’t feel like autumn yet.
Once that mental switch flips, I want cozy, slightly spooky decor everywhere I look. Fall Halloween crafts hit that exact spot between “cute” and “a little bit haunted.” I want the fun part, the cute result, and a reasonable amount of glitter to clean up afterward. Best case, my kids can help too.
Pinterest doesn’t make this easy. Scroll for five minutes and you’ll find twelve-foot skeletons and hand-built haunted villages. My actual porch fits neither of those things, and honestly, neither does my weekend. I want ideas that look intentional, cost very little, and don’t take over my entire Saturday.
So that’s exactly what this post is. Ten fall Halloween crafts I’d actually make, styled with a little vintage charm and a lot of dollar-store cheating. Some are elegant, and some are silly. All of them photograph better than they cost, which is really the whole goal.
Some of the links on this page are affiliate links, which means I may earn a small commission if you purchase through them. It never costs you extra. You can always peek at my full disclosure if you’d like the details.
Fall Halloween Crafts That Look Better Than They Cost
Here’s the first thing I noticed about great fall Halloween crafts: price has very little to do with it. Texture and contrast do the real work. A flat wood sign looks boring sitting on a shelf. Add torn fabric and matte paint, though, and suddenly it looks expensive.
I like to start with one plain base, then add a single detail that feels unexpected. Velvet ribbon on a foam pumpkin works well. So does antique-style paper tucked inside a thrifted frame. You’re not adding more stuff here. Instead, you’re choosing one thing that changes the whole mood of the piece.
Most people get this part wrong: cheap doesn’t need to look busy. Fewer details almost always read as more expensive. Personally, I’d rather see one oversized black bow. That beats ten tiny plastic spiders all competing for attention on the same shelf.
The same idea applies to cuter projects, too. Little ghosts and mini garlands stay charming instead of childish when you resist the urge to overdo it. Scale matters more than most people realize, especially once several pieces end up sitting together.
Still, don’t dump every seasonal item onto one table at once. Give each piece room to breathe. Let a simple color palette hold everything together. Cream, rust, black, and warm wood tones rarely let me down, year after year.
That’s the real secret behind expensive-looking fall Halloween crafts. It isn’t some special product or pricey material. It’s restraint, plain and simple, and restraint costs exactly nothing.
Cute With Just Enough Spooky
I love Halloween crafts that sit right on the edge of adorable and slightly weird. One smiling ghost is charming on its own. A whole shelf of grinning ghosts, though, starts to look like a tiny haunted daycare. Mixing sweet shapes with grown-up textures fixes that fast.
A soft yarn ghost looks better propped next to old books or dark wood. Likewise, a painted pumpkin feels less cutesy beside brass candlesticks or a pile of dried leaves. That contrast keeps simple crafts from drifting into school-project territory.
Here’s my slightly unpopular opinion. You don’t need purple, green, orange, and black all fighting for space in one spot. Pick one loud color and let it carry the whole display. Everything else can stay neutral and give your eye somewhere to rest.
This approach also works well for family crafting nights. Kids can paint pumpkins or cut simple paper bats. Adults can style the finished pieces afterward without changing what made them fun to make in the first place. Everybody wins, including your dining table.
Faces make almost anything cuter, but placement really matters. Two small dot eyes can turn plain felt scraps into a ghost. One crooked little smile can turn a plain pumpkin into the star of your mantel. Small details build personality faster than piles of extra supplies ever will.
Just don’t confuse cute with fussy. The best simple crafts lean on basic shapes, limited colors, and one charming detail. That keeps the project moving along when little hands, or your own patience, start to wander.

Fall Halloween Crafts From Dollar Tree Finds
Dollar Tree hauls are hit or miss, and that’s honestly part of the fun for me. Some pieces look ready to use right off the shelf. Others clearly need a serious glow-up first. I judge shape before anything else, since paint fixes color far more easily than it fixes an awkward shape.
The best fall Halloween crafts often start with plain pieces hiding near the seasonal aisle. Skip anything with too many molded-in details — those tend to fight every makeover you attempt. Instead, look for simple shapes you can actually build on:
- Plain foam pumpkins for paint, fabric, or ribbon
- Wood signs you can flip over and repaint
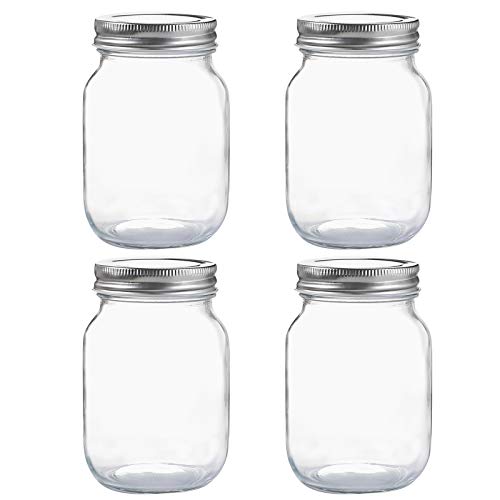
- Glass jars for spooky silhouettes or soft candle glow
- Plastic skeleton pieces for wreaths, frames, or garlands
- Basic trays for mini Halloween scenes or candy displays
Here’s the mindset shift that helps the most: you’re not really buying decor at the store. You’re buying a shape to redesign later at home. Once that clicks, the discount aisle gets a lot more interesting to walk through.
Pair one dollar-store piece with one nicer material, like velvet ribbon or better craft paint. The whole project levels up instantly. You don’t need premium supplies everywhere, just in a spot or two.
One more tip worth remembering: resist grabbing ten items just because each one is cheap. That math adds up fast at the register. Pick two or three bases instead, then stretch your leftover materials across every one of them. That’s how you actually stay budget-friendly here. The real savings come from editing your cart, not filling it.

Elegant Ideas for Your Mantel
These three projects lean moody and a little glam. They use simple, affordable materials, but the finished look reads far more expensive than it actually was to make.
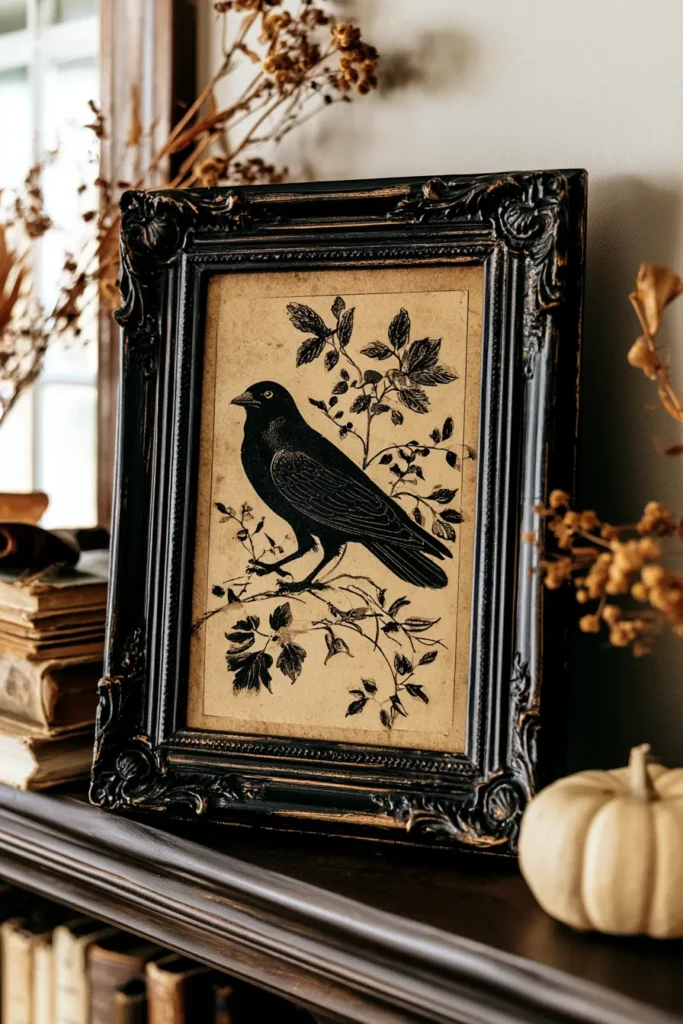
Vintage Raven Frame Materials:
- Thrifted frame
- Black paint and gold craft paint
- Aged paper and a raven printable
- Sandpaper
Paint the frame black, then lightly brush gold paint over the raised details. Slide the raven print in behind the glass. Sand the edges gently afterward for that old, slightly haunted finish.
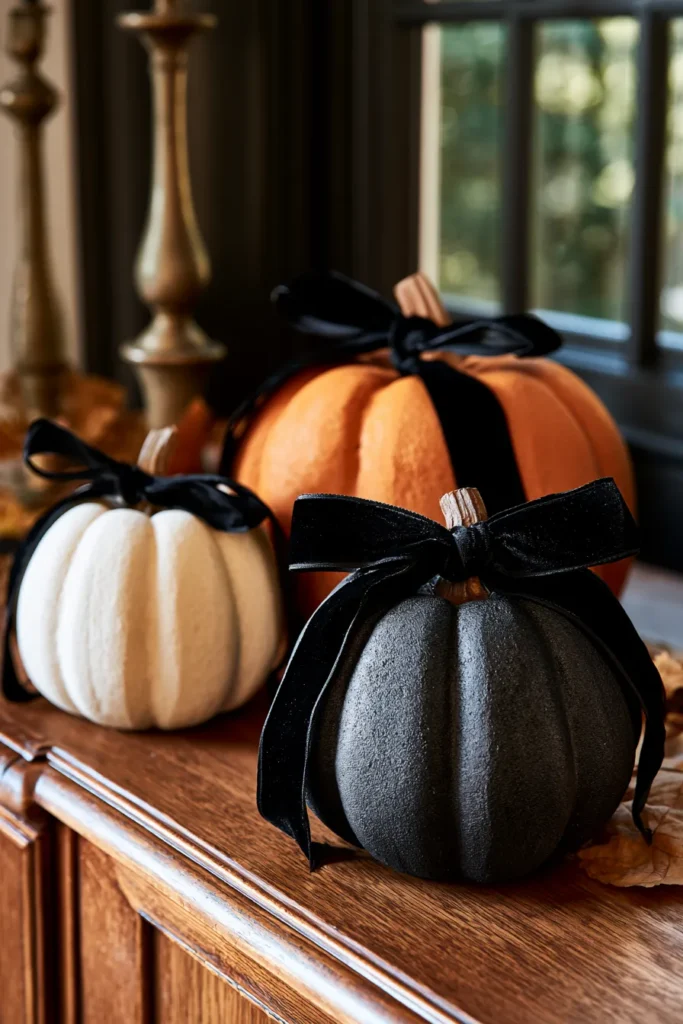
Black Velvet Bow Pumpkins Materials:
- Foam pumpkins
- Matte craft paint and paintbrushes
- Black velvet ribbon
- Hot glue
Paint your pumpkins black, cream, and classic orange. Once everything dries, tie a velvet bow around each stem. Add a small dot of hot glue if the ribbon refuses to stay put.
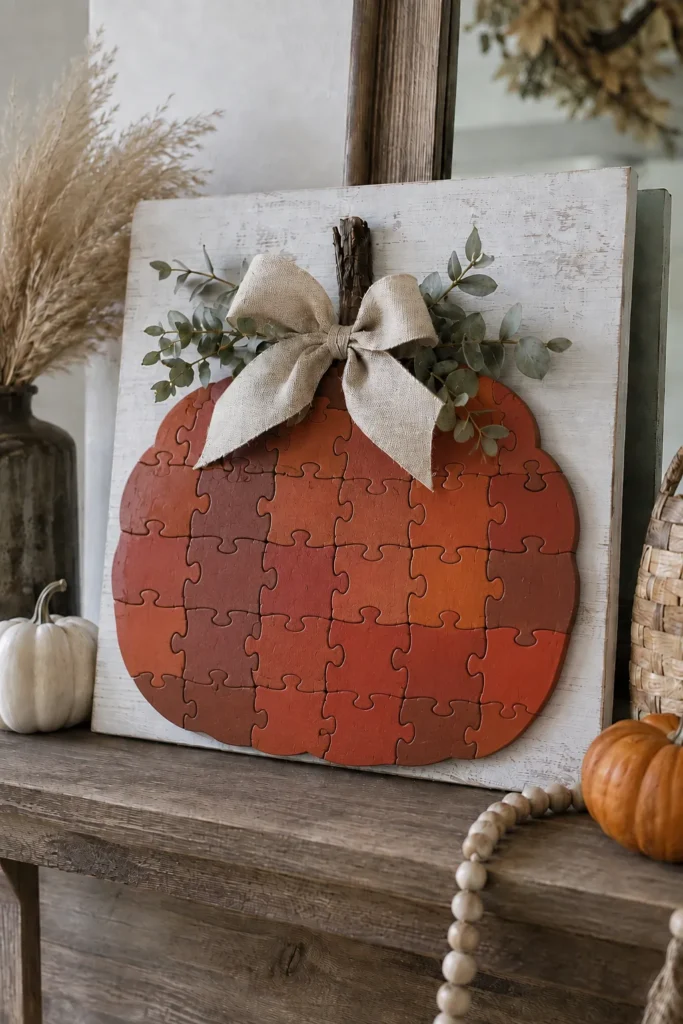
Puzzle Piece Pumpkin Plaque Materials:
- Old puzzle pieces and craft paint
- A wood board and a twig
- Linen ribbon and greenery
- Hot glue
Paint the puzzle pieces in rust, orange, and terracotta shades. Arrange them into a rounded pumpkin shape before gluing anything down permanently. Add a twig stem, a linen bow, and a little greenery up top. It’s a clever way to finally use up those mystery puzzle pieces nobody in the house can ever match.
Together, these three give your mantel real presence without a single trip to a specialty craft store.
Cute Fall Halloween Crafts With Ghosts Everywhere
Ghost crafts have gotten surprisingly cute lately, and I’m fully on board with that shift. These four keep the playful side of Halloween without turning your shelf into a kindergarten project table.
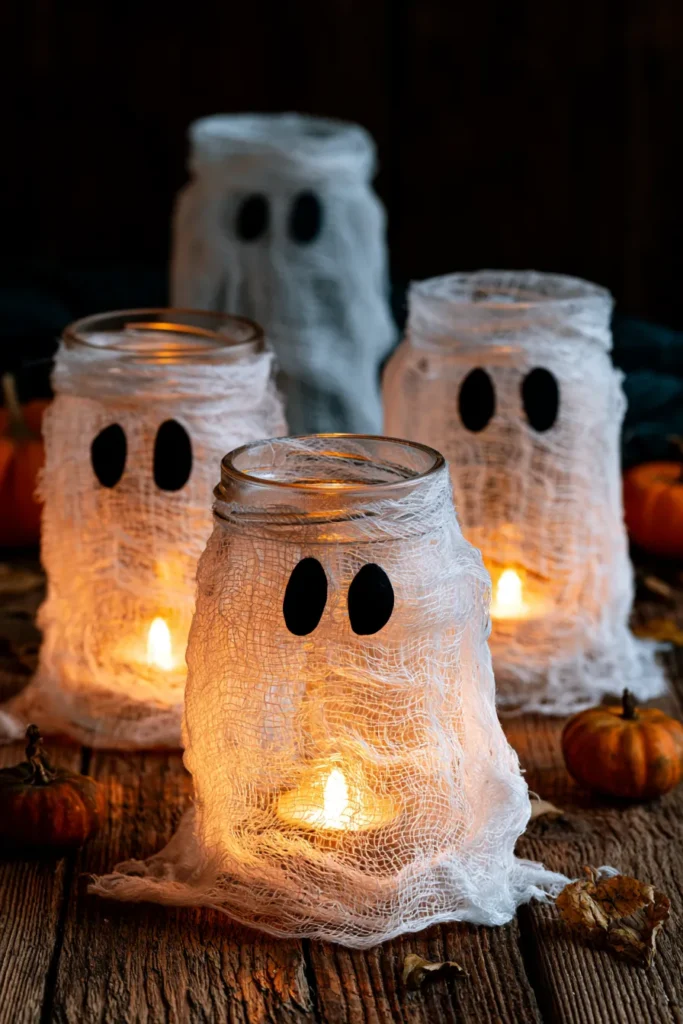
Glowing Ghost Jars Materials:
- Glass jars
- White gauze or cheesecloth
- Black felt and craft glue
- Battery tea lights
Wrap each jar loosely with gauze and secure the edges underneath. Cut oval eyes from black felt and glue them on. Drop a battery light inside each one for a soft, spooky glow.
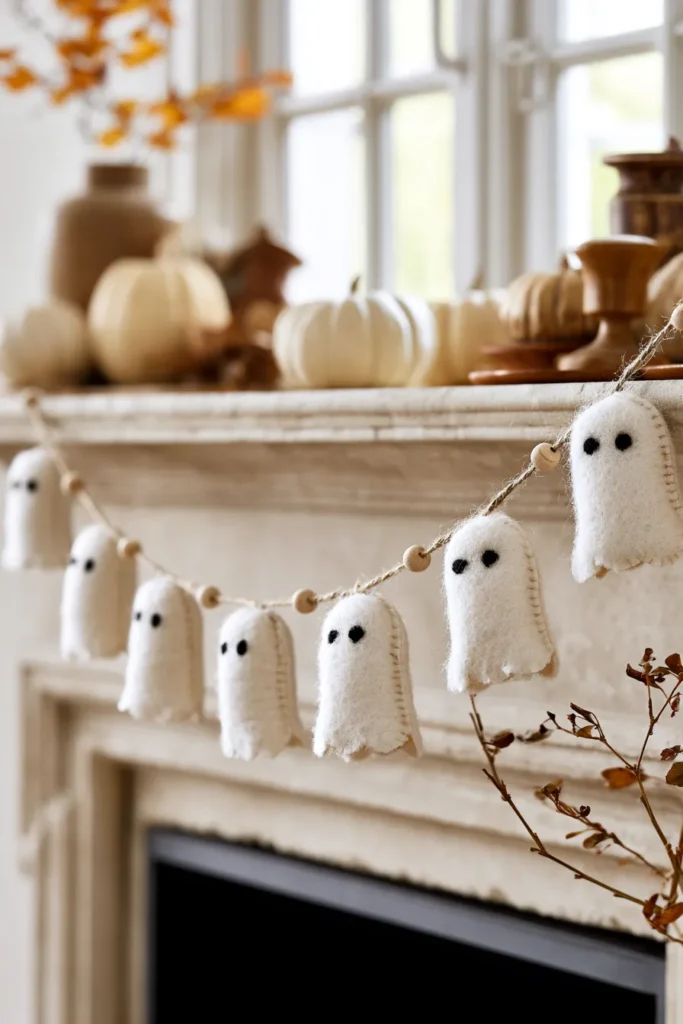
Felt Ghost Garland Materials:
- Cream felt
- Black felt or embroidery thread
- Twine and wooden beads
- Stuffing, scissors, and glue
Cut two matching ghost shapes for each one you plan to make. Add small black eyes, then glue or stitch the edges together, tucking in a little stuffing first. String the finished ghosts and beads onto twine.
Mini Ghost Portrait Gallery Materials:
- Egg cartons
- White and black paint
- Small thrifted frames and scrapbook paper
- Glue and tiny embellishments
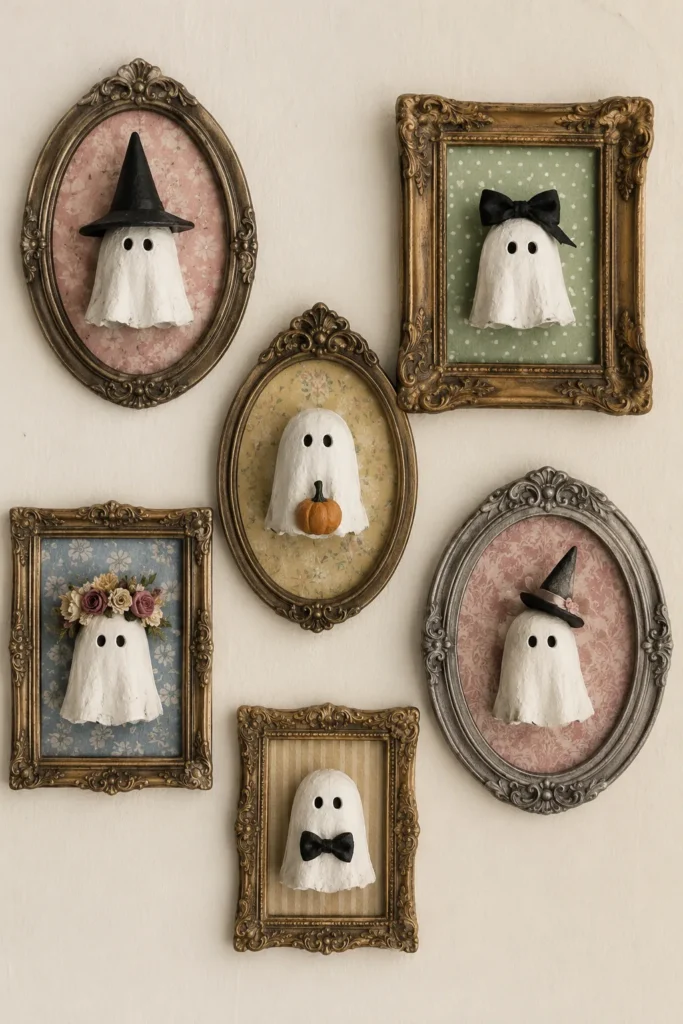
Cut the raised sections of an egg carton into little ghost shapes. Paint them white and add two small black eyes. Line each frame with patterned paper, then glue one ghost inside. Finish with a tiny witch hat, a bow, or a mini pumpkin.
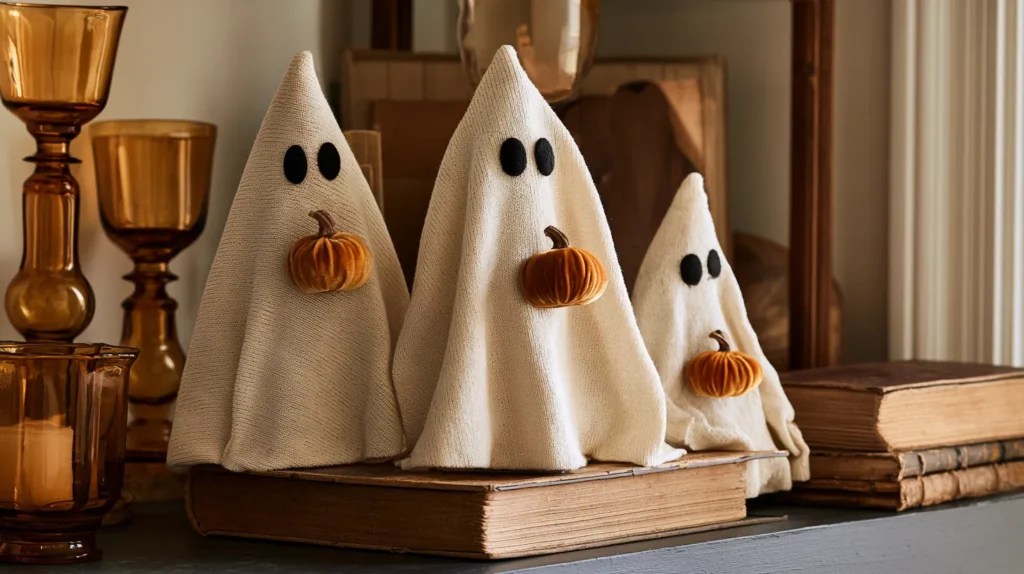
Cozy Fabric Ghosts Materials:
- Cone forms
- Cream fabric and black felt
- Glue
- Mini velvet pumpkins
Drape fabric over each cone and secure the edges underneath. Leave the bottom a little uneven for texture and movement. Add felt eyes and a mini velvet pumpkin for a little extra fall color.
Group all four together on a mantel, and vary the heights a bit for the best effect.
Fall Halloween Crafts With Serious Display Potential
These three have enough presence to anchor your whole seasonal setup on their own. Each one still uses approachable supplies, but the finished pieces look far more involved than they actually were to build.
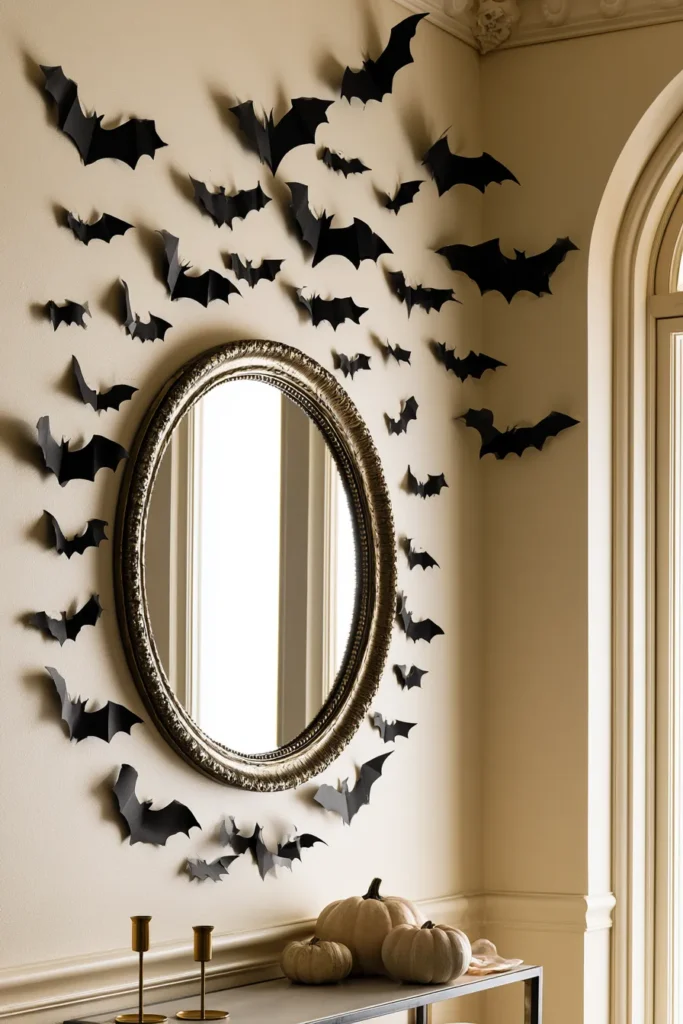
Paper Bat Mirror Materials: black cardstock, bat templates, scissors, and removable adhesive. Cut bats in a few different sizes, then gently fold the wings forward for a little dimension. Arrange them around a mirror in a loose, upward sweep. Start with fewer bats than you think you need, since you can always add more later.
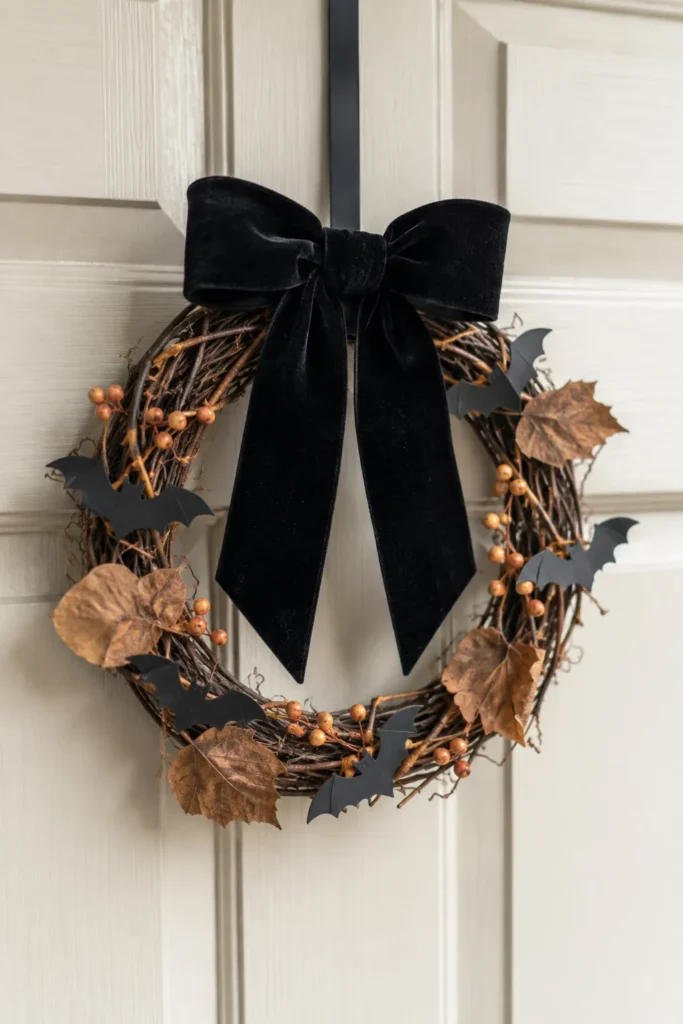
Halloween Grapevine Wreath Materials: a grapevine wreath, black velvet ribbon, faux orange berries, dried leaves, black cardstock, and floral wire. Wire the berries and leaves around the base of the wreath. Cut small bats from cardstock and tuck them between the vines. Finish with one big, generous black velvet bow at the top. A tiny bow looks a little nervous in this spot.
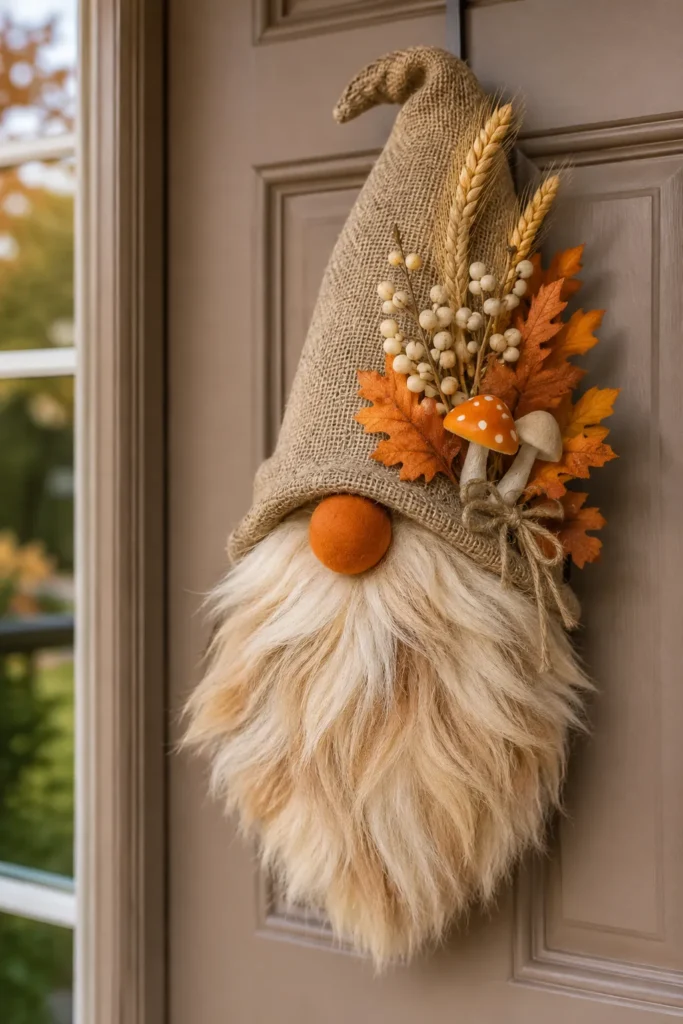
Fall Gnome Door Hanger Materials: burlap, faux fur, a round wood or foam ball, orange paint, dried wheat, faux leaves and berries, and twine. Shape burlap into a floppy pointed hat and secure it to a simple backing. Add faux fur underneath the hat for the beard. Paint the nose orange, then glue it between the hat and the beard. Finish with wheat, berries, and a few faux leaves.
Any one of these can carry a whole door or mantel entirely on its own.
Halloween Crafts for Adults Without the Craft-Supply Chaos
Adult Halloween crafts can get a little unhinged online, honestly. One minute you’re painting a mason jar. The next, someone expects you to own a rotary tool and twelve specialty brushes. I’m firmly in favor of projects that respect both your time and your kitchen counter.
For me, adult crafts work best when the result has an obvious home waiting for it. A wreath goes on a door. Framed art sits on a shelf. A painted tray holds candy or keys. Purpose keeps a project from turning into a random object with nowhere to live.
I also stick to materials with zero learning curve: paint, paper, ribbon, fabric, glue, and basic wood pieces. Once power tools enter the conversation, my enthusiasm gets a lot more selective. Honestly, so does my free time.
That doesn’t mean the finished piece has to look plain. Layering makes basic supplies feel much richer. Torn paper under glass adds real depth. Ribbon wrapped around a pumpkin adds softness. Matte paint over cheap plastic changes the entire finish of a piece.
Here’s the surprising part: these projects often look better a little imperfect. A crooked brush edge can read as pleasantly aged. Uneven fabric can look handmade instead of sloppy. Precision genuinely isn’t always the goal here.
A limited color palette helps a lot, too. Black, cream, rust, and brown build a strong fall mood entirely on their own. Add a little gold or deep burgundy only when you want some extra drama.
Don’t skip the playful touches, either. Tuck a tiny paper bat into a framed print. Hide a small skeleton hand near a candle. Grown-up Halloween doesn’t have to mean boring Halloween. It just means the glitter knows exactly when to leave the party.
Quick Fall Crafts You Can Finish Fast
Some days call for a five-minute fix, not a whole weekend project. It’s 4:30, dinner still needs attention, and the mantel suddenly looks emotionally underdressed. A fast craft solves that problem without hijacking your entire evening.
The smartest quick projects skip drying time and complicated assembly altogether. If something needs three coats of paint, it has already left the “quick” category behind. Stick with glue, ribbon, paper, or pieces you can rearrange in minutes flat:
- Tie black ribbon around mini pumpkins and group them in a bowl
- Cut paper bats and tape them across a wall or mirror
- Wrap a jar in gauze and add two simple felt eyes
- Fill an old frame with a vintage-style Halloween printable
- Tuck black lace around a plain candleholder or vase
These ideas also work well in repeats. Three matching jars look intentional and styled. Five paper bats create real movement across a wall. One lonely craft, especially on a bigger wall, can end up looking like an accident instead of a choice.
If you fall in love with how a project turns out, a few of these translate nicely into gifts or small batches to sell. Think garlands, gift tags, or a set of fabric pumpkins in matching colors. Keep the design simple enough to repeat easily, and keep your finish consistent from piece to piece.
Either way, a quick craft solves one small decor problem fast. Most days, that’s genuinely enough.
FAQs About Fall Halloween Crafts
What are the easiest fall Halloween crafts for beginners? Start with paint, ribbon, paper, jars, or foam pumpkins. These supplies forgive small mistakes and don’t require any special tools. Simple shapes also keep the finished project looking clean and intentional, even on your first try.
What are good Halloween crafts for kids and adults to make together? Paper bats, painted pumpkins, felt ghost garlands, and decorated treat bags all work well for mixed ages. Adults can handle any cutting or hot glue steps. Kids can focus on paint, faces, stickers, and simple assembly.
Can Dollar Tree Halloween crafts actually look expensive? Yes, especially once you change the finish and simplify your color palette. Matte paint, ribbon, better fabric, and nicer paper transform basic pieces fast. Focus on the shape first, and worry about decoration second.
What are good adult Halloween craft ideas for small spaces? Try framed art, mini wreaths, garlands, or candleholder makeovers instead of large displays. These pieces add real impact without taking over an entire room. They also store away easily once the season wraps up.
What are some quick Halloween crafts for last-minute decorating? Paper bats, ribbon-wrapped pumpkins, gauze-wrapped jars, and printable art all come together fast. Most of these don’t need overnight drying time at all. That makes them great for a sudden party or a surprise guest.
Which fall Halloween crafts work best to sell in small batches? Garlands, gift tags, small signs, and fabric pumpkin sets are usually the easiest to repeat. Sticking to one simple design saves both time and materials. Keep your finish consistent across every single piece you make.
One Last Thing
By this point, I’m usually looking around my own house differently. A plain frame suddenly has possibilities again. That leftover ribbon in my craft bin looks suspiciously useful. Even an empty jar starts making a case for staying out of the recycling bin a little longer.
That’s what I love most about fall Halloween crafts. They make ordinary supplies feel exciting again. And they do it without blowing your budget. Grab one small thing, place it somewhere new, and the whole room shifts a little.
As a busy mom, I care about projects that flex around real life. Maybe you’ve got twenty spare minutes while dinner cooks. Or maybe the whole family wants to jump in and help. Either way, none of this needs to become a huge event unless you actually want it to be.
I’d rather have three black bows and a well-styled thrifted frame. That beats a stressed-out weekend chasing someone else’s twelve-foot skeleton display. Pull out the paint, rescue that leftover ribbon, and give a cheap pumpkin one more look. There’s usually one good idea hiding somewhere in your own craft pile.
Save this post to your fall Pinterest board so you can find it again the second the craft mood strikes. And if you end up making one of these yourself, I would genuinely love to see it.